Adorable Polar Bear Cookies Recipe: Frosty Fun In Every Bite!
Soft, buttery cookies with a delightful polar bear cookies recipe twist bring winter magic to your dessert table.
These charming treats capture the essence of snowy landscapes with their adorable design.
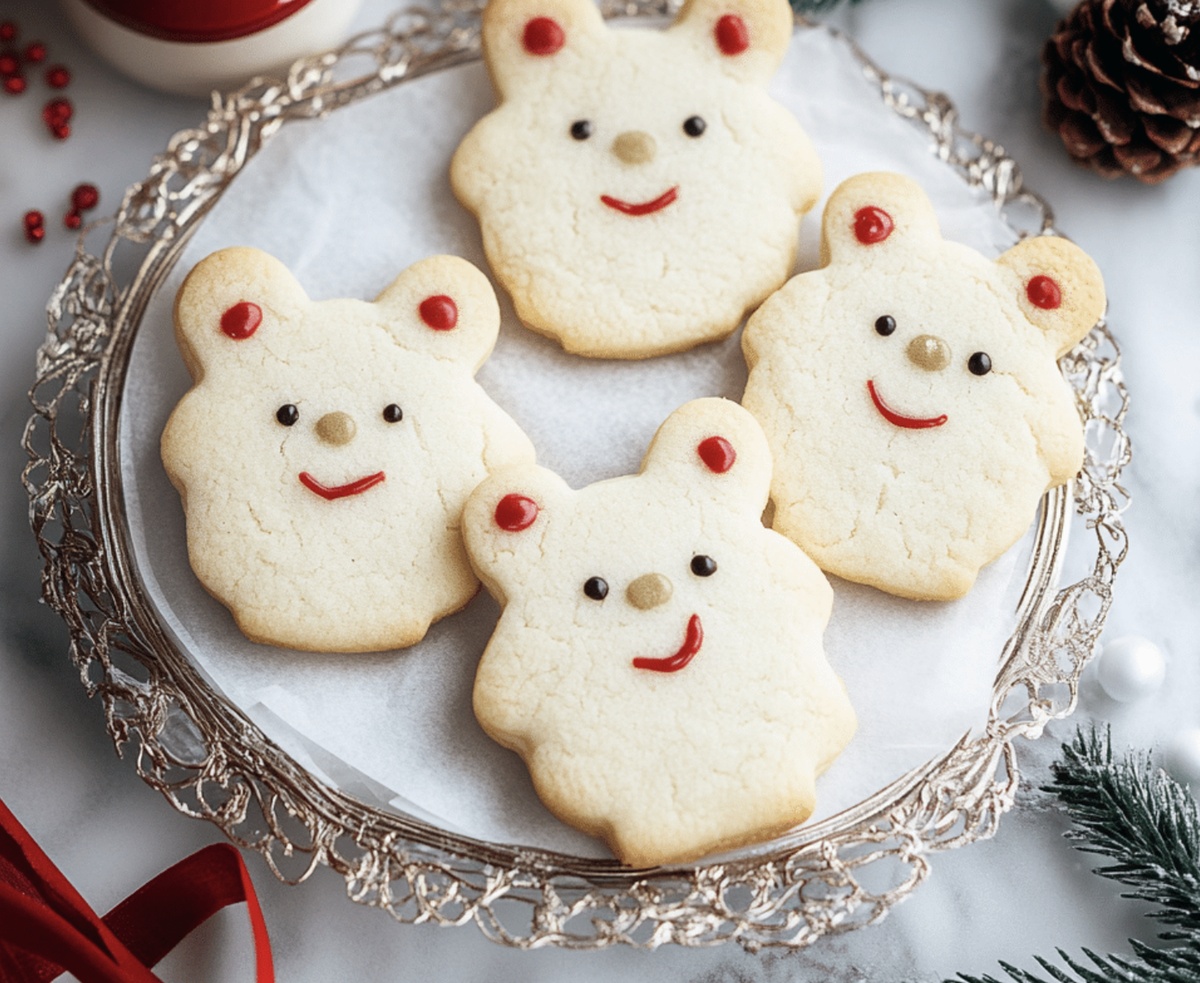
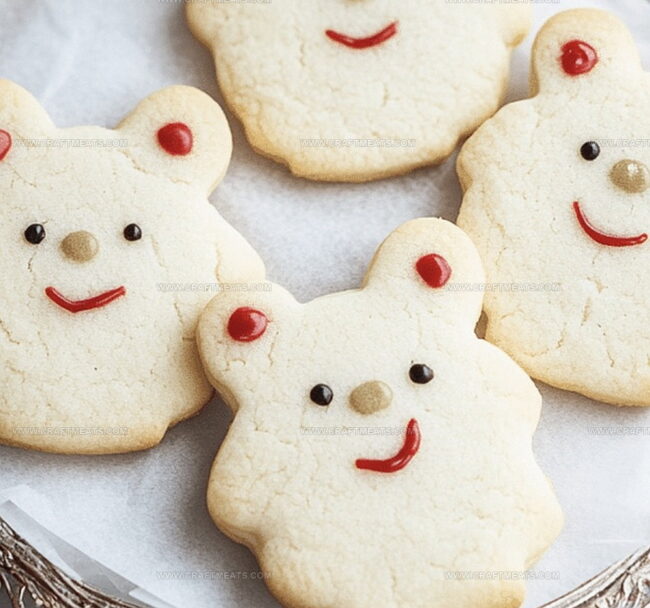
White frosting and creative decorations turn simple sugar cookies into adorable polar bear faces that spark joy.
Baking becomes an art form when you craft these cute confections.
Kids and adults alike will fall in love with these playful, sweet creations.
The simple ingredients and easy assembly make these cookies perfect for holiday gatherings or cozy afternoons.
Dive into this delightful recipe and let your baking creativity run wild.
Quick Recipe Overview

What Goes Into Polar Bear Cookies
For Dough Base:For Coating and Decoration:For Optional Embellishments:Tools To Make Polar Bear Cookies Look Adorable
How To Create Polar Bear Cookies With Ease
Start by combining soft butter and sugar in a large mixing bowl. Blend until the mixture becomes airy and light. Add a single egg and vanilla, mixing until everything looks smooth and creamy.
In another bowl, blend flour with baking powder and salt. Slowly incorporate these dry ingredients into the buttery mixture, stirring gently until a consistent dough forms.
Roll small portions of dough into round spheres. Arrange them carefully on a lined baking tray, ensuring each cookie has enough space to spread. Press down gently on each ball to create a slight flattening.
Place the tray in a preheated oven. Bake until the cookie edges turn a delicate golden color, which typically takes about 10-12 minutes. Remove and let the cookies cool completely on a wire rack.
Melt white chocolate using short microwave bursts, stirring between each interval. Carefully dunk each cookie into the smooth white coating. While the chocolate remains wet, attach marshmallow ears, candy eyes, and a tiny chocolate nose to create adorable polar bear faces.
Allow the decorated cookies to rest at room temperature until the white chocolate hardens completely. For quicker results, pop them in the refrigerator for a few minutes.
Creative Options For Polar Bear Cookies Faces And Flavor
Serving Polar Bear Cookies For Winter Fun
Best Ways To Store Polar Bear Cookies Fresh
Print
Adorable Polar Bear Cookies Recipe
- Total Time: 40 minutes
- Yield: 23 1x
Description
Polar bear cookies bring arctic charm to winter dessert tables with adorable bear-shaped treats. Sweet coconut-covered sugar cookies deliver whimsical winter magic for delightful seasonal celebrations.
Ingredients
- 1 large egg
- 1 stick (113 g) unsalted butter, softened
- ¾ cup (150 g) granulated sugar
- 1 ½ cups (180 g) all-purpose flour
- ½ tsp baking powder
- ¼ tsp salt
- 2 cups white chocolate chips or candy melts
- mini marshmallows
- candy eyes
- mini chocolate chips or black edible pearls
- 1 tsp vanilla extract
- optional: red or blue sprinkles
Instructions
- Preparation: Calibrate the oven to 350°F (175°C) and line a baking sheet with parchment paper, ensuring all ingredients are room temperature for seamless integration.
- Blend Base: Whip butter and sugar in a generous mixing bowl until fluffy and pale, then smoothly incorporate egg and vanilla extract, creating a silky emulsion.
- Compose Dough: Sift flour, baking powder, and salt together, then tenderly fold into the wet mixture, gently combining until a uniform dough emerges without overworking.
- Shape Cookies: Craft uniform spherical dough portions using a cookie scoop, positioning them methodically on the prepared baking sheet with strategic spacing to accommodate expansion.
- Bake Precisely: Flatten each dough ball slightly with your palm, then slide the tray into the preheated oven, monitoring for delicate golden edges after 10-12 minutes of baking.
- Cool and Prepare: Transfer cookies to a wire rack, allowing complete cooling while simultaneously preparing the white chocolate coating via careful microwave melting in 20-second increments.
- Chocolate Immersion: Dip each cooled cookie into the glossy white chocolate, ensuring comprehensive coverage, then position on fresh parchment paper for decorative embellishment.
- Character Creation: While chocolate remains wet, strategically attach mini marshmallow ears, candy eyes, and a chocolate chip nose to transform cookies into playful polar bear characters.
- Finalize Design: Optionally enhance with sprinkles or subtle icing details, then allow cookies to set at ambient temperature or expedite hardening with a brief refrigeration period.
Notes
- Prevent Overmixing: Stir dry ingredients into wet mixture gently to avoid tough cookies, maintaining a light and tender texture.
- Temperature Precision: Ensure butter and eggs are room temperature for smoother blending and consistent cookie performance.
- Uniform Cookie Sizing: Use a cookie scoop or tablespoon to create consistent dough balls, guaranteeing even baking and professional appearance.
- Chocolate Melting Technique: Microwave white chocolate in short intervals, stirring between each to prevent burning and achieve smooth, glossy coating.
- Prep Time: 20 minutes
- Cook Time: 20 minutes
- Category: Desserts, Snacks
- Method: Baking
- Cuisine: American
Nutrition
- Serving Size: 23
- Calories: 160
- Sugar: 9 g
- Sodium: 50 mg
- Fat: 7 g
- Saturated Fat: 4 g
- Unsaturated Fat: 2 g
- Trans Fat: 0 g
- Carbohydrates: 22 g
- Fiber: 0 g
- Protein: 2 g
- Cholesterol: 25 mg
Liam O’Sullivan
Founder & Culinary Content Creator
Expertise
Recipe Development, Traditional Irish and European Cuisines, Food Styling and Photography, Culinary Education
Education
Dublin Institute of Technology (DIT) – School of Culinary Arts and Food Technology
Ballymaloe Cookery School
Isabella brings a global spark to the Craft Meats table. Born in Florence and trained at the Apicius International School of Hospitality, she blends classic Italian flavor with modern writing that’s easy to follow and hard to forget.
Her additional training at the Italian Chef Academy fueled her love for well-crafted dishes, especially ones that spotlight beautiful cuts of meat.
She’s a food writer with heart, and a deep love for storytelling through single recipes. Her goal? To help you cook with more confidence and a little more joy, no matter where you start.