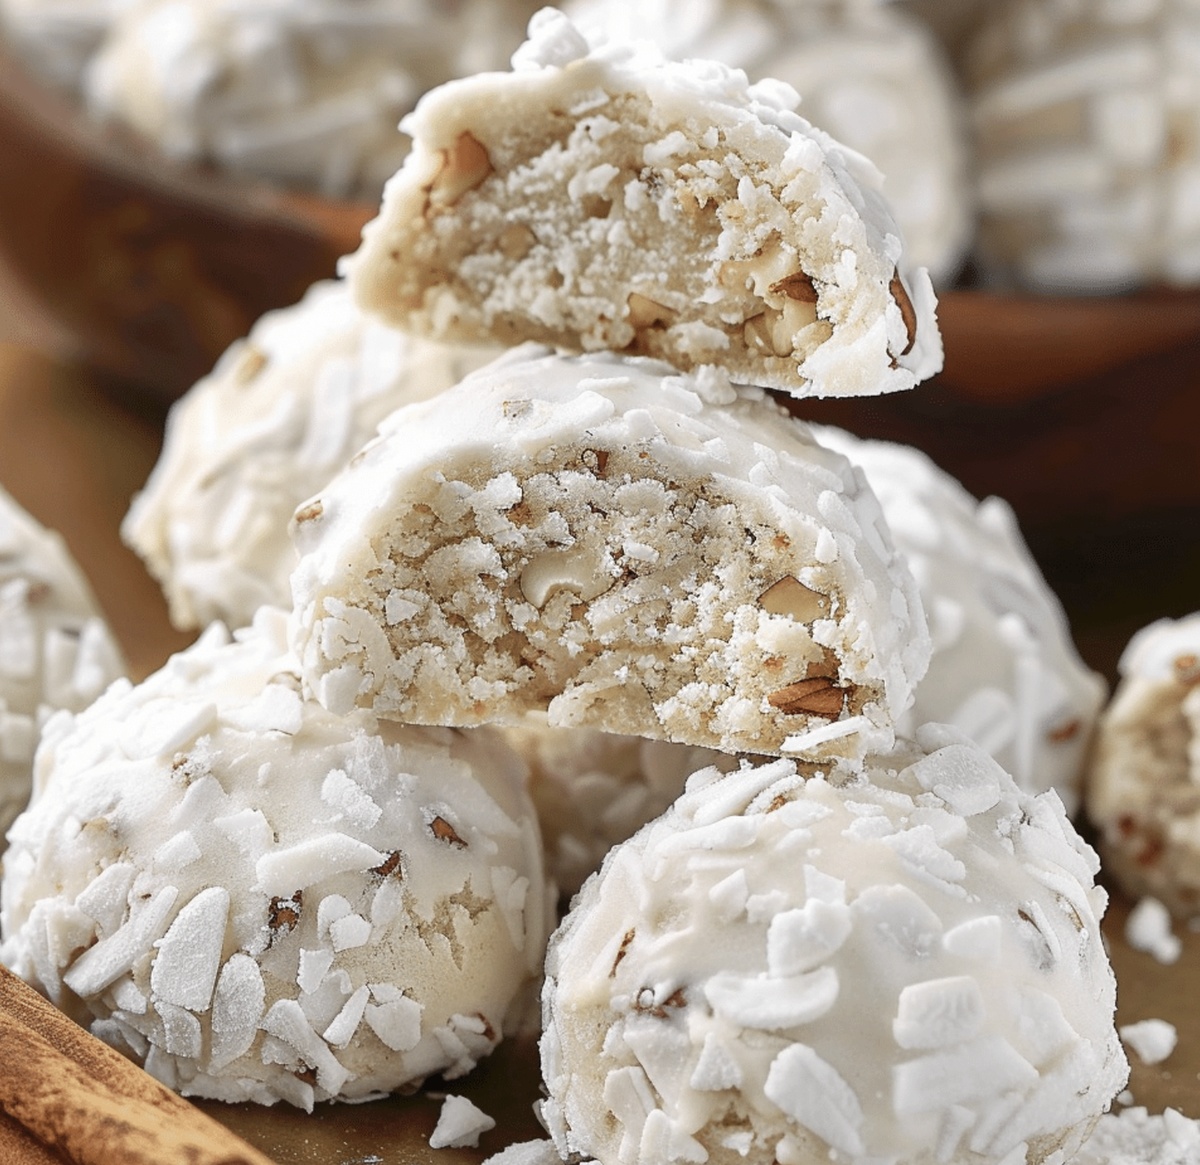
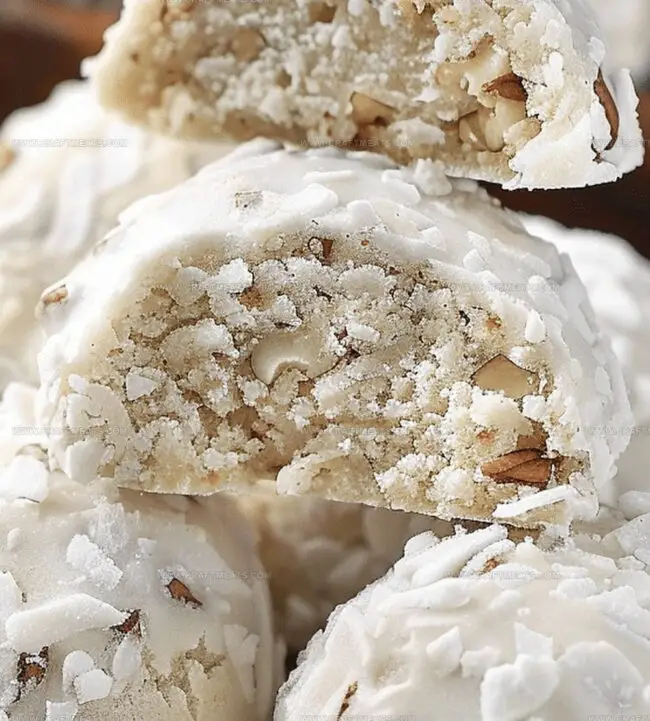
Delightfully Dusty Pecan Snowball Cookies Recipe for Winter Joy
Soft, powdery snowball cookies packed with rich pecan snowball cookies recipe charm are pure holiday magic.
These delicate morsels melt in your mouth with buttery goodness.
Generations of bakers have cherished this classic treat passed down through kitchens.
Crumbly, nutty, and blanketed in a cloud of sweet powdered sugar, these cookies embody festive comfort.
The simple ingredients blend into delightful spheres that sparkle like winter’s first snowfall.
Each bite delivers a delicate crunch and warm pecan flavor that transports you to cozy family gatherings.
Discover why these irresistible cookies have been a beloved dessert staple for decades.
Quick Recipe Overview

Ingredients Needed For Pecan Snowball Cookies
For Base and Binding:For Structure and Texture:For Crunch and Depth:For Finishing:Tools You’ll Need For Pecan Snowball Cookies
How To Bake Pecan Snowball Cookies Step-By-Step
Bring butter to room temperature for smooth, creamy mixing. This helps create a silky, luxurious cookie texture that melts in your mouth.
Blend softened butter with powdered sugar until the mixture becomes light and airy. Add a splash of vanilla for a warm, inviting aroma. Slowly incorporate flour, creating a tender dough that’s studded with crunchy pecan pieces.
Craft delicate round balls from the nutty dough. Arrange these little treasures on a baking sheet, giving each one enough space to breathe and transform.
Slide the baking sheet into a warm oven. Watch as the cookies turn a beautiful golden shade, filling your kitchen with a rich, buttery fragrance. The edges will become delicately crisp while maintaining a soft center.
While the cookies are still warm and gentle, lovingly coat them in a cloud of powdered sugar. Let them cool completely, then give them a second luxurious dusting, creating a snow-like finish that sparkles and delights.
Tips To Make Pecan Snowball Cookies Just Right
Simple Ways To Serve Pecan Snowball Cookies
Storage Instructions For Pecan Snowball Cookies
Print
Jalapeno Cheese Rounds With Spicy Yogurt Dip Recipe
- Total Time: 25 minutes
- Yield: 6 1x
Description
Jalapeno cheese rounds tantalize taste buds with their zesty Mexican-inspired profile. Crispy edges and spicy yogurt dip create an irresistible snack you’ll crave again and again.
Ingredients
Main Ingredients:
- 3 large fresh jalapeno chillies
- 2 cups (473 ml) extra tasty cheddar, grated
- 1 cup (237 ml) parmesan, grated
Dairy and Seasoning Ingredients:
- 1 cup (237 ml) Greek yogurt
- 1 clove garlic
Spices and Condiments:
- 2 tablespoons sriracha sauce
- 1 teaspoon paprika
- Salt, to taste
- Freshly ground black pepper, to taste
Instructions
- Craft a zesty yogurt dip by blending Greek yogurt, sriracha, paprika, and minced garlic in a food processor until silky smooth. Adjust seasoning with salt and pepper, then chill in the refrigerator for optimal flavor melding.
- Heat the oven to 180C (350F) and strategically line two baking sheets with parchment paper to prevent sticking.
- Create a robust cheese base by thoroughly mixing grated cheddar and parmesan in a spacious mixing bowl, ensuring even distribution.
- Protect hands with culinary gloves while handling jalapenos. Meticulously trim pepper ends, carefully extract seeds, and slice into delicate rings that will crown each cheese medallion.
- Employ a tablespoon to portion cheese mixture onto prepared baking sheets, forming rustic circular shapes. Gently press a jalapeno ring into the center of each round, maintaining adequate spacing to allow for natural spreading.
- Roast the cheese rounds in the preheated oven for 8-10 minutes until edges transform into a golden, crisp perimeter. Let the rounds cool directly on the baking sheet before transferring to a serving platter.
- Present the spicy cheese rounds alongside the chilled yogurt dip, creating a tantalizing appetizer that balances heat and creaminess.
Notes
- Protect your hands with gloves when handling jalapenos to avoid skin irritation from their spicy oils.
- Ensure baking paper is used to prevent cheese rounds from sticking and make cleanup easier.
- Let the cheese rounds cool completely on the baking tray to help them firm up and maintain their crispy texture.
- Refrigerate the spicy yogurt dip ahead of time to allow flavors to meld and intensify.
- Keep an eye on the cheese rounds while baking, as they can quickly go from golden to burnt in just a minute or two.
- Serve these rounds immediately after cooling for the best crispy, cheesy experience.
- Prep Time: 15 minutes
- Cook Time: 10 minutes
- Category: Appetizer, Snacks
- Method: Baking
- Cuisine: Mexican
Nutrition
- Serving Size: 6
- Calories: 80
- Sugar: 1g
- Sodium: 200mg
- Fat: 6g
- Saturated Fat: 3.5g
- Unsaturated Fat: 2g
- Trans Fat: 0g
- Carbohydrates: 4g
- Fiber: 0g
- Protein: 5g
- Cholesterol: 15mg
Liam O’Sullivan
Founder & Culinary Content Creator
Expertise
Recipe Development, Traditional Irish and European Cuisines, Food Styling and Photography, Culinary Education
Education
Dublin Institute of Technology (DIT) – School of Culinary Arts and Food Technology
Ballymaloe Cookery School
Isabella brings a global spark to the Craft Meats table. Born in Florence and trained at the Apicius International School of Hospitality, she blends classic Italian flavor with modern writing that’s easy to follow and hard to forget.
Her additional training at the Italian Chef Academy fueled her love for well-crafted dishes, especially ones that spotlight beautiful cuts of meat.
She’s a food writer with heart, and a deep love for storytelling through single recipes. Her goal? To help you cook with more confidence and a little more joy, no matter where you start.