
Crispy Cheeseburger Spring Rolls Delight Recipe for Snack Lovers
These crispy cheeseburger spring rolls blend cultural culinary innovation with irresistible comfort food magic.
Classic hamburger ingredients get a surprising twist inside delicate wrapper folds.
Imagine your favorite burger reimagined as a crunchy, handheld treasure packed with familiar flavors.
Texture contrasts create an exciting experience that surprises and satisfies simultaneously.
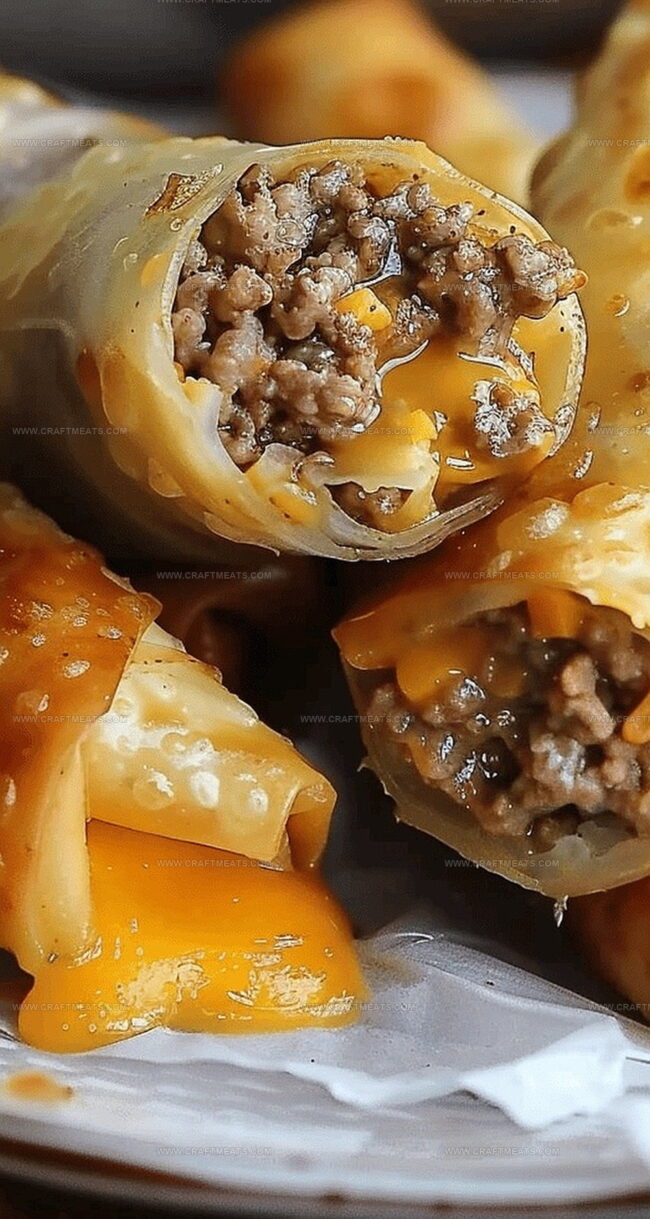
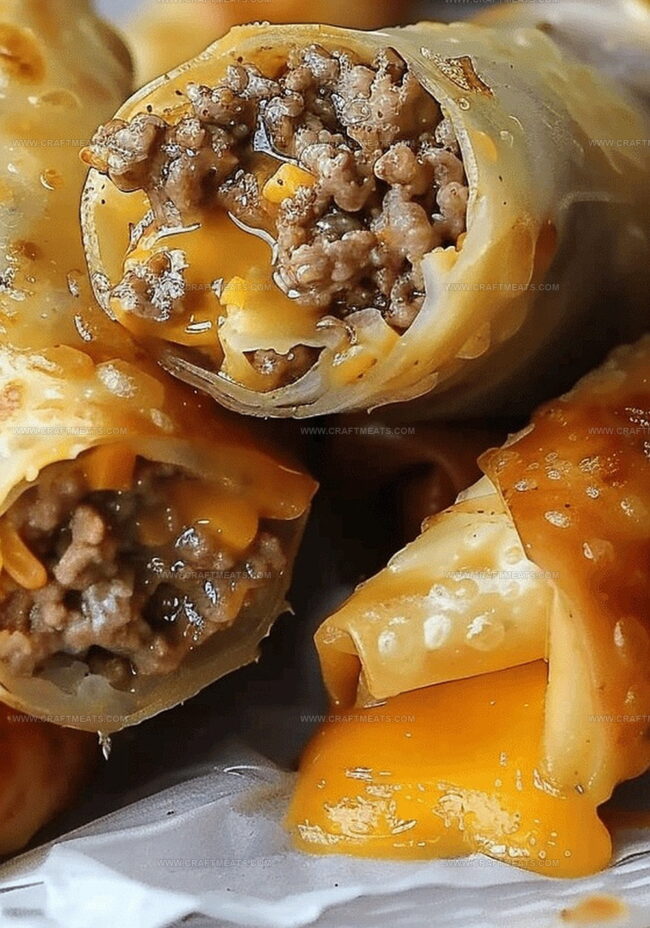
Perfectly golden-brown exteriors promise a juicy, melty interior waiting to be devoured.
Each bite combines the best elements of American and Asian cuisines in one incredible appetizer.
Rich, savory fillings nestle within paper-thin pastry, creating a mouthwatering fusion that will become your new party favorite.
You won’t be able to resist these incredible rolls that elevate classic burger ingredients into something extraordinary.
Why Cheeseburger Spring Rolls Delight Are So Fun
Ingredients for Cheeseburger Spring Rolls
Meat and Protein:Aromatics and Seasonings:Wrapper and Cooking Components:Rolling and Cooking Cheeseburger Spring Rolls
Step 1: Sauté Aromatic Base
Heat a medium skillet over medium-high temperature. Gently sweat the onions and garlic until they become soft and release their delightful fragrance, about 2-3 minutes.
Step 2: Brown Ground Beef
Add ground beef to the skillet. Break down the meat with a wooden spoon, cooking until it transforms from pink to a rich, appetizing brown color. This should take roughly 5-7 minutes.
Step 3: Create Flavor Profile
Introduce these zesty ingredients:Stir everything together, allowing the spices to dance and meld into a mouthwatering mixture. Remove from heat and let the blend cool slightly.
Step 4: Incorporate Cheesy Goodness
Gently fold shredded cheddar cheese into the warm beef mixture. Watch as the cheese begins to soften and create a creamy, irresistible filling.
Step 5: Craft Spring Roll Packets
Lay out spring roll wrappers on a clean surface. Brush edges with water to create a perfect seal. Spoon the beef and cheese mixture into the center of each wrapper. Fold the bottom corner over the filling, tuck in the sides, and roll tightly, ensuring a snug closure.
Step 6: Crisp to Golden Perfection
Pour enough oil into a skillet to create a shallow pool. Heat to medium-high temperature. Carefully place spring rolls into the hot oil, cooking until they transform into a gorgeous golden-brown color. Flip once to ensure even crispiness, about 2-3 minutes per side.
Step 7: Drain and Serve
Transfer the sizzling spring rolls to a plate lined with paper towels. Allow excess oil to drain, creating a lighter, crunchier texture. Serve immediately while hot and crispy.
Spring Roll Pro Tips to Know
How to Store and Reheat Cheeseburger Spring Rolls
What to Serve with Cheeseburger Spring Rolls
Cheeseburger Spring Roll Variations
Cheeseburger Spring Rolls Delight FAQs
Yes! Ground turkey or chicken work great as alternatives to beef in this recipe.
Make sure to seal the edges with water and roll them tightly. Press the edges firmly when wrapping to create a secure seal.
Absolutely! Brush the rolls with olive oil and bake at 400°F for about 15-20 minutes, turning halfway through to ensure even crispiness.
Store in an airtight container in the refrigerator for up to 3 days. Reheat in the oven to maintain crispiness, avoiding the microwave which can make them soggy.
Print
Cheeseburger Spring Rolls Delight Recipe
- Total Time: 45 minutes
- Yield: 4 1x
Description
Crispy cheeseburger spring rolls combine American comfort classic with Asian fusion flair. Packed with ground beef, melted cheese, and signature burger flavors, these rolls offer a perfect handheld bite you’ll crave again and again.
Ingredients
Meat:
- 1 pound ground beef
- 1 tablespoon Worcestershire sauce
Cheese and Dairy:
- 1 cup shredded cheddar cheese
Vegetables and Seasonings:
- 1 small onion, diced
- 2 garlic cloves, minced
- 2 tablespoons olive oil
- 1 tablespoon ketchup
- ½ teaspoon garlic powder
- ¼ teaspoon onion powder
- ¼ teaspoon smoked paprika
- Salt and pepper to taste
Wrapper:
- 1 package spring roll wrappers
Instructions
- Heat olive oil in a skillet and gently sauté diced onions with minced garlic until they become soft and aromatic, releasing their delicate flavors.
- Introduce ground beef to the skillet, breaking it into fine crumbles and cooking thoroughly until no pink remains, ensuring complete and even browning.
- Enhance the meat mixture with a vibrant blend of ketchup, Worcestershire sauce, garlic powder, onion powder, smoked paprika, salt, and pepper, creating a rich and complex flavor profile.
- Allow the seasoned beef to cool slightly, then gently incorporate shredded cheddar cheese, allowing the warmth to slightly melt the cheese and create a cohesive filling.
- Prepare spring roll wrappers by laying them flat, moistening edges with water to create a secure seal. Carefully spoon the beef and cheese mixture near one corner, then fold and roll tightly, ensuring a compact and neat package.
- Warm oil in a fresh skillet, creating a golden cooking surface. Carefully place spring rolls into the hot oil, rotating to achieve an even, crispy golden-brown exterior on all sides.
- Transfer the crispy spring rolls to a paper towel-lined plate, allowing excess oil to drain and ensuring a light, non-greasy texture.
- Plate the spring rolls and serve immediately, offering a delightful fusion of cheeseburger flavors in a crispy, portable format.
Notes
- Fusion Flavor Explosion: Combine the classic American cheeseburger with crispy Asian-style spring rolls for an unexpected and mouthwatering appetizer.
- Prep-Ahead Potential: Make the filling and assemble spring rolls in advance, then refrigerate until ready to fry for easy party planning.
- Cheese Melting Magic: Let the beef mixture cool slightly before adding cheese to prevent immediate melting and ensure perfect texture.
- Sealing Secrets: Use water as glue to keep spring roll wrappers tightly sealed and prevent filling from leaking during frying.
- Oil Temperature Tip: Maintain medium-high heat to achieve a golden-brown crispy exterior without burning the wrapper.
- Serving Suggestion: Pair with classic burger condiments like ketchup, mustard, or a zesty dipping sauce for extra flavor punch.
- Prep Time: 25 minutes
- Cook Time: 20 minutes
- Category: Lunch, Appetizer, Snacks
- Method: Frying
- Cuisine: Fusion
Nutrition
- Serving Size: 4
- Calories: 150
- Sugar: 1g
- Sodium: 300mg
- Fat: 8g
- Saturated Fat: 3g
- Unsaturated Fat: 4g
- Trans Fat: 0g
- Carbohydrates: 14g
- Fiber: 1g
- Protein: 7g
- Cholesterol: 30mg
Isabella Rossi
Founder & Culinary Content Creator
Expertise
Recipe Development, Traditional Irish and European Cuisines, Food Styling and Photography, Culinary Education
Education
Dublin Institute of Technology (DIT) – School of Culinary Arts and Food Technology
Ballymaloe Cookery School
Liam is the voice behind many of Craft Meats’ most flavorful features. With roots in Dublin’s smoky barbecue scene and a culinary degree from the Dublin Institute of Technology, he brings time-tested cooking techniques to life.
His training at Ballymaloe Cookery School sharpened his farm-to-table approach, giving him a deep respect for every ingredient he writes about.
He’s not about overcomplicating the process, just helping you cook meat that’s worth talking about. When he’s not writing or grilling, he’s out foraging or nerding out on regional spice blends to add to his next recipe.