
Cheesy Chicken Stuffed Crescent Rolls Recipe
Lazy weeknight dinners demand quick and delicious chicken stuffed crescent rolls that save time without sacrificing flavor.
These golden, flaky pockets pack serious comfort food appeal with minimal effort.
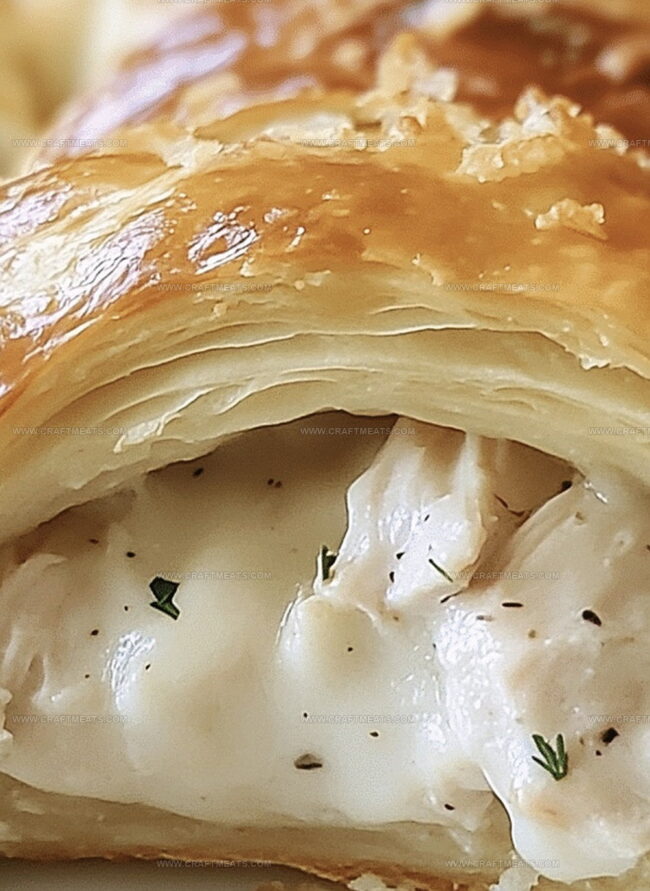
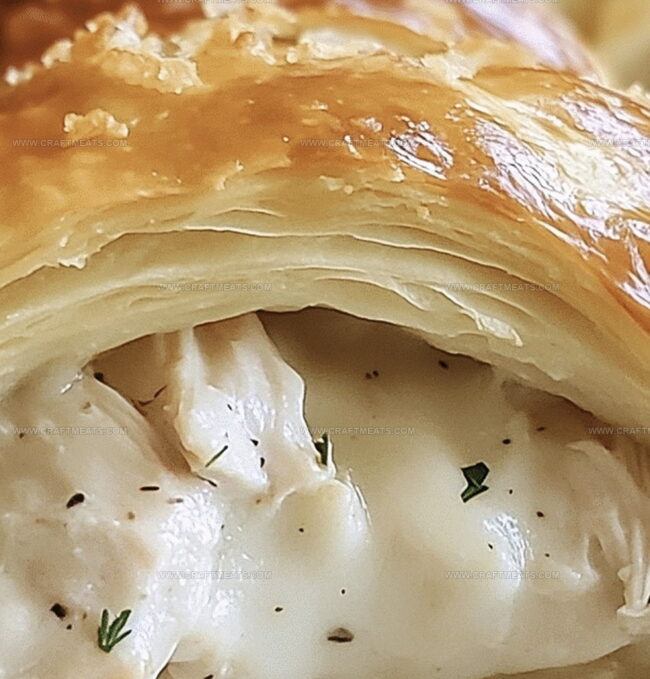
Tender chicken nestles inside buttery crescent dough, creating a handheld meal everyone craves.
Creamy cheese and herbs add depth to each bite, making this recipe a reliable crowd-pleaser.
Simple ingredients come together effortlessly to produce a satisfying dish that feels like a home-cooked triumph.
Weeknight magic happens when you combine shredded chicken, soft cream cheese, and rolled-up crescents.
Serve these irresistible rolls and watch hungry faces light up with pure culinary joy.
Quick Recipe Overview
All You Need For Chicken Stuffed Crescent Rolls
For Protein and Filling:For Cheese and Seasoning:For Dough and Assembly:Essential Tools For Chicken Stuffed Crescent Rolls Success
How To Wrap Chicken Stuffed Crescent Rolls Nicely
Crank up the oven to a toasty 375F. Grab a baking sheet and give it a quick spray or line with parchment paper for easy cleanup.
Dive into creating a creamy chicken mixture by blending shredded chicken with soft cream cheese, sharp cheddar, and a splash of sour cream. Sprinkle in garlic powder, Italian herbs, and a pinch of salt and pepper to make the filling sing with flavor.
Unroll the crescent dough and separate into triangle shapes. Dollop a generous spoonful of the chicken mixture onto the wide end of each triangle. Roll these little pockets carefully, tucking in the edges to keep all that delicious filling secure.
Arrange the filled crescents on the prepared baking sheet. Send them into the oven for 12-15 minutes until they turn a beautiful golden brown and look irresistibly puffy.
Let the crescent pockets cool just a bit so they’re not scorching hot. Scatter some fresh herbs on top if you’re feeling fancy. Serve alongside a cool ranch dip or zesty marinara sauce for an extra flavor kick.
Easy Fixes For Chicken Stuffed Crescent Rolls Trouble
How To Serve Chicken Stuffed Crescent Rolls Fresh From The Oven
Storing Chicken Stuffed Crescent Rolls Without Losing Texture
Keep leftover crescent rolls in an airtight container inside the refrigerator for 3-4 days. Wrap individually in foil to maintain freshness and prevent moisture loss.
Print
Cheesy Chicken Stuffed Crescent Rolls Recipe
- Total Time: 25 minutes
- Yield: 7 1x
Description
Hearty Chicken Stuffed Crescent Rolls deliver comfort and flavor in one delightful package. Italian herbs and melted cheese create a simple yet satisfying meal that brings warmth to your table.
Ingredients
- 2 cups (300 g) cooked chicken, shredded or diced
- 4 oz (115 g) cream cheese, softened
- ½ cup (50 g) shredded cheddar cheese
- 1 (8 oz/235 g) can of crescent roll dough (8 rolls)
- ¼ cup (60 ml) sour cream
- 1 tsp garlic powder
- 1 tsp Italian seasoning
- ½ tsp salt
- ¼ tsp black pepper
- Chopped fresh parsley
- Grated Parmesan cheese
Instructions
- Preheating and Preparation: Set the oven to 375F (190C) and prepare a baking sheet with parchment paper or a light grease coating to prevent sticking.
- Chicken Mixture Creation: In a mixing bowl, thoroughly combine shredded chicken, cream cheese, cheddar cheese, sour cream, garlic powder, Italian seasoning, salt, and pepper until the ingredients form a uniform, creamy filling.
- Dough Arrangement and Filling: Unroll the crescent dough, separating into triangular sections, and distribute a generous spoonful of the chicken mixture across the wider base of each triangle, ensuring even coverage.
- Rolling and Sealing: Carefully roll each triangle from the broad base to the pointed tip, meticulously pinching and sealing the edges to contain the savory filling securely within the dough.
- Baking and Transformation: Position the stuffed crescents on the prepared baking sheet with slight spacing, then place in the preheated oven and bake for 12-15 minutes until they achieve a perfect golden-brown exterior.
- Cooling and Finishing: Remove the crescents from the oven and allow a brief cooling period to stabilize their structure, then optionally garnish with freshly chopped parsley or sprinkled Parmesan cheese.
- Serving Suggestion: Present the warm rolls immediately, accompanied by complementary dipping sauces like ranch dressing or marinara, and consider pairing with a crisp side salad for a complete and satisfying meal.
Notes
- Cheese Consistency Check: Ensure cream cheese and cheddar are at room temperature for smoother, more even mixing and better blending with chicken.
- Seal Securely: Pinch crescent roll edges firmly to prevent filling from leaking during baking, creating a clean and professional-looking final product.
- Moisture Management: Drain excess liquid from shredded chicken to avoid soggy or watery filling that could compromise the roll’s texture.
- Flavor Customization: Experiment with different seasonings like smoked paprika, dried herbs, or hot sauce to personalize the chicken mixture and add unique flavor profiles.
- Prep Time: 10 minutes
- Cook Time: 15 minutes
- Category: Lunch, Dinner, Appetizer, Snacks
- Method: Baking
- Cuisine: American
Nutrition
- Serving Size: 7
- Calories: 230
- Sugar: 1 g
- Sodium: 450 mg
- Fat: 14 g
- Saturated Fat: 7 g
- Unsaturated Fat: 5 g
- Trans Fat: 0 g
- Carbohydrates: 16 g
- Fiber: 0 g
- Protein: 12 g
- Cholesterol: 50 mg
Liam O’Sullivan
Founder & Culinary Content Creator
Expertise
Recipe Development, Traditional Irish and European Cuisines, Food Styling and Photography, Culinary Education
Education
Dublin Institute of Technology (DIT) – School of Culinary Arts and Food Technology
Ballymaloe Cookery School
Isabella brings a global spark to the Craft Meats table. Born in Florence and trained at the Apicius International School of Hospitality, she blends classic Italian flavor with modern writing that’s easy to follow and hard to forget.
Her additional training at the Italian Chef Academy fueled her love for well-crafted dishes, especially ones that spotlight beautiful cuts of meat.
She’s a food writer with heart, and a deep love for storytelling through single recipes. Her goal? To help you cook with more confidence and a little more joy, no matter where you start.