Cherry Cake Recipe for a Sweet Summer Treat
A cherry delight cake promises pure bliss with its luscious layers and irresistible charm.
Sweet cherries dance through delicate crumb, creating a dessert that feels both nostalgic and exciting.
Soft textures mingle with bright fruit notes, offering a sensational culinary experience.
Light and airy, this cake captures the essence of summer’s most beloved flavor.
Imagine a dessert that melts on your tongue, leaving behind a delightful burst of fruity goodness.
Bakers of all skill levels can master this crowd-pleasing treat with confidence.
Every slice tells a story of comfort and indulgence that will leave you wanting more.
Reasons You’ll Love Cherry Delight Cake
Cherry Delight Cake Ingredients
Cake Base:Fruit Layer:Creamy Layers:How to Make Cherry Delight Cake Easily
Step 1: Create First Cake Layer
Break or cut angel food cake into bite-sized cubes. Spread half of the cubes across the bottom of a 9×13-inch baking dish, creating an even base layer.
Step 2: Add Cherry Filling
Pour two-thirds of the cherry pie filling over the cake cubes. Use a spatula to distribute the filling evenly, ensuring complete coverage of the cake layer.
Step 3: Build Second Cake Layer
Arrange the remaining cake cubes over the cherry filling, creating a second soft layer that covers the previous cherry topping.
Step 4: Prepare Creamy Pudding Mixture
In a medium mixing bowl, whisk together pudding mix, milk, and sour cream. Stir until the mixture becomes smooth and creamy with no lumps.
Step 5: Cover with Pudding
Gently spoon the pudding mixture over the second cake layer. Use a spatula to spread it evenly, covering the entire surface.
Step 6: Add Whipped Topping
Spread the thawed cool whip over the pudding layer, creating a light and fluffy final layer.
Step 7: Final Cherry Decoration
Drizzle the remaining cherry pie filling across the top of the cool whip, creating an attractive and delicious finish.
Step 8: Chill and Serve
Refrigerate the dessert for 4 to 5 hours. This resting time allows the layers to set and flavors to blend beautifully. Slice and serve chilled for a delightful treat.
Cherry Delight Cake Tips That Help
How to Store Cherry Delight Cake
What to Pair with Cherry Delight Cake
Cherry Delight Cake Twists You’ll Enjoy
Cherry Delight Cake FAQs
The cake needs to be chilled for 4 to 5 hours before serving. This allows all layers to set properly and lets the flavors blend together perfectly.
Absolutely! This cake is great for preparing in advance. You can make it a day before your event and keep it refrigerated until you’re ready to serve.
You can substitute with pound cake or vanilla sponge cake. Just ensure the cake is light and can absorb the cherry and pudding layers well.
The Cherry Delight Cake will stay fresh for 2-3 days when stored in an airtight container in the refrigerator. Make sure to cover it completely to prevent it from absorbing other refrigerator odors.
Print
Cherry Delight Cake Recipe
- Total Time: 20 minutes
- Yield: 12 1x
Description
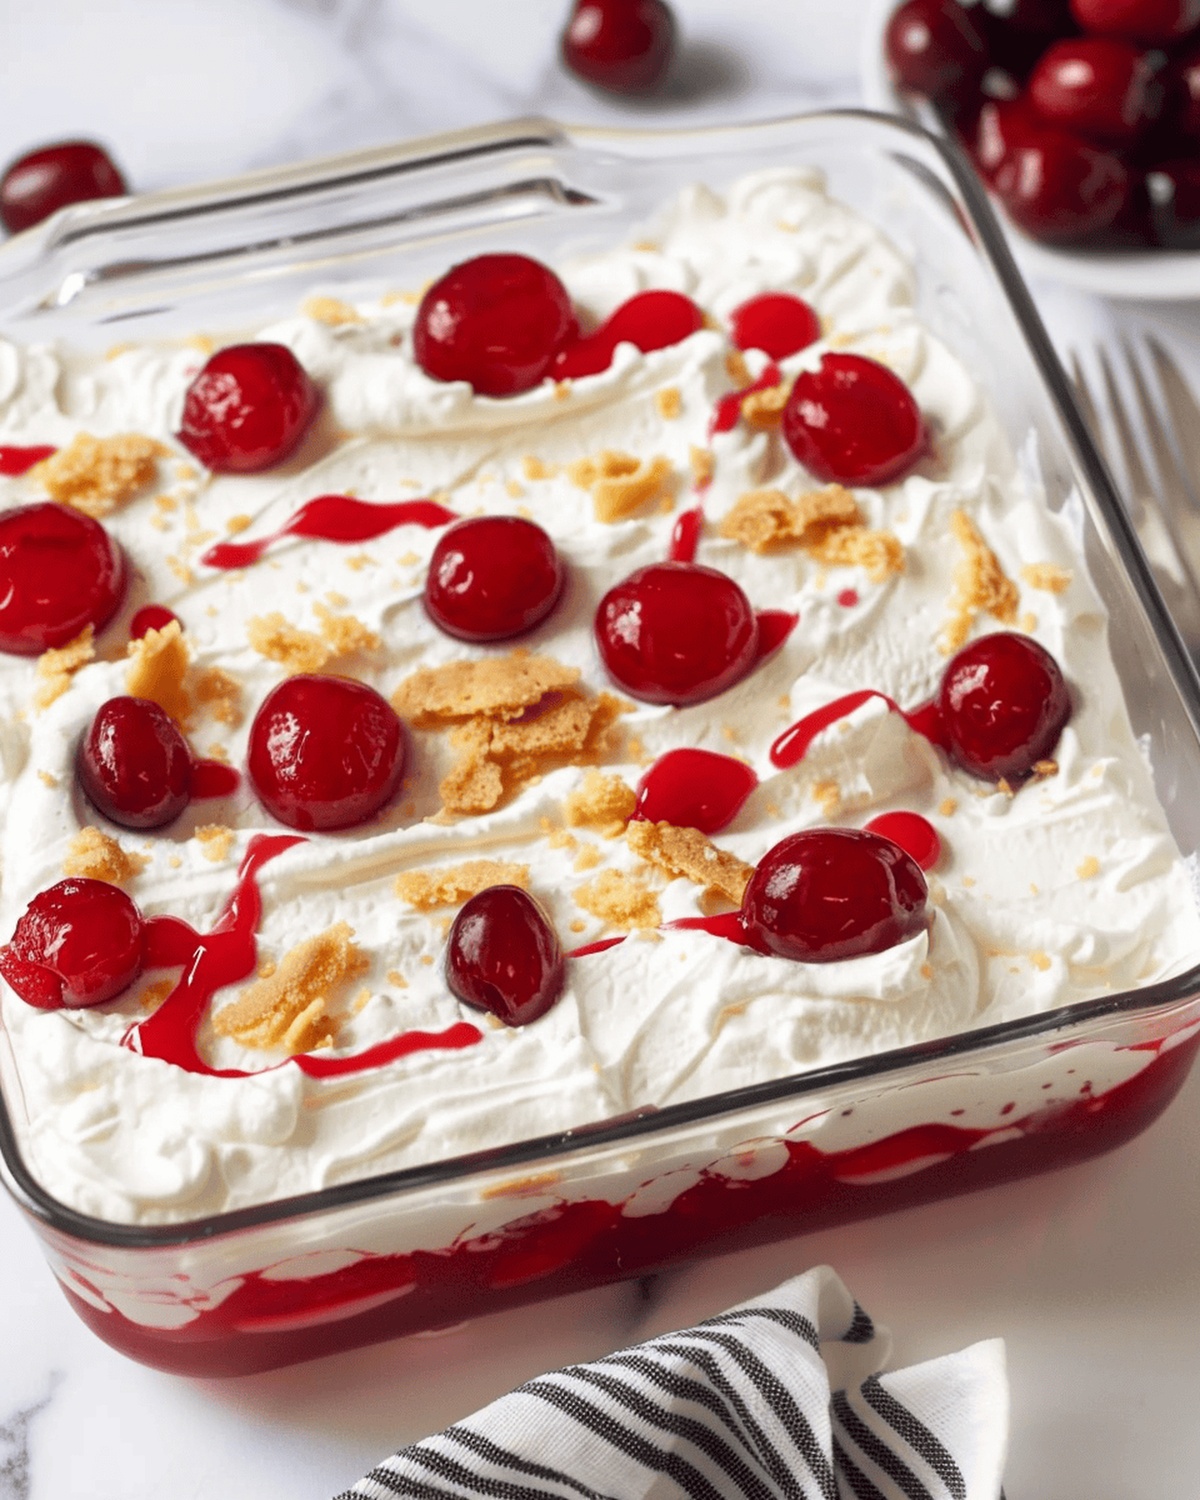
Sweet memories bloom with this cherry delight cake, promising pure dessert magic straight from grandma’s kitchen. Layers of tender crumb, luscious cherry filling, and pillowy frosting invite you to savor each delectable slice of nostalgic comfort.
Ingredients
Cake Base:
- 1 (14 ounces / 396 grams) prepared angel food cake, cut into 1-inch cubes
Creamy Mixture:
- 1 (3.5 ounces / 99 grams) box instant vanilla pudding
- 1 ½ cups milk
- 1 cup sour cream
- 1 (8 ounces / 226 grams) tub cool whip, thawed
Fruit Topping:
- 1 (21 ounces / 595 grams) can cherry pie filling
Instructions
- Gently crumble half of the angel food cake into a 9×13-inch dish, creating an even base layer that covers the entire bottom surface.
- Carefully distribute two-thirds of the cherry pie filling across the cake cubes, ensuring a uniform spread that reaches all corners of the dessert.
- Delicately arrange the remaining cake pieces over the cherry filling, creating a second soft layer that completely covers the previous fruity surface.
- In a mixing bowl, whisk together the pudding mix, milk, and sour cream until the mixture transforms into a smooth, creamy consistency with no lumps.
- Methodically pour the pudding mixture over the cake layer, using a spatula to create an even, glossy surface that covers all the cake pieces.
- Gently spread the thawed cool whip across the pudding layer, creating a light and airy topping that conceals the underlying layers.
- Artfully drizzle the remaining cherry pie filling over the cool whip, allowing the vibrant red sauce to create an appetizing pattern and add a burst of fruity color.
- Place the dessert in the refrigerator and allow it to chill for 4 to 5 hours, giving the layers time to set and the flavors to meld into a harmonious, refreshing treat.
Notes
- Effortlessly create this stunning dessert with minimal baking skills required, perfect for beginners and experienced cooks alike.
- Allow ample chilling time to ensure layers set properly and flavors develop a rich, harmonious blend.
- Use room temperature ingredients for smoother mixing and better incorporation of pudding and cream layers.
- Fresh or frozen cool whip works equally well, giving flexibility for last-minute preparation.
- Can be prepared a day ahead, making it an ideal make-ahead dessert for gatherings and potlucks.
- Store covered in the refrigerator for up to 3 days to maintain optimal texture and taste.
- Prep Time: 20 minutes
- Cook Time: 0 minutes
- Category: Desserts
- Method: Mixing
- Cuisine: American
Nutrition
- Serving Size: 12
- Calories: 180
- Sugar: 22 g
- Sodium: 150 mg
- Fat: 7 g
- Saturated Fat: 3 g
- Unsaturated Fat: 4 g
- Trans Fat: 0 g
- Carbohydrates: 26 g
- Fiber: 0 g
- Protein: 3 g
- Cholesterol: 10 mg
Isabella Rossi
Founder & Culinary Content Creator
Expertise
Recipe Development, Traditional Irish and European Cuisines, Food Styling and Photography, Culinary Education
Education
Dublin Institute of Technology (DIT) – School of Culinary Arts and Food Technology
Ballymaloe Cookery School
Liam is the voice behind many of Craft Meats’ most flavorful features. With roots in Dublin’s smoky barbecue scene and a culinary degree from the Dublin Institute of Technology, he brings time-tested cooking techniques to life.
His training at Ballymaloe Cookery School sharpened his farm-to-table approach, giving him a deep respect for every ingredient he writes about.
He’s not about overcomplicating the process, just helping you cook meat that’s worth talking about. When he’s not writing or grilling, he’s out foraging or nerding out on regional spice blends to add to his next recipe.