
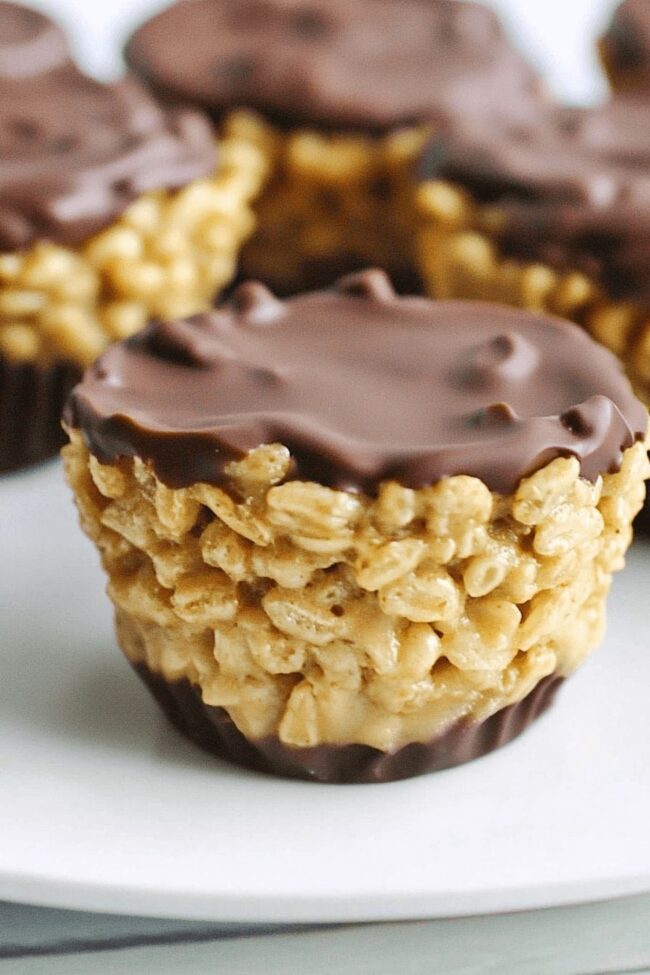
Chocolate Peanut Butter Krispie Cups Recipe
Chocolate peanut butter rice krispie cups blend irresistible textures and flavors that spark pure culinary excitement.
Sweet meets salty in a delightful dance of crunch and smoothness.
Imagine a treat that melts effortlessly on your tongue, creating an instant moment of bliss.
Childhood memories collide with gourmet indulgence through this simple yet sophisticated dessert.
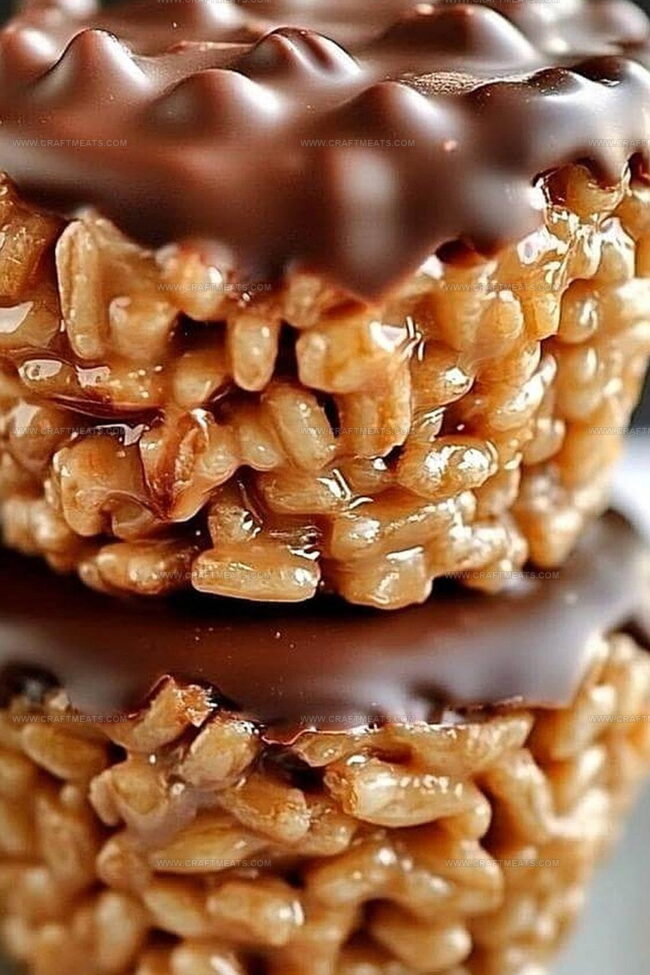
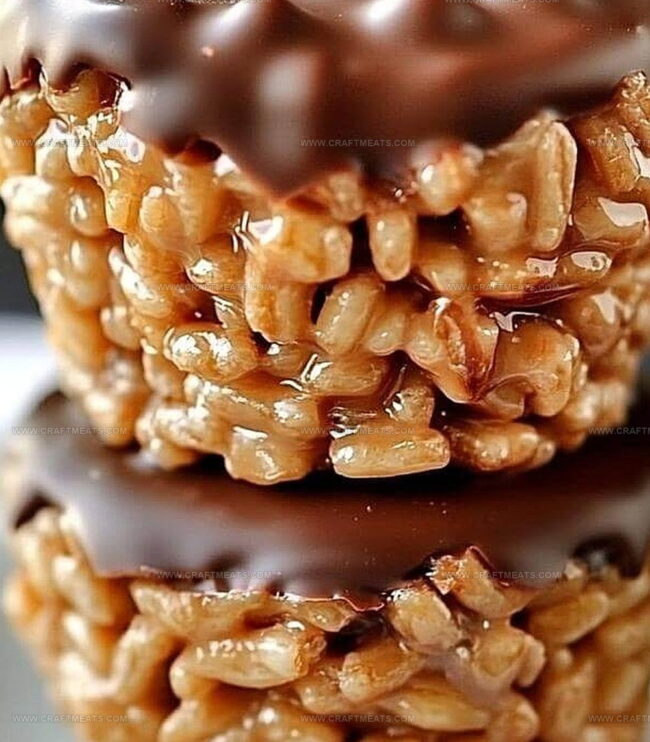
Rich layers of creamy chocolate and nutty peanut butter nestle between crispy, airy rice cereal.
Each bite promises a symphony of contrasting sensations that will make you swoon.
Quick to assemble and impossible to resist, these cups represent comfort and joy in one delectable package.
You won’t be able to stop at just one of these magical morsels.
Chocolate Peanut Butter Rice Krispie Cups You’ll Crave

Ingredients You’ll Need for Rice Krispie Cups
Base Ingredients:Chocolate Layer:Seasoning:Extras for Preparation:Steps for Making Chocolate PB Rice Krispie Cups
Step 1: Prepare The Muffin Tin
Line a 12-cup muffin tin with paper or silicone liners. This will make removing the treats super easy after they set. Choose colorful liners for extra fun!
Step 2: Create Peanut Butter Base
In a medium saucepan over low heat, combine:Stir ingredients until they transform into a smooth, glossy mixture. Remove from heat once blended.
Step 3: Mix Cereal With Peanut Butter
Pour Rice Krispies cereal into the warm peanut butter mixture. Gently fold until every single crispy piece gets perfectly coated with the delicious mixture.
Step 4: Form Base Layer
Spoon the peanut butter cereal mixture evenly into each muffin liner. Press down gently with the back of a spoon to create a compact base layer.
Step 5: Melt Chocolate Topping
In a separate saucepan over low heat, melt chocolate chips. Stir continuously until the chocolate becomes silky smooth and shiny.
Step 6: Cover With Chocolate
Carefully spoon the melted chocolate over the peanut butter cereal layer in each cup. Use a small spatula to spread chocolate evenly, ensuring complete coverage.
Step 7: Chill And Set
Place the muffin tin in the refrigerator for at least 1 hour. Wait until the chocolate becomes completely firm and set. Once ready, gently remove the cups from the liners and enjoy your decadent treat!
Handy Tips for Perfect Peanut Butter Krispie Cups

How to Store and Reheat Krispie Cup Leftovers
Best Pairings for Chocolate PB Krispie Cups
Flavor Ideas for Rice Krispie Cup Variations
Common FAQs for Peanut Butter Rice Krispie Cups
Yes, you can substitute Rice Krispies with other crispy cereals like cornflakes or rice puffs. Just ensure they provide a similar crunchy texture.
Store them in an airtight container in the refrigerator for up to 7 days. They’ll stay fresh and maintain their delicious texture.
Absolutely! You can replace honey with maple syrup or agave nectar. These alternatives will help bind the cereal and provide sweetness.
Yes, you can freeze them for up to 2 months. Wrap each cup individually in plastic wrap before storing in a freezer-safe container for easy preservation.
Print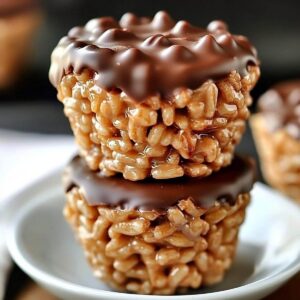
Chocolate Peanut Butter Rice Krispie Cups Recipe
- Total Time: 20 minutes
- Yield: 12 1x
Description
Indulgent chocolate peanut butter rice krispie cups bring nostalgic childhood memories to life with rich layers of creamy sweetness. Sweet crunch meets silky chocolate in these irresistible no-bake treats that promise pure deliciousness in every single bite.
Ingredients
Main Ingredients:
- 1.5 cups (370 milliliters) chocolate chips (vegan chocolate chips can be used)
- 1 cup (240 milliliters) chunky peanut butter (for peanut flavor and texture)
- 3 cups (90 grams) Rice Krispies cereal (for crunchy base)
Sweeteners and Flavor Enhancers:
- 6 tablespoons (90 milliliters) honey (for natural sweetness)
- 1/8 teaspoon (0.6 grams) salt (enhances flavor)
Instructions
- Prepare a muffin tin by lining each cavity with paper or silicone liners to facilitate easy removal of the finished treats.
- Create a smooth peanut butter base by gently heating peanut butter, honey, and salt in a saucepan, stirring until the mixture becomes uniform and glossy.
- Carefully fold Rice Krispies cereal into the warm peanut butter mixture, ensuring each crisp morsel is thoroughly coated and distributed evenly.
- Distribute the peanut butter-coated cereal mixture into the prepared muffin tin, using gentle pressure to compact the base layer in each cup.
- Melt chocolate chips in a separate saucepan over low heat, stirring continuously until the chocolate transforms into a silky, glossy liquid.
- Generously drizzle the melted chocolate over the peanut butter cereal layer, using a spoon to spread and completely cover the surface of each cup.
- Chill the filled muffin tin in the refrigerator for a minimum of one hour, allowing the chocolate to solidify and set completely.
- Once fully set, carefully remove the cups from the tin, peel away the liners, and savor the delectable combination of chocolate and peanut butter.
Notes
- Prep these treats ahead of time for a quick no-bake dessert that satisfies sweet and salty cravings.
- Use room temperature ingredients to help them blend smoothly and prevent clumping.
- Silicone or paper liners make removing the cups effortless and ensure a clean, professional presentation.
- Press the cereal mixture gently to create a compact base that holds together perfectly.
- Store these chocolate peanut butter cups in the refrigerator for up to a week in an airtight container.
- For a fun twist, sprinkle sea salt or crushed peanuts on top of the melted chocolate layer before chilling.
- Prep Time: 15 minutes
- Cook Time: 5 minutes
- Category: Snacks, Desserts
- Method: Mixing
- Cuisine: American
Nutrition
- Serving Size: 12
- Calories: 210
- Sugar: 10g
- Sodium: 50mg
- Fat: 12g
- Saturated Fat: 3g
- Unsaturated Fat: 9g
- Trans Fat: 0g
- Carbohydrates: 24g
- Fiber: 2g
- Protein: 5g
- Cholesterol: 0mg
Isabella Rossi
Founder & Culinary Content Creator
Expertise
Recipe Development, Traditional Irish and European Cuisines, Food Styling and Photography, Culinary Education
Education
Dublin Institute of Technology (DIT) – School of Culinary Arts and Food Technology
Ballymaloe Cookery School
Liam is the voice behind many of Craft Meats’ most flavorful features. With roots in Dublin’s smoky barbecue scene and a culinary degree from the Dublin Institute of Technology, he brings time-tested cooking techniques to life.
His training at Ballymaloe Cookery School sharpened his farm-to-table approach, giving him a deep respect for every ingredient he writes about.
He’s not about overcomplicating the process, just helping you cook meat that’s worth talking about. When he’s not writing or grilling, he’s out foraging or nerding out on regional spice blends to add to his next recipe.