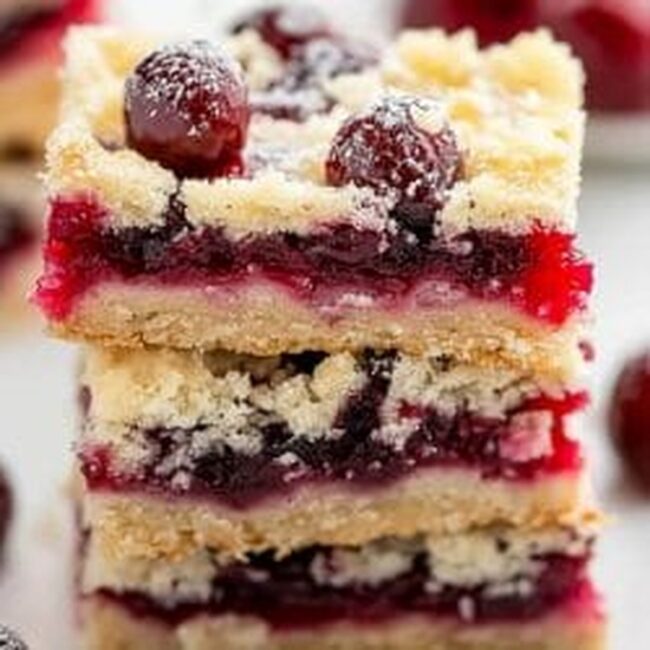
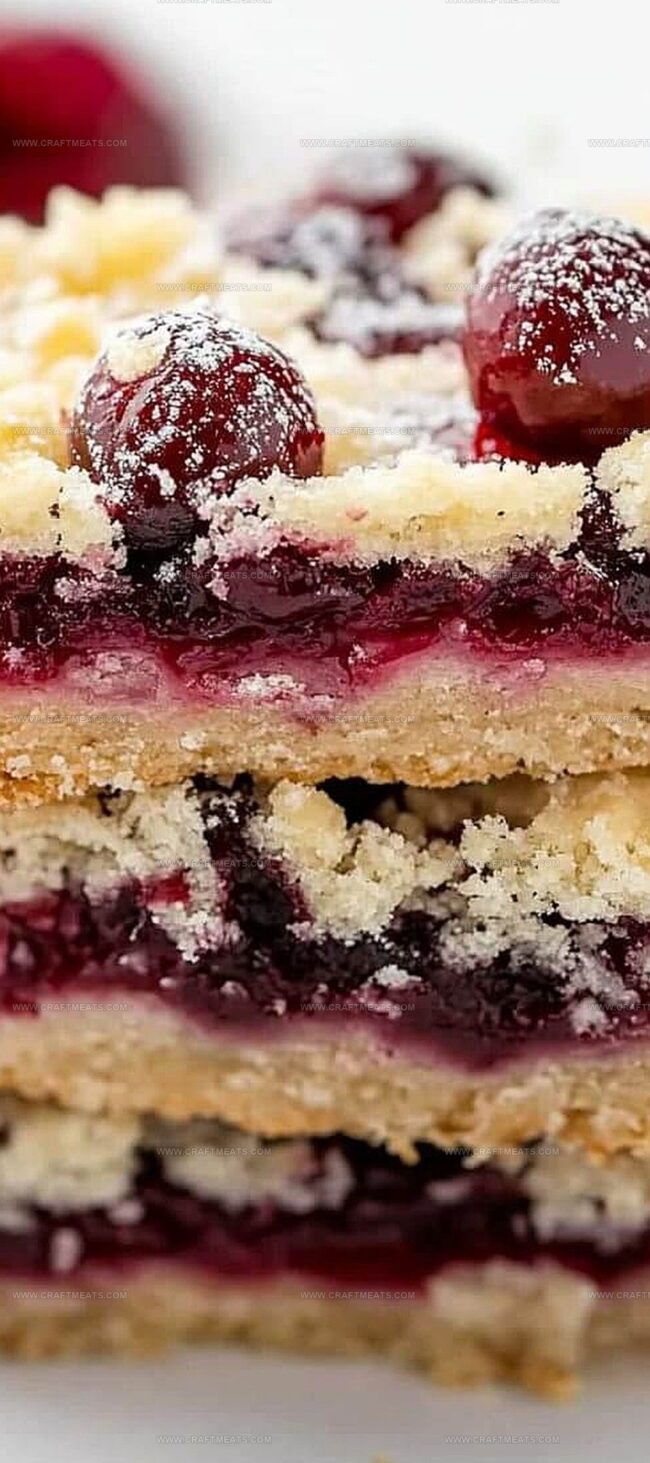
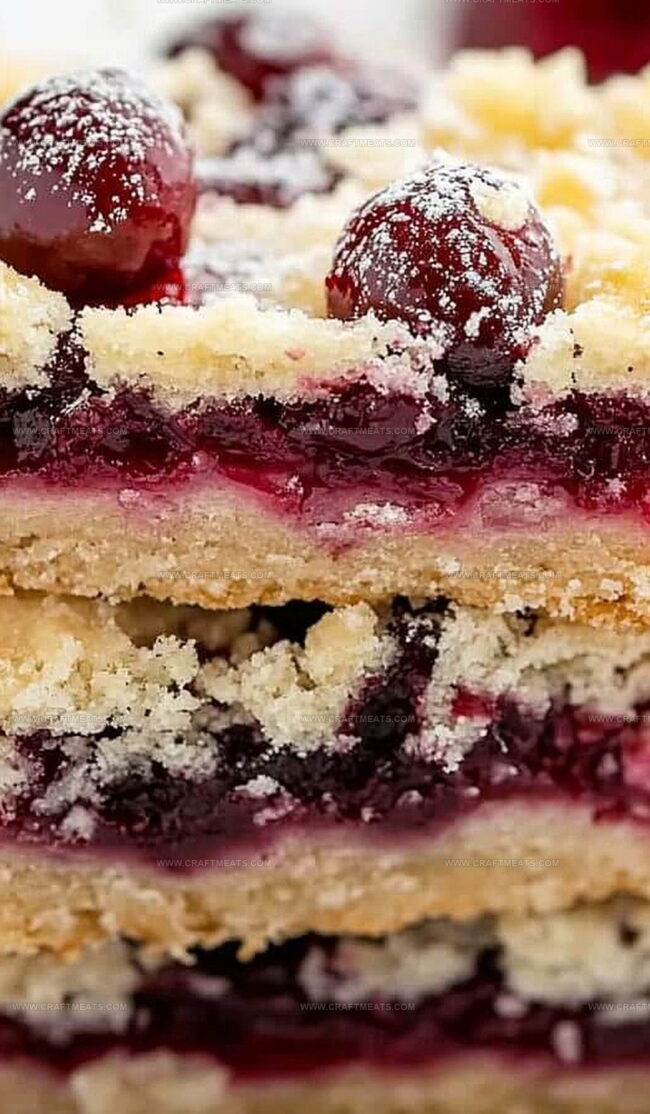
Christmas Cherry Bars Recipe for Holiday Baking
Sweet, crumbly Christmas cherry bars tantalize taste buds with their festive charm and delightful layers of flavor.
Imagine a dessert that combines buttery textures with vibrant fruity notes and a hint of seasonal magic.
Soft, pillowy pastry cradles rich cherry filling, creating a mouthwatering experience that sparks memories of cozy holiday gatherings.
Delicate crumbles and smooth fruit preserve intertwine, promising a treat that’s both comforting and elegant.
Home bakers adore these bars for their simplicity and crowd-pleasing appeal.
Each bite promises a delectable journey through sweet, tangy sensations that capture the warmth of celebration.
You can want to savor every crumbly, fruity moment of this irresistible seasonal delight.
Christmas Cherry Bars That Taste Like Holiday Cheer
Ingredients You’ll Need for Christmas Cherry Bars
Base Ingredients:Dry Ingredients:Filling and Topping Ingredients:How to Bake Christmas Cherry Bars in Simple Steps
Step 1: Warm Up The Oven
Preheat the oven to 350°F (175°C). Grab a 9×13-inch baking pan and lightly coat it with cooking spray or butter to prevent sticking.
Step 2: Create A Creamy Base
In a large mixing bowl, blend together:Whip until the mixture looks light and fluffy. Add eggs one at a time, mixing thoroughly after each addition. Stir in vanilla extract for extra flavor.
Step 3: Prepare The Dry Ingredients
In a separate bowl, combine:Gently fold the dry ingredients into the butter mixture, stirring until everything is smoothly incorporated.
Step 4: Layer The Deliciousness
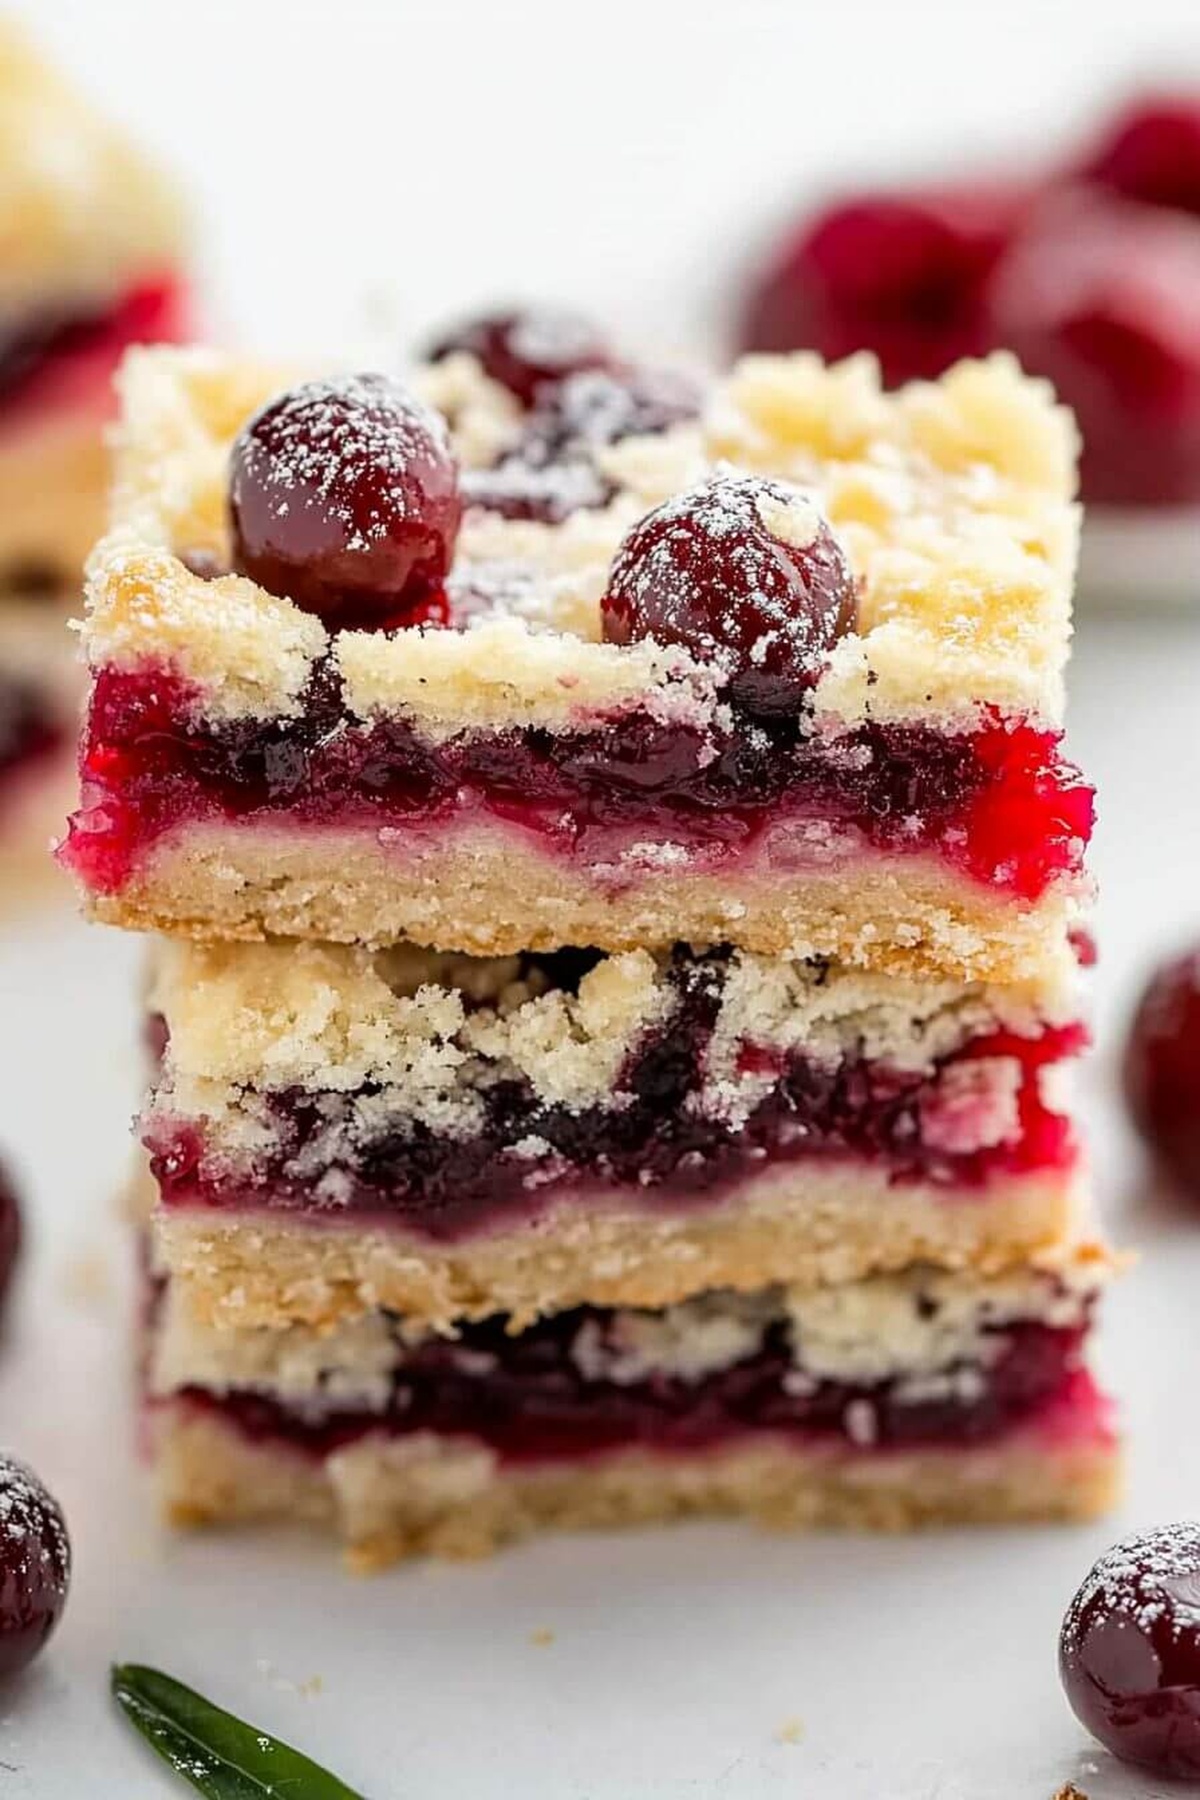
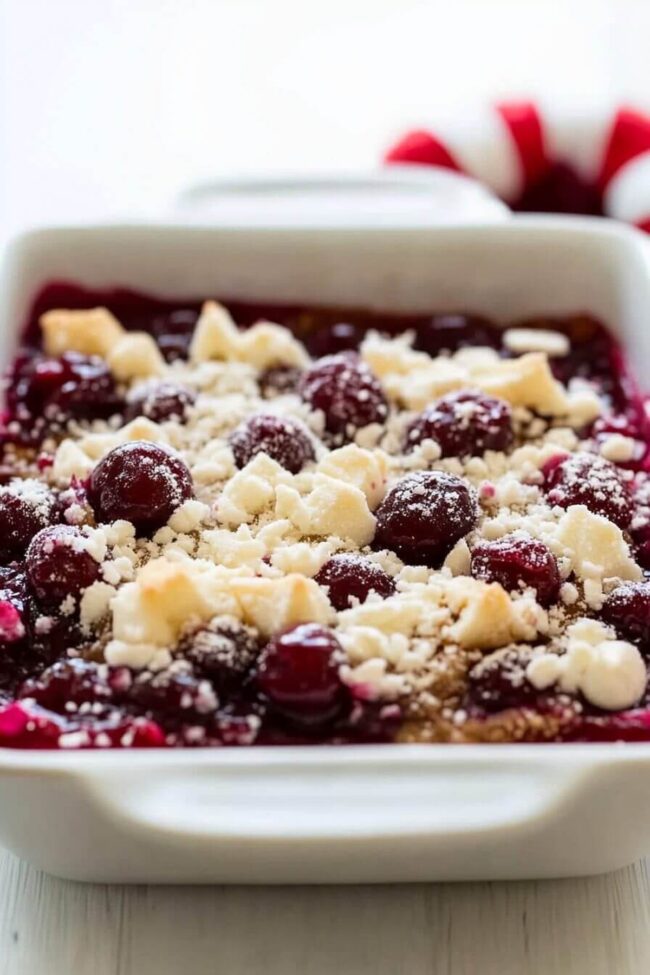
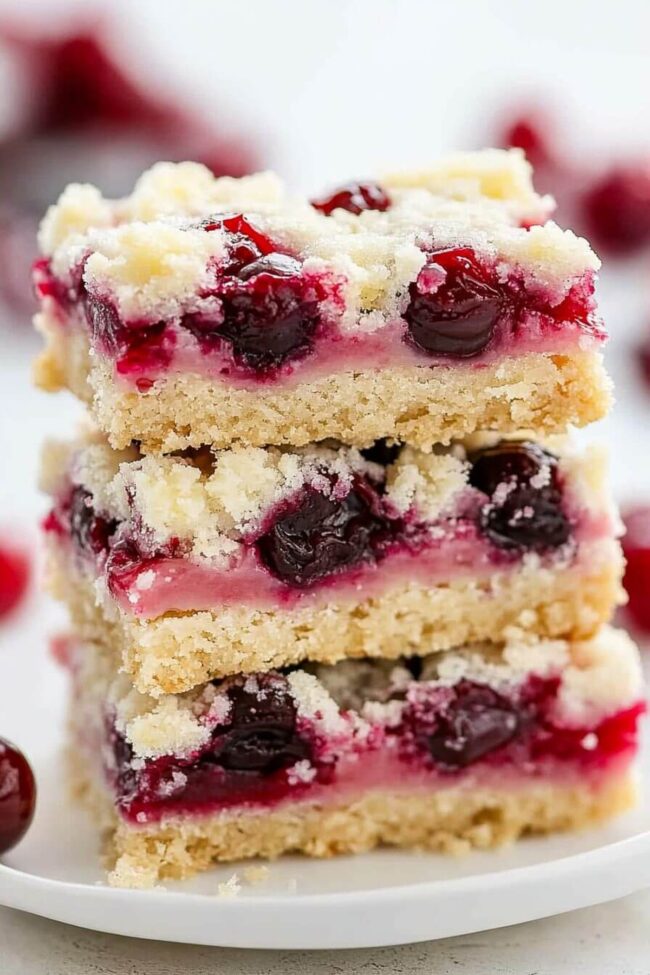
Spread approximately 3 cups of batter evenly across the bottom of the prepared pan. Carefully spoon cherry pie filling over the first layer. Drop small dollops of remaining batter on top of the cherry layer, creating a rustic, swirled appearance.
Step 5: Bake To Golden Perfection
Place the pan in the preheated oven and bake for 35-40 minutes. Watch for a golden-brown top and check doneness by inserting a toothpick into the center – it should come out clean.
Step 6: Cool And Rest
Remove from the oven and let the bars cool completely on a wire rack. Patience is key for the perfect texture.
Step 7: Drizzle With Glaze
Create a delectable glaze by whisking together:Once the bars are fully cooled, drizzle the glaze generously over the top.
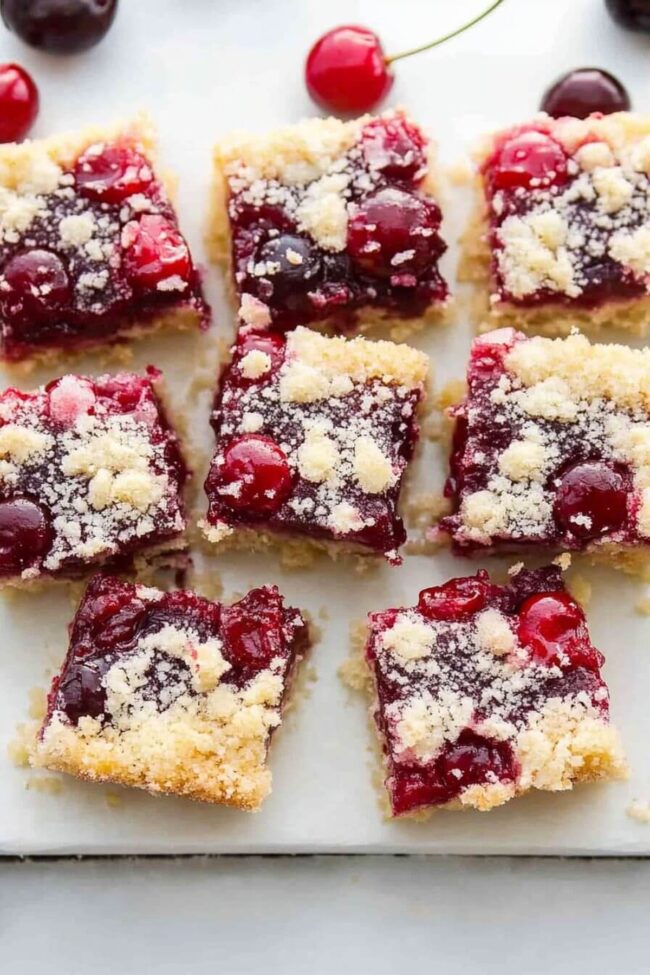
Step 8: Slice And Serve
Allow the glaze to set for a few minutes, then cut into delightful bars. Enjoy your homemade Christmas Cherry Bars with friends and family!
Pro Tips for Perfect Christmas Cherry Bars
How to Store and Reheat Christmas Cherry Bar Leftovers
Sweet Pairings for Christmas Cherry Bars
Fun Ways to Customize Christmas Cherry Bars
Frequently Asked Questions on Christmas Cherry Bars
Yes! Homemade cherry pie filling works great and can add a more personal touch to your Christmas Cherry Bars.
Store the bars in an airtight container at room temperature for up to 3 days, or refrigerate for up to a week. They’ll stay moist and delicious.
Absolutely! Wrap the bars tightly in plastic wrap and then aluminum foil. They’ll keep in the freezer for up to 3 months. Thaw at room temperature before serving.
You can use a similar-sized baking dish, but adjust baking time slightly. Just make sure the batter spreads evenly and watch for golden brown color.
Print
Christmas Cherry Bars Recipe
- Total Time: 55 minutes
- Yield: 24 1x
Description
These festive Christmas Cherry Bars blend sweet nostalgia with holiday cheer, promising delightful moments of pure indulgence. Buttery shortbread crust topped with tart cherry filling creates a simple yet irresistible dessert you’ll savor with each delectable bite.
Ingredients
Main Ingredients:
- 3 cups all-purpose flour
- 2 cups sugar
- 4 eggs
- 1 can (21 ounces / 595 grams) cherry pie filling
- 1 cup (227 grams) butter, softened
Flavoring Ingredients:
- 1 teaspoon vanilla extract
- 1 teaspoon salt
Optional Glaze Ingredients:
- 1 cup (120 grams) powdered sugar
- 2 tablespoons milk
- ½ teaspoon vanilla extract
Instructions
- Prepare the oven environment by heating to 350°F and coating a 9×13-inch baking vessel with a light grease layer to ensure effortless removal.
- In a spacious mixing vessel, transform butter and sugar into a pillowy, aerated mixture by vigorously creaming together. Integrate eggs individually, whisking thoroughly after each addition, then incorporate vanilla extract for enhanced flavor complexity.
- Simultaneously, combine flour and salt in a separate receptacle, meticulously blending dry ingredients before gradually folding into the butter mixture, ensuring smooth and consistent integration.
- Distribute approximately three-quarters of the batter across the pan’s bottom, creating an even, uniform foundation. Artfully cascade cherry pie filling over the initial layer, then delicately disperse remaining batter in small, irregular clusters atop the crimson fruit surface.
- Transfer the pan to the preheated oven, allowing the dessert to transform for 35-40 minutes. Monitor the surface, seeking a golden-brown hue and confirming doneness by inserting a toothpick into the center, which should emerge pristine.
- Extract the pan and position on a cooling rack, permitting the bars to reach ambient temperature completely before embellishing.
- Craft a silky glaze by whisking powdered sugar with milk and vanilla extract until achieving a smooth, pourable consistency. Elegantly drizzle the luminous mixture across the cooled bars.
- Allow the glaze to solidify, then slice into individual servings, revealing the festive layers within.
Notes
- Perfectly prepare your pan by greasing it thoroughly to ensure easy bar removal and clean slicing.
- Creaming butter and sugar creates a light, fluffy base that guarantees tender, melt-in-your-mouth texture.
- Layer cherry pie filling strategically between batches of dough for a delightful fruity surprise in every bite.
- Check doneness by inserting a toothpick – it should emerge clean, indicating perfectly baked bars.
- Allow bars to cool completely before glazing to prevent runny, messy topping and ensure a professional finish.
- Drizzle glaze in artistic patterns for a festive, bakery-style presentation that makes these bars look as good as they taste.
- Prep Time: 15 minutes
- Cook Time: 40 minutes
- Category: Desserts, Snacks
- Method: Baking
- Cuisine: American
Nutrition
- Serving Size: 24
- Calories: 210
- Sugar: 15 g
- Sodium: 120 mg
- Fat: 9 g
- Saturated Fat: 5 g
- Unsaturated Fat: 3 g
- Trans Fat: 0 g
- Carbohydrates: 31 g
- Fiber: 0.5 g
- Protein: 2 g
- Cholesterol: 40 mg
Isabella Rossi
Founder & Culinary Content Creator
Expertise
Recipe Development, Traditional Irish and European Cuisines, Food Styling and Photography, Culinary Education
Education
Dublin Institute of Technology (DIT) – School of Culinary Arts and Food Technology
Ballymaloe Cookery School
Liam is the voice behind many of Craft Meats’ most flavorful features. With roots in Dublin’s smoky barbecue scene and a culinary degree from the Dublin Institute of Technology, he brings time-tested cooking techniques to life.
His training at Ballymaloe Cookery School sharpened his farm-to-table approach, giving him a deep respect for every ingredient he writes about.
He’s not about overcomplicating the process, just helping you cook meat that’s worth talking about. When he’s not writing or grilling, he’s out foraging or nerding out on regional spice blends to add to his next recipe.