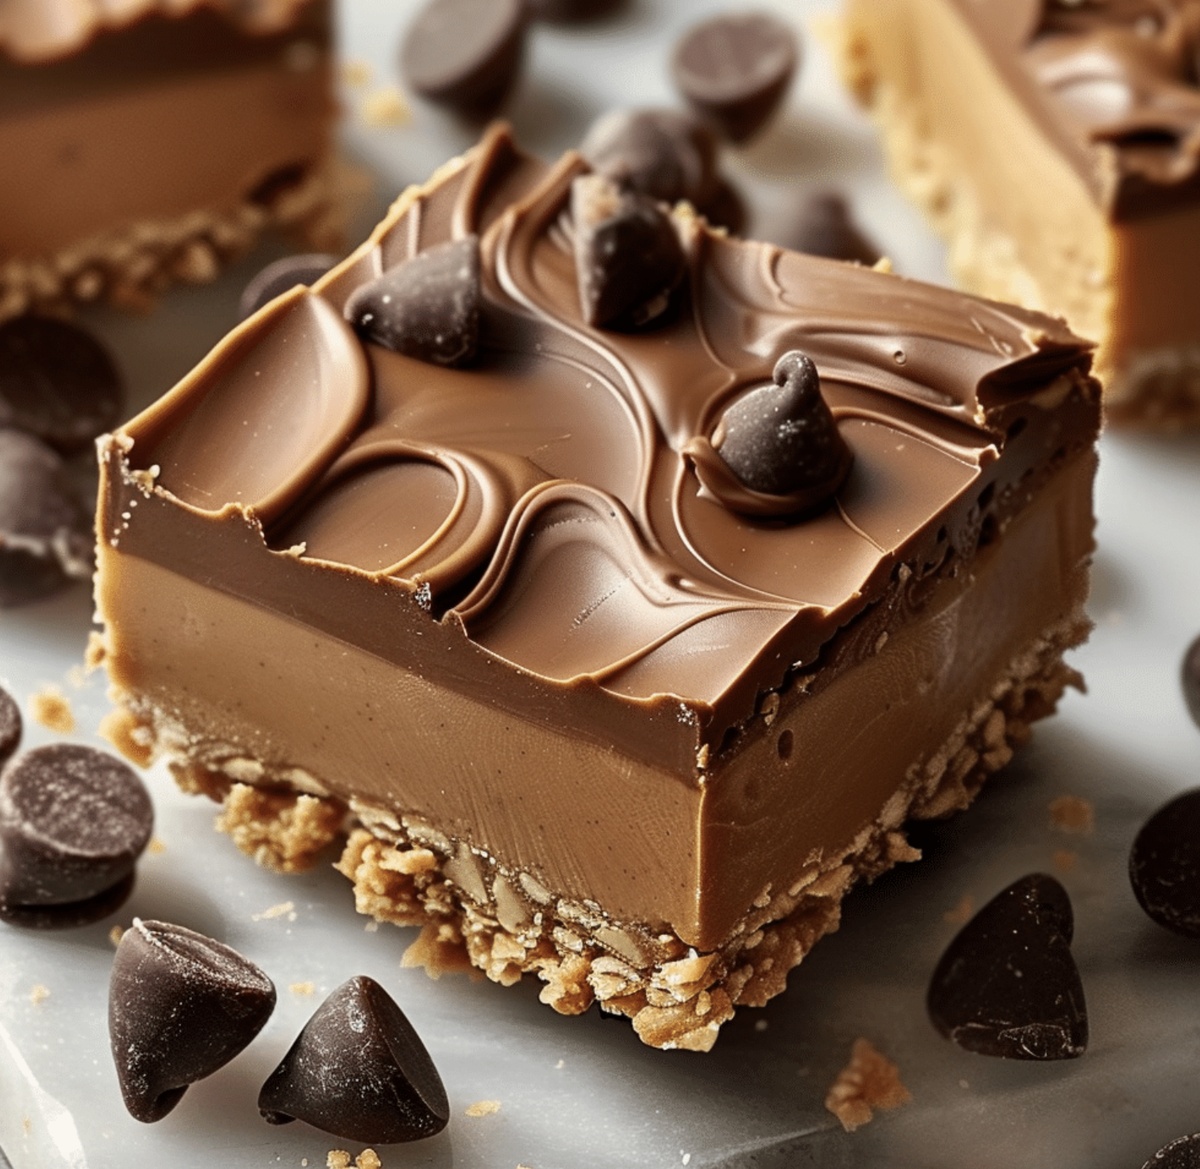
Swift & Sweet: Reeses Peanut Butter No-Bake Bars Recipe
Chocolate and peanut butter create an irresistible dance of flavors in these reeses peanut butter no-bake bars that melt in your mouth.
Sweet richness combines with creamy textures to deliver pure indulgence.
No oven is required for this simple treat that comes together faster than traditional desserts.
Each layer promises a decadent experience of contrasting yet harmonious tastes.
Smooth chocolate meets rich peanut butter in a no-fuss recipe anyone can master.
The magic happens with just a few ingredients and minimal effort.
Dive into this delightful dessert that will become your new go-to sweet sensation.
Quick Recipe Overview
What Goes Into Reeses Peanut Butter No-Bake Bars
For Base Layer Ingredients:For Chocolate Topping Ingredients:For Preparation Support:Kitchen Items For Reeses Peanut Butter No-Bake Bars
How To Mix And Chill Reeses Peanut Butter No-Bake Bars
Whip together rich peanut butter with softened butter and sweet powdered sugar. Crush graham crackers into fine crumbs and fold them into the mixture. Press this velvety blend smoothly into a lined baking pan, creating a delicious foundation that’s both soft and sturdy.
Melt chocolate chips with a touch of peanut butter in the microwave. Stir gently until the mixture transforms into a glossy, silky river of chocolate. Pour this luxurious layer over the peanut butter base, using a spatula to spread it evenly and create a perfect chocolate blanket.
Let the bars rest in the refrigerator, allowing the layers to bond and solidify. The cool environment works its magic, turning the ingredients into a perfectly structured treat. After about an hour, the squares will become firm and ready to slice.
Remove the bars from the pan using the parchment paper. Cut into neat squares, revealing the beautiful layers. Serve these indulgent squares and watch as everyone falls in love with this simple yet decadent dessert.
Reeses Peanut Butter No-Bake Bars Tweaks To Try
How To Present Reeses Peanut Butter No-Bake Bars Nicely
How To Store Reeses Peanut Butter No-Bake Bars Without Melting
Print
Creamy Reeses Peanut Butter No-Bake Bars Recipe
- Total Time: 1 hour 10 minutes
- Yield: 11 1x
Description
Reeses peanut butter no-bake bars blend creamy chocolate and peanut butter in a quick, irresistible dessert. Graham cracker crumbs and powdered sugar create a delightful base that satisfies sweet cravings without turning on the oven.
Ingredients
- 1 ½ cups (270 g / 9.5 oz) semi-sweet or milk chocolate chips
- 1 cup (240 g / 8.5 oz) creamy peanut butter
- 1 ½ cups (180 g / 6.3 oz) crushed graham crackers
- ½ cup (115 g / 4 oz) unsalted butter, melted
- 1 ¼ cups (150 g / 5.3 oz) powdered sugar
- 2 tbsps creamy peanut butter
Instructions
- Preparation: Combine peanut butter, softened butter, powdered sugar, and crushed graham crackers in a mixing bowl, whisking until a smooth, uniform mixture forms with no visible lumps.
- Base Formation: Transfer the creamy mixture into a parchment-lined baking dish, firmly pressing and evenly distributing the layer to create a solid, compact foundation that will support the chocolate topping.
- Chocolate Coating: Melt chocolate chips and peanut butter together in the microwave, using short bursts and stirring between intervals to achieve a glossy, smooth chocolate layer without burning.
- Layering: Pour the molten chocolate over the peanut butter base, using a spatula to spread it evenly, ensuring complete coverage and a seamless, appetizing appearance.
- Chilling and Setting: Refrigerate the pan for approximately one hour, allowing the bars to solidify completely and the flavors to meld together into a harmonious dessert.
- Serving: Remove from the refrigerator, lift the entire creation out of the pan using the parchment paper edges, and slice into precise, uniform squares that showcase the delectable layers.
Notes
- Prevent Crumbly Texture: Ensure graham crackers are finely crushed for a smooth, compact base that holds together perfectly when sliced.
- Control Chocolate Melting: Use short 15-second microwave intervals and stir thoroughly to avoid chocolate burning or becoming grainy.
- Achieve Perfect Chill: Refrigerate for exactly one hour to create ideal firmness without becoming too hard or losing creamy consistency.
- Customize Dietary Needs: Swap regular peanut butter with natural versions, use gluten-free graham crackers, or substitute dark chocolate for vegan alternatives to accommodate different dietary restrictions.
- Prep Time: 10 minutes
- Cook Time: 1 hour
- Category: Desserts, Snacks
- Method: Mixing
- Cuisine: American
Nutrition
- Serving Size: 11
- Calories: 319
- Sugar: 24 g
- Sodium: 80 mg
- Fat: 20 g
- Saturated Fat: 9 g
- Unsaturated Fat: 11 g
- Trans Fat: 0 g
- Carbohydrates: 30 g
- Fiber: 1 g
- Protein: 5 g
- Cholesterol: 15 mg
Liam O’Sullivan
Founder & Culinary Content Creator
Expertise
Recipe Development, Traditional Irish and European Cuisines, Food Styling and Photography, Culinary Education
Education
Dublin Institute of Technology (DIT) – School of Culinary Arts and Food Technology
Ballymaloe Cookery School
Isabella brings a global spark to the Craft Meats table. Born in Florence and trained at the Apicius International School of Hospitality, she blends classic Italian flavor with modern writing that’s easy to follow and hard to forget.
Her additional training at the Italian Chef Academy fueled her love for well-crafted dishes, especially ones that spotlight beautiful cuts of meat.
She’s a food writer with heart, and a deep love for storytelling through single recipes. Her goal? To help you cook with more confidence and a little more joy, no matter where you start.