
Cherry Cheesecake Egg Rolls Recipe With a Crispy Shell
Crispy and decadent, these cherry cheesecake egg rolls blend sweet and tangy flavors in a delightful fusion of textures.
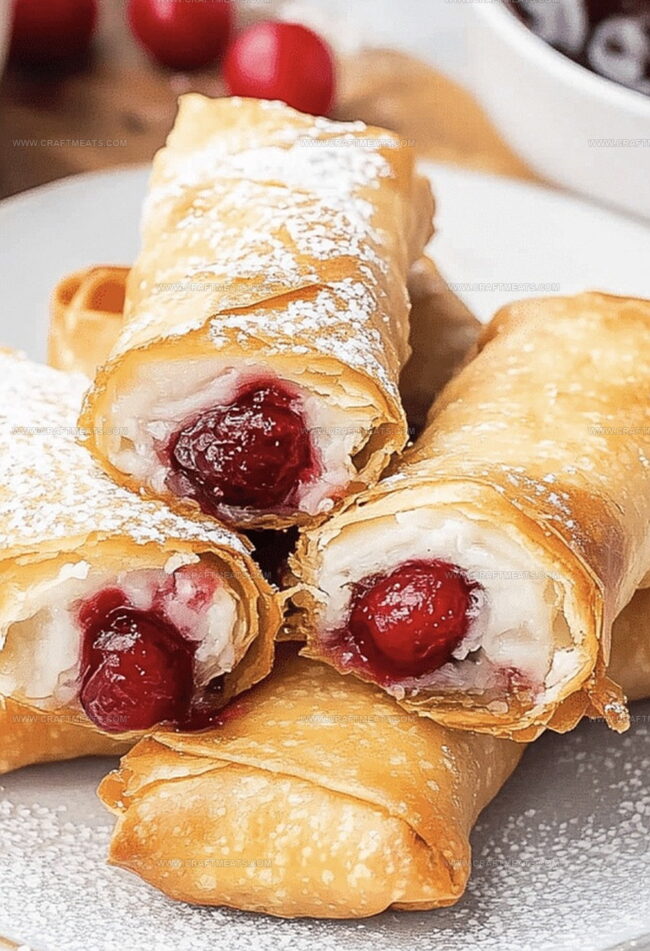
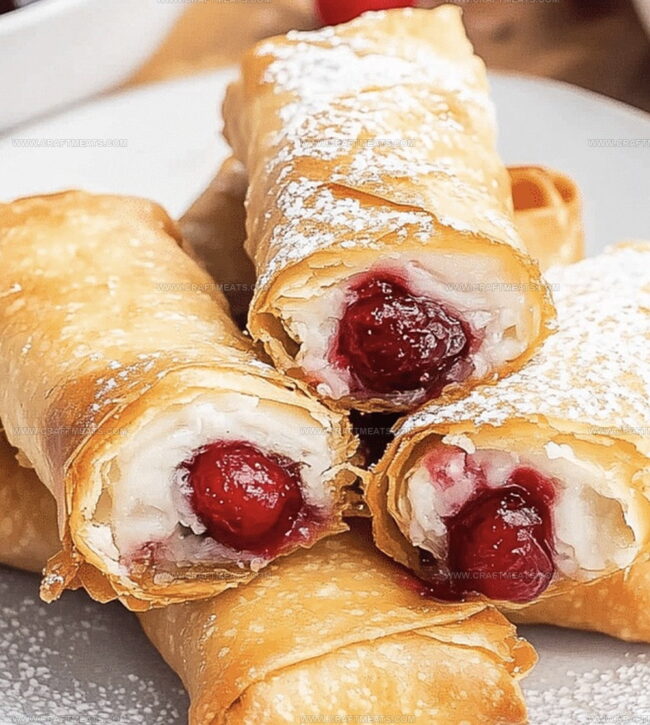
Creamy cheesecake filling nestled inside a golden-brown wrapper creates an irresistible dessert that surprises and delights.
Crunchy edges give way to a smooth, rich center bursting with cherry goodness.
Each bite delivers a perfect balance of warmth and coolness, making these egg rolls an unexpected treat.
The contrast between the crisp exterior and velvety interior keeps you coming back for more.
Simple to prepare and impressive to serve, these egg rolls transform an ordinary dessert into an extraordinary culinary experience.
Dive into this mouthwatering recipe and treat yourself to a delectable fusion of comfort and creativity.
Quick Recipe Overview
What Goes In Cherry Cheesecake Egg Rolls
For Cream Cheese Mixture:For Wrapping and Sealing:For Fruity Filling and Garnish:For Frying:Cherry Cheesecake Egg Rolls Tools List
Directions For Cherry Cheesecake Egg Rolls
Whip together soft cream cheese, sweet sugar, and aromatic vanilla until luxuriously smooth. Set aside vibrant cherry pie filling ready for delightful stuffing.
Place egg roll wrapper diagonally like a sparkling diamond. Spread luscious cream cheese mixture in center, then generously top with ruby-red cherry filling. Carefully fold bottom corner over mixture, tuck side edges, and roll tightly into a beautiful parcel.
Warm oil in deep skillet until shimmering hot. Gently slide egg rolls into golden liquid, transforming them into crispy treasures. Fry each side until perfectly bronzed and crunchy, about 2-3 minutes.
Dust these crispy delights with delicate powdered sugar. Serve immediately while warm, accompanied by billowy whipped cream or extra cherry sauce for dipping. Watch guests marvel at your culinary creation.
Tasty Twists For Cherry Cheesecake Egg Rolls
How To Serve Cherry Cheesecake Egg Rolls
How To Store Cherry Cheesecake Egg Rolls
Print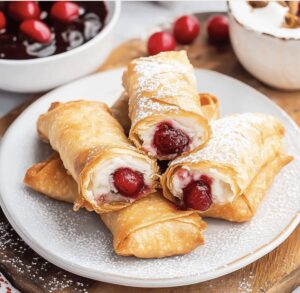
Crispy Cherry Cheesecake Egg Rolls
- Total Time: 25 minutes
- Yield: 80 1x
Description
Crispy cherry cheesecake egg rolls blend Asian and American dessert traditions into one irresistible treat. Perfectly golden rolls deliver creamy cheesecake and sweet cherry filling that will delight friends and family at any gathering.
Ingredients
- 1 cup (250 milliliters) cherry pie filling
- 8 oz (226 grams) cream cheese, softened
- ¼ cup (50 grams) granulated sugar
- 1 teaspoon vanilla extract
- 8 egg roll wrappers
- 1 large egg, beaten (for sealing)
- Vegetable or canola oil (for frying)
- Powdered sugar (optional topping)
- Whipped cream (optional topping)
Instructions
- Prepare Filling: Whisk cream cheese with sugar and vanilla until smooth and creamy, creating a luxurious base for the egg rolls.
- Prepare Wrappers: Lay egg roll wrappers diamond-style on a clean surface, ready for precise filling and folding.
- Assemble Rolls: Place a dollop of cream cheese mixture in the center of each wrapper, then top with cherry pie filling, positioning ingredients strategically for optimal flavor distribution.
- Fold Technique: Encase the filling by folding the bottom corner over, tucking side edges inward, and rolling upward with gentle tension to create a compact cylindrical shape.
- Seal Edges: Use beaten egg as a binding agent to secure the final wrapper corner, ensuring a tight seal that prevents filling from escaping during cooking.
- Fry to Perfection: Heat oil to 350°F and carefully introduce egg rolls in small batches, rotating periodically to achieve a uniformly golden and crispy exterior.
- Drain and Garnish: Transfer fried egg rolls to paper towels to remove excess oil, then elegantly dust with powdered sugar and serve with whipped cream or additional cherry pie filling for a decadent presentation.
Notes
- Prevent Filling Leakage: Seal egg roll edges meticulously by pressing wrapper corners firmly and using beaten egg as glue to block potential seepage during frying.
- Maintain Consistent Temperature: Keep oil precisely at 350°F using a kitchen thermometer, ensuring golden-brown exterior without burning or soggy centers.
- Control Batch Size: Fry egg rolls in small groups to preserve oil temperature and prevent overcrowding, which can lead to uneven cooking and greasy texture.
- Dietary Adaptation Options: Substitute traditional wrappers with gluten-free versions and use low-fat cream cheese for lighter, alternative preparation suitable for different dietary needs.
- Prep Time: 10 minutes
- Cook Time: 15 minutes
- Category: Desserts, Snacks
- Method: Frying
- Cuisine: American
Nutrition
- Serving Size: 80
- Calories: 104
- Sugar: 5 g
- Sodium: 90 mg
- Fat: 4 g
- Saturated Fat: 2 g
- Unsaturated Fat: 1 g
- Trans Fat: 0 g
- Carbohydrates: 14 g
- Fiber: 0 g
- Protein: 2 g
- Cholesterol: 30 mg
Liam O’Sullivan
Founder & Culinary Content Creator
Expertise
Recipe Development, Traditional Irish and European Cuisines, Food Styling and Photography, Culinary Education
Education
Dublin Institute of Technology (DIT) – School of Culinary Arts and Food Technology
Ballymaloe Cookery School
Isabella brings a global spark to the Craft Meats table. Born in Florence and trained at the Apicius International School of Hospitality, she blends classic Italian flavor with modern writing that’s easy to follow and hard to forget.
Her additional training at the Italian Chef Academy fueled her love for well-crafted dishes, especially ones that spotlight beautiful cuts of meat.
She’s a food writer with heart, and a deep love for storytelling through single recipes. Her goal? To help you cook with more confidence and a little more joy, no matter where you start.