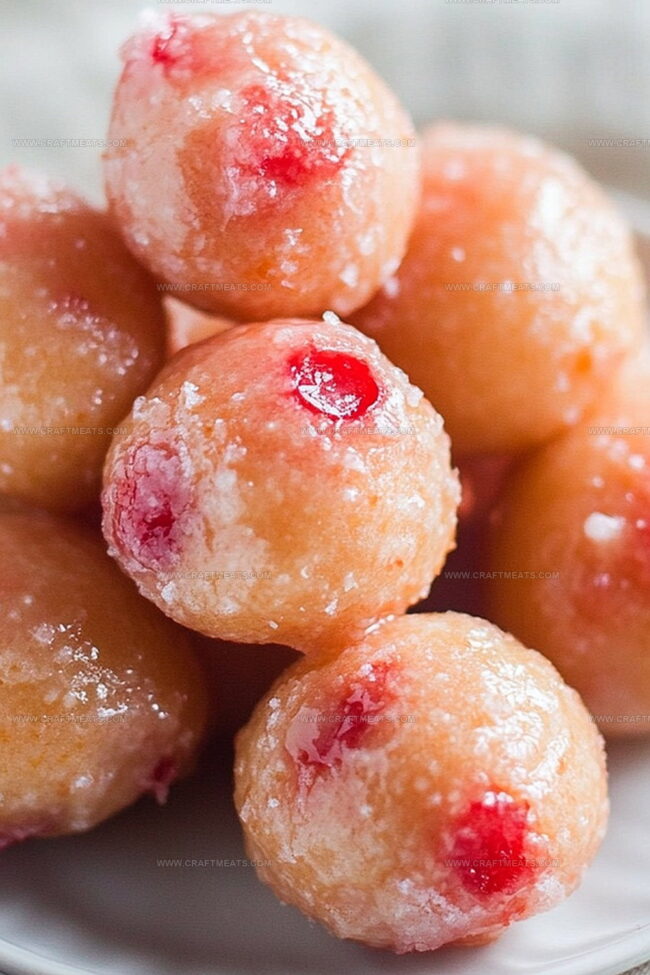
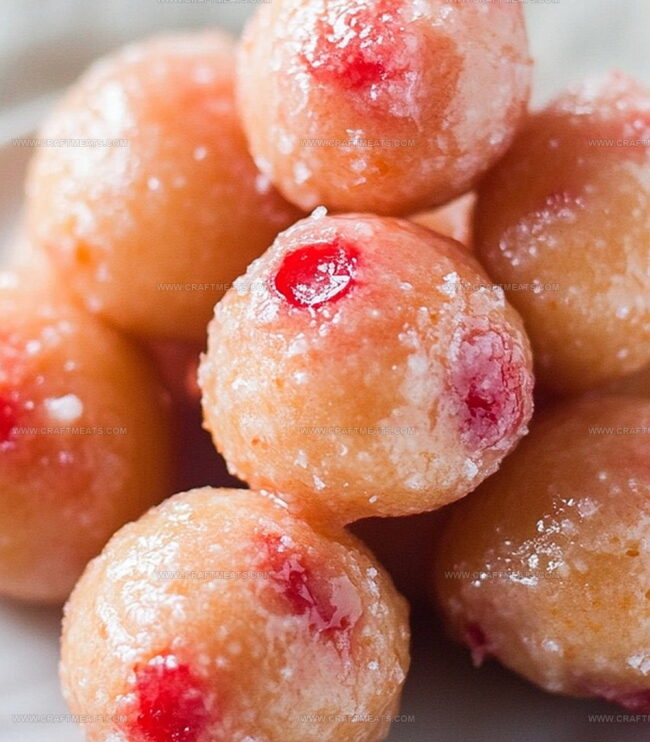
Sweet and fluffy cherry doughnut holes burst with delightful flavor in this irresistible treat.
Homemade pastries always bring joy to the kitchen.
Soft dough mingles with vibrant cherry essence, creating a mouthwatering bite-sized delight.
The recipe combines simple ingredients with a touch of culinary magic.
Light, golden-brown spheres emerge from the fryer, promising pure indulgence.
Powdered sugar dusts these little gems, adding a delicate sweetness that melts on your tongue.
Dive into this delectable recipe and treat yourself to a moments of pure bliss.
Quick Recipe Overview
Prep Time: 20 minutes
Cook Time: 15 minutes
Total Time: 35 minutes
Calories: 170 kcal
Servings: 11
What You’ll Need For Cherry Doughnut Holes
For Dry Ingredients:
Flour: Provides the foundational structure for your doughnut holes, selecting all-purpose flour ensures a tender, light texture.
Baking Powder: Creates the perfect lift and airiness, ensuring your doughnut holes are fluffy and not dense.
Salt: Enhances overall flavor and balances the sweetness of the dough.
Sugar: Adds sweetness and helps with golden-brown caramelization during frying.
For Wet Ingredients:
Egg: Binds the ingredients together and contributes to a rich, smooth dough consistency.
Milk: Adds moisture and helps create a soft, tender doughnut hole texture.
Vanilla Extract: Provides a warm, comforting background flavor that complements the cherries.
Melted Butter: Brings richness and depth to the dough, creating a more luxurious mouthfeel.
For Flavor and Coating Ingredients:
Cherries: Introduces bursts of fruity freshness and vibrant color throughout the doughnut holes.
Vegetable Oil: Essential for deep-frying, creating a crispy exterior and golden-brown color.
Powdered Sugar: Forms a smooth, sweet glaze that adds a beautiful finish.
Milk (for Glaze): Helps create a silky, pourable glaze consistency.
Almond or Vanilla Extract: Enhances the glaze with a subtle, complementary flavor.
Must-Have Tools For Cherry Doughnut Holes
Large mixing bowl: Essential for combining dry and wet ingredients smoothly.
Whisk: Perfect for blending ingredients without lumps.
Deep saucepan or fryer: Crucial for safely heating oil to the right temperature.
Cookie scoop or spoon: Helps create uniform doughnut holes for even cooking.
Slotted spoon: Allows safe removal of doughnut holes from hot oil.
Paper towel-lined plate: Helps drain excess oil from fried doughnut holes.
Small bowl: Needed for preparing the glaze.
Wire rack: Allows excess glaze to drip off and prevents soggy bottoms.
Simple Steps For Cherry Doughnut Holes
Oil Temperature The key to perfect doughnut holes is getting the oil just right. Warm vegetable oil in a deep pan until it hits the sweet spot of 350F.
Dough Mixing Create a fluffy base by gently combining dry ingredients with wet ingredients. The secret is mixing just until everything comes together – no need for aggressive stirring. Fold in fresh cherries for bursts of fruity flavor.
Frying Magic Drop small dollops of dough into the hot oil, working in batches. Watch them transform into golden-brown treasures, rotating occasionally to ensure even cooking. Use a slotted spoon to rescue these little gems.
Glaze Transformation Whip up a silky smooth glaze by blending powdered sugar with milk and a touch of extract. The goal is a glossy coating that makes these doughnut holes irresistible.
Final Touch While the doughnut holes are still warm, dunk them into the glaze. Let excess drip away on a wire rack, creating a beautiful, even shine. For extra pizzazz, sprinkle with chopped cherries or colorful toppings.
Serving Moment Let the glaze set briefly, then serve these delightful treats. They’re best enjoyed fresh, with a cup of coffee or as a sweet afternoon pick-me-up.
Ideas To Switch Up Cherry Doughnut Holes
Perfect Frying Technique: Use a candy thermometer to maintain consistent oil temperature, ensuring evenly cooked doughnut holes without burning or undercooking. Keep the oil steady between 350-375°F for the best golden-brown exterior.
Gluten-Free Adaptation: Replace all-purpose flour with a gluten-free blend, adding 1/2 teaspoon xanthan gum to help bind the ingredients and maintain the traditional doughnut hole texture.
Cherry Flavor Boost: Choose fresh or frozen cherries at peak ripeness. For intensified cherry flavor, add a splash of cherry extract to the dough or mix finely chopped dried cherries into the batter for extra fruity bursts.
Make-Ahead Convenience: Prepare the dough in advance and refrigerate for up to 24 hours. When ready to fry, let the dough come to room temperature for 30 minutes before cooking. Unglazed doughnut holes can be stored in an airtight container for 1-2 days.
Dairy-Free Option: Substitute milk with almond milk or coconut milk, and use melted coconut oil instead of butter. These swaps maintain moisture while creating a delightful alternative for those with dairy restrictions.
Ways To Share Cherry Doughnut Holes
Sweet Breakfast Companion: Pair these cherry doughnut holes with a steaming mug of coffee or fresh orange juice for a delightful morning treat.
Dessert Plate Stunner: Arrange the glazed doughnut holes on a pretty platter with fresh mint leaves and additional chopped cherries for an elegant presentation.
Picnic Perfect Snack: Pack these portable treats in a sealed container for outdoor adventures, making them an ideal grab-and-go snack for family gatherings or weekend outings.
Party Pleaser Platter: Create a colorful display by mixing these cherry doughnut holes with other mini pastries, offering guests a variety of bite-sized delights that look irresistible.
Storage Advice For Cherry Doughnut Holes
Smart Refrigeration Strategy: Store freshly made doughnut holes in an airtight container at room temperature for 1-2 days. Keep them away from direct sunlight and heat sources to maintain their crispy texture.
Quick Freezing Hack: Wrap individual doughnut holes in plastic wrap, then place them in a freezer-safe bag. They’ll stay delicious for up to 2 weeks when frozen. Thaw at room temperature for 15-20 minutes before enjoying.
Moisture Management: Place a paper towel inside the storage container to absorb excess oil and prevent soggy doughnut holes. This trick helps maintain their delightful crunch and prevents unwanted sogginess.
Glaze Timing Tip: Apply the glaze just before serving for the best taste and texture. If preparing in advance, store the glaze separately and coat the doughnut holes right before eating to keep them crisp and fresh.
Homemade cherry doughnut holes offer a delightful twist on classic pastry treats. Sweet spheres of fried dough combine tart cherry glaze with delicate powdered sugar coating, inviting you to savor each delectable bite.
Ingredients
Scale
2 cups (250 g) all-purpose flour
2 tsps baking powder
½ tsp salt
⅓ cup (65 g) granulated sugar
1 large egg
¾ cup (180 ml) milk
1 tsp vanilla extract
2 tbsps unsalted butter, melted
½ cup (100 g) chopped maraschino cherries or cherry pie filling
Vegetable oil, for frying
1 cup (120 g) powdered sugar
2–3 tbsps milk
½ tsp almond or vanilla extract (optional)
Extra chopped cherries or sprinkles (optional)
Instructions
Oil Preparation: Heat vegetable oil in a deep saucepan or fryer to a precise 350F (175C), maintaining consistent temperature for uniform frying.
Dry Ingredient Fusion: Whisk flour, baking powder, salt, and sugar in a large mixing bowl until thoroughly combined, creating a smooth dry base.
Wet Component Blending: Combine egg, milk, vanilla extract, and melted butter in a separate bowl, whisking until achieving a homogeneous mixture.
Dough Formation: Delicately incorporate wet and dry ingredients, minimizing mixing, then gently fold in chopped cherries to distribute evenly throughout the dough.
Frying Process: Using a small cookie scoop, portion uniform dough balls and carefully drop them into hot oil in small batches, ensuring temperature stability.
Cooking and Browning: Rotate doughnut holes during frying, monitoring their transformation until a rich golden-brown exterior develops, approximately 2-3 minutes.
Oil Drainage: Remove doughnut holes with a slotted spoon, transferring to a paper towel-lined plate to absorb excess oil and cool momentarily.
Glaze Creation: Whisk powdered sugar, milk, and almond or vanilla extract in a shallow bowl to produce a silky, glossy coating.
Glazing Technique: While warm, delicately immerse each doughnut hole in the glaze, ensuring complete coverage and allowing excess to drip away.
Finishing Touch: Position glazed doughnut holes on a wire rack, permitting the coating to set and slightly harden, then optionally garnish with additional chopped cherries or sprinkles before serving.
Notes
Maintain Precise Oil Temperature: Keep the oil consistently at 350F to prevent undercooked or greasy doughnut holes, using a reliable kitchen thermometer for accuracy.
Minimize Dough Handling: Mix ingredients gently and sparingly to avoid tough, dense doughnut holes, stopping stirring the moment ingredients are just combined.
Control Batch Size: Fry small quantities to preserve oil temperature, preventing overcrowding that leads to uneven cooking and soggy texture.
Customize Dietary Needs: Swap regular flour with gluten-free alternatives, use plant-based milk and egg substitutes for vegan-friendly doughnut holes, ensuring inclusive recipe adaptation.
Recipe Development, Traditional Irish and European Cuisines, Food Styling and Photography, Culinary Education
Education
Dublin Institute of Technology (DIT) – School of Culinary Arts and Food Technology
Degree: Bachelor of Arts in Culinary Arts
Focus: Comprehensive training in classical and modern cooking techniques, kitchen management, and menu development.
Ballymaloe Cookery School
Program: 12-Week Certificate Course
Focus: Intensive, hands-on experience emphasizing farm-to-table cooking and sustainable practices.
Isabella brings a global spark to the Craft Meats table. Born in Florence and trained at the Apicius International School of Hospitality, she blends classic Italian flavor with modern writing that’s easy to follow and hard to forget.
Her additional training at the Italian Chef Academy fueled her love for well-crafted dishes, especially ones that spotlight beautiful cuts of meat.
She’s a food writer with heart, and a deep love for storytelling through single recipes. Her goal? To help you cook with more confidence and a little more joy, no matter where you start.


Liam O’Sullivan
Founder & Culinary Content Creator
Expertise
Recipe Development, Traditional Irish and European Cuisines, Food Styling and Photography, Culinary Education
Education
Dublin Institute of Technology (DIT) – School of Culinary Arts and Food Technology
Ballymaloe Cookery School
Isabella brings a global spark to the Craft Meats table. Born in Florence and trained at the Apicius International School of Hospitality, she blends classic Italian flavor with modern writing that’s easy to follow and hard to forget.
Her additional training at the Italian Chef Academy fueled her love for well-crafted dishes, especially ones that spotlight beautiful cuts of meat.
She’s a food writer with heart, and a deep love for storytelling through single recipes. Her goal? To help you cook with more confidence and a little more joy, no matter where you start.