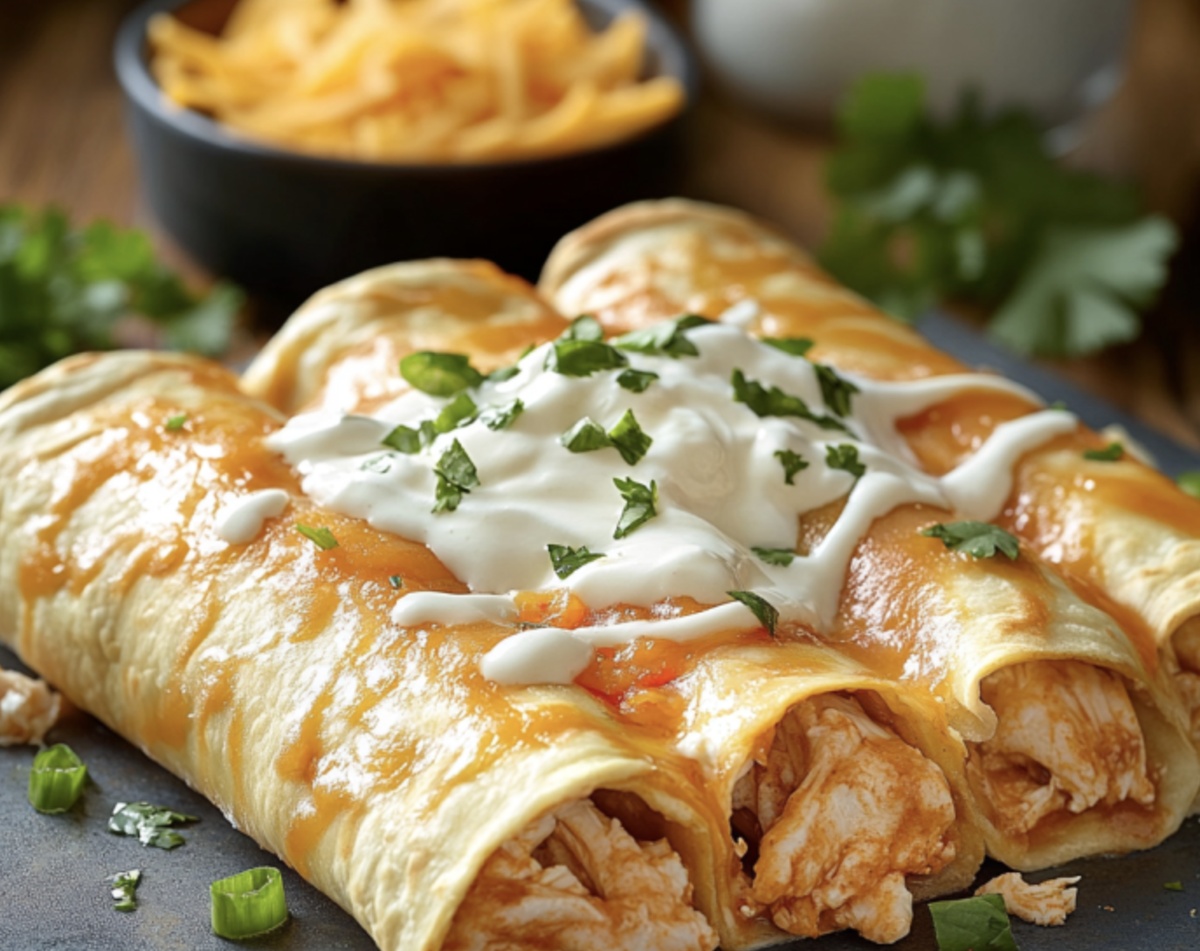
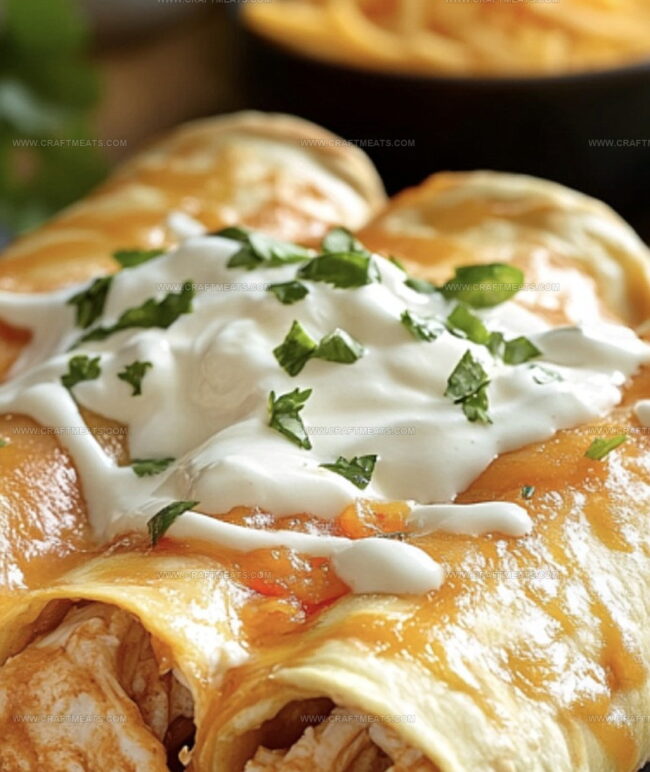
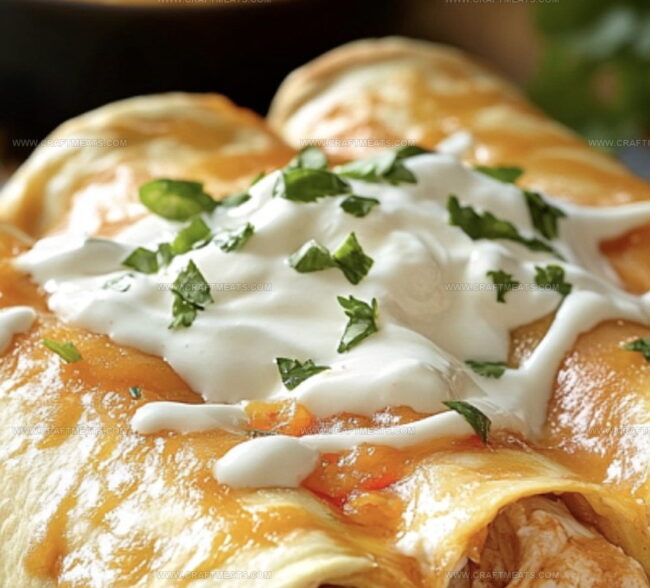
Crispy Golden Chicken Chimichangas Recipe for Taco Tuesday
Crispy, golden chicken chimichangas dance with flavor on the plate, offering a mouthwatering twist to traditional Mexican cuisine.
Packed with succulent shredded chicken and a blend of zesty spices, these deep-fried delights will transport you straight to culinary bliss.
Every bite promises a perfect harmony of crisp tortilla and tender filling that melts in your mouth.
The aroma of sizzling chicken and melted cheese wafts through the kitchen, promising an irresistible meal.
Preparing these chimichangas is easier than you might expect, with simple ingredients and straightforward steps.
Serve them alongside fresh salsa, cool sour cream, or creamy guacamole for a complete flavor experience.
These chimichangas are sure to become a new favorite that will have everyone asking for seconds.
Quick Recipe Overview
Everything You Need For Chicken Chimichangas
For Chicken Filling:For Wrapping and Structure:For Cooking and Finishing:Kitchen Gear For Chicken Chimichangas
Steps To Cook Chicken Chimichangas Easily
Sizzle onions and peppers in a skillet until they’re soft and fragrant. Add garlic for an extra punch of taste. Toss in shredded chicken and green chilies, sprinkle with zesty seasonings, and let everything mingle together with a splash of broth. Fold in melted cheese for a creamy twist.
Place a tortilla on your workspace. Layer a scoop of the spicy chicken mixture in the center. Carefully fold the sides over the filling, then roll from the bottom into a neat bundle. Keep the edges tucked tight to prevent any delicious filling from escaping.
Heat oil in a deep skillet until it’s shimmering hot. Gently slide the wrapped bundles into the oil, turning them until each side becomes a beautiful golden brown. If you prefer a lighter touch, brush the chimichangas with oil and bake in a hot oven until they’re wonderfully crisp.
Pile on cool, creamy toppings like sour cream and fresh salsa. Sprinkle with bright green cilantro for a burst of freshness. Serve immediately while the chimichangas are still crackling hot and irresistibly crunchy.
Tips To Make Chicken Chimichangas Crispy
Ways To Serve Chicken Chimichangas Fresh
How To Store Chicken Chimichangas Neatly
Print
Crispy Chicken Chimichangas Recipe
- Total Time: 40 minutes
- Yield: 3 1x
Description
Mexican chicken chimichangas deliver a crispy, golden-brown delight packed with seasoned meat and melted cheese. Served with zesty salsa and sour cream, these authentic treats will transport you to the heart of Mexico’s culinary landscape.
Ingredients
- 2 cups (450 g / 1 lb) cooked, shredded chicken
- 8 large flour tortillas
- 1 cup (120 g / 4 oz) shredded cheddar or monterey jack cheese
- 1 can (15 oz / 425 g) refried beans (optional)
- ½ cup (120 ml / 4 fl oz) chicken broth
- 1 tbsp taco seasoning
- 1 can (4 oz / 113 g) diced green chilies
- 1 small onion, diced
- 1 green bell pepper, diced
- 2 garlic cloves, minced
- 1 tbsp olive oil
- Vegetable oil, for frying
- Sour cream
- Salsa
- Guacamole
- Chopped fresh cilantro
Instructions
- Vegetable Foundation: In a skillet, sauté onions and bell peppers with olive oil until they become translucent and release their aromatic essence. Introduce minced garlic, allowing it to infuse the mixture with its robust flavor.
- Flavor Infusion: Add shredded chicken, green chilies, and taco seasoning to the vegetable base. Pour chicken broth and simmer until the ingredients create a cohesive, moisture-rich filling. Incorporate shredded cheese, stirring until it melts and binds the mixture with creamy texture.
- Assembly Technique: Spread a thin layer of refried beans on each tortilla as a flavor foundation. Spoon the chicken mixture into the center, carefully folding and rolling to create a secure, compact packet that prevents filling from escaping.
- Cooking Method: Choose between two preparation techniques – deep frying or oven roasting. For frying, heat vegetable oil in a heavy skillet until it reaches optimal temperature. Carefully lower chimichangas seam-side down, rotating to achieve an even, golden-brown exterior. Alternatively, for a healthier option, arrange on a baking sheet, brush with oil, and roast in a preheated oven until crisp and golden.
- Serving Presentation: Transfer chimichangas to a serving platter. Embellish with generous dollops of sour cream, vibrant salsa, creamy guacamole, and a sprinkle of fresh cilantro. Serve immediately to preserve the perfect crispy texture and warmth.
Notes
- Prevent Soggy Bottoms: Pat chicken dry before sautéing to remove excess moisture, ensuring a crisp texture when frying or baking chimichangas.
- Oil Temperature Control: Maintain oil at 350-375°F for perfect golden-brown crispiness without burning the tortilla exterior.
- Sealing Technique: Use a small amount of water or beaten egg along tortilla edges to create a tight seal and prevent filling from leaking during cooking.
- Healthier Cooking Option: Swap deep-frying with air fryer or oven-baking method to reduce oil content while maintaining a crispy exterior, ideal for health-conscious diners.
- Prep Time: 15 minutes
- Cook Time: 25 minutes
- Category: Lunch, Dinner, Snacks
- Method: Frying
- Cuisine: Mexican
Nutrition
- Serving Size: 3
- Calories: 550
- Sugar: 2g
- Sodium: 800mg
- Fat: 25g
- Saturated Fat: 10g
- Unsaturated Fat: 15g
- Trans Fat: 0g
- Carbohydrates: 50g
- Fiber: 6g
- Protein: 30g
- Cholesterol: 80mg
Liam O’Sullivan
Founder & Culinary Content Creator
Expertise
Recipe Development, Traditional Irish and European Cuisines, Food Styling and Photography, Culinary Education
Education
Dublin Institute of Technology (DIT) – School of Culinary Arts and Food Technology
Ballymaloe Cookery School
Isabella brings a global spark to the Craft Meats table. Born in Florence and trained at the Apicius International School of Hospitality, she blends classic Italian flavor with modern writing that’s easy to follow and hard to forget.
Her additional training at the Italian Chef Academy fueled her love for well-crafted dishes, especially ones that spotlight beautiful cuts of meat.
She’s a food writer with heart, and a deep love for storytelling through single recipes. Her goal? To help you cook with more confidence and a little more joy, no matter where you start.