Crispy Chinese Honey Garlic Chicken Recipe for Dinner Joy
Weeknight dinners demand a knockout recipe that delivers serious flavor with minimal effort.
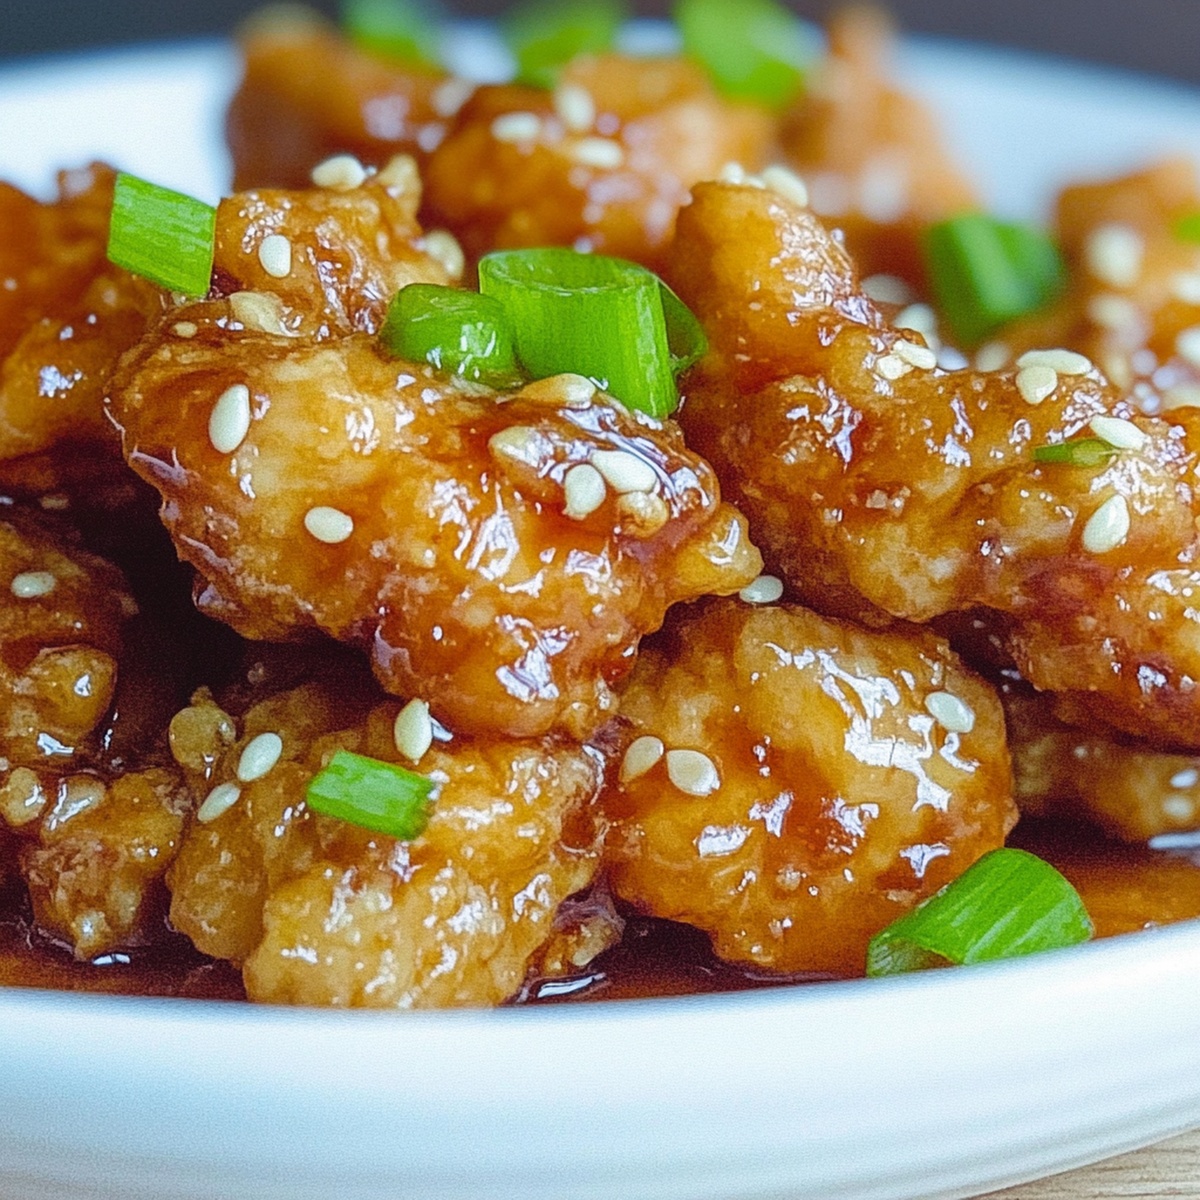
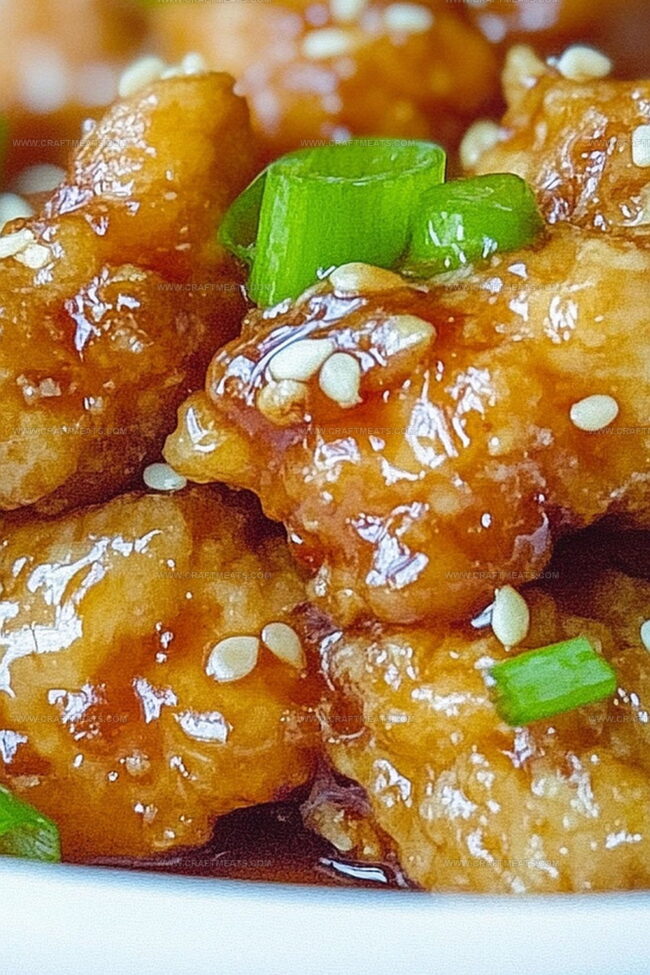
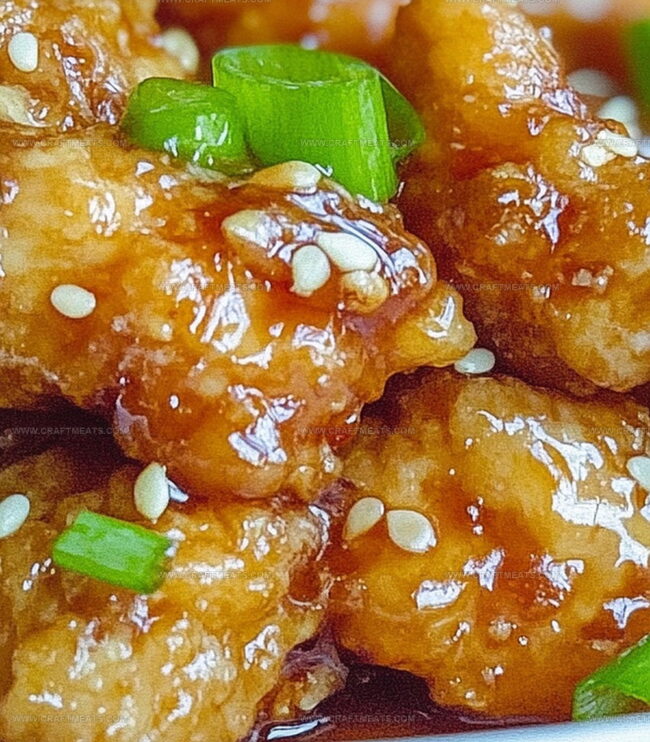
This crispy chinese honey garlic chicken recipe brings restaurant-quality magic right to your kitchen.
Sweet, tangy, and perfectly crisp, each bite promises a delightful culinary adventure.
Golden-brown chicken pieces glisten with a glossy sauce that combines robust garlic notes and delicate honey undertones.
Crunchy exterior gives way to tender, juicy meat that dances with complex seasoning.
Simplified techniques make this dish surprisingly easy to master, even for home cooks with limited experience.
Quick Recipe Overview
What You’ll Need For Crispy Chinese Honey Garlic Chicken
For Crispy Coating:For Wet Ingredients:For Honey Garlic Sauce:For Garnish:Tools To Make Crispy Chinese Honey Garlic Chicken
How To Make Crispy Chinese Honey Garlic Chicken Right
Create a crispy base for your chicken by mixing flour with seasonings. Dunk each chicken piece into beaten eggs, then roll in the seasoned flour blend. Shake off any extra coating to ensure a light, even layer.
Warm vegetable oil in a deep skillet until it reaches the perfect sizzling temperature. Carefully lower chicken pieces into the hot oil, cooking in small batches to maintain crispiness. Let each piece turn a gorgeous golden brown while cooking thoroughly.
Craft a magical sauce by combining sweet honey with rich soy sauce and aromatic garlic. Simmer the ingredients together, allowing the flavors to dance and meld. Thicken the sauce until it reaches a glossy, clingy consistency.
Pour the luscious sauce over the crispy chicken pieces. Gently tumble the chicken to ensure each morsel gets completely coated in the sticky, fragrant mixture.
Arrange the glistening chicken on a beautiful serving plate. Sprinkle with a handful of green onions and sesame seeds for a pop of color and extra flavor. Serve alongside steamed rice or your favorite side dish.
Helpful Hints For Crispy Chinese Honey Garlic Chicken
Serving Crispy Chinese Honey Garlic Chicken Made Simple
How To Store Crispy Chinese Honey Garlic Chicken Properly
Print
Philly Cheese Steak Sloppy Joes Recipe
- Total Time: 30 minutes
- Yield: 6 1x
Description
Sizzling Philly cheese steak sloppy joes bring classic sandwich flavors together in one messy, irresistible meal. Hearty beef, melted cheese, and caramelized onions create a mouthwatering experience you’ll crave again and again.
Ingredients
Main Protein:
- 1 lb (0.45 kg) lean ground beef
Vegetables:
- 1 small yellow onion (diced)
- 1 small green bell pepper (diced)
- 8 oz (226 g) brown mushrooms (minced)
Cheese and Buns:
- 8 oz (226 g) provolone cheese (sliced, chopped)
- 6 brioche hamburger buns (toasted)
Sauce and Seasoning Ingredients:
- 2 tablespoons butter
- 2 tablespoons ketchup
- 1 tablespoon worcestershire sauce
- ½ teaspoon kosher salt
- ½ teaspoon fresh ground black pepper
- 1 tablespoon cornstarch
- 1 cup beef broth
Instructions
- Heat a cast iron skillet over medium-high, allowing ground beef to develop a rich, caramelized crust without moving. Crumble the meat and continue cooking until completely browned and no pink remains.
- Transfer the beef to a plate, reserving the rendered fat in the skillet. Melt butter and introduce diced onions, bell peppers, and sliced mushrooms. Allow vegetables to sit undisturbed initially, then stir to achieve an even golden-brown caramelization.
- Reintroduce the browned beef to the vegetable mixture. Incorporate ketchup, Worcestershire sauce, and season with salt and pepper. Create a quick slurry by whisking beef broth with cornstarch, then pour into the skillet to create a glossy, thickened sauce.
- Reduce heat and gently fold chopped Provolone into the meat mixture, stirring until the cheese melts completely and creates a creamy, luxurious texture.
- Prepare brioche buns by lightly buttering the interior and toasting under a broiler or in a toaster oven until edges are golden and crisp.
- Generously ladle the cheesy beef mixture onto the toasted buns, ensuring an abundant serving that slightly overflows the bread.
- Serve immediately while the filling remains hot and the buns maintain their crisp texture, ready to be devoured.
Notes
- Perfectly sear ground beef to develop a deep, caramelized flavor that enhances the overall taste of the Philly Cheese Steak Sloppy Joes.
- Create a rich, vegetable base by caramelizing onions, bell peppers, and mushrooms in the same skillet used for browning the beef, capturing all the delicious drippings.
- Use cornstarch slurry to naturally thicken the sauce, ensuring a luscious, clingy texture that coats every bite of the ground beef mixture.
- Choose high-quality Provolone cheese for maximum creaminess and an authentic Philly cheesesteak-inspired flavor profile.
- Toast brioche buns to add a golden, crispy exterior that provides the perfect textural contrast to the saucy, cheesy beef mixture.
- Serve immediately while the cheese is still melted and the buns are warm for the most satisfying eating experience.
- Prep Time: 10 minutes
- Cook Time: 20 minutes
- Category: Lunch, Dinner, Snacks
- Method: Sautéing
- Cuisine: American
Nutrition
- Serving Size: 6
- Calories: 480
- Sugar: 3 g
- Sodium: 890 mg
- Fat: 24 g
- Saturated Fat: 12 g
- Unsaturated Fat: 10 g
- Trans Fat: 1 g
- Carbohydrates: 36 g
- Fiber: 2 g
- Protein: 28 g
- Cholesterol: 85 mg
Liam O’Sullivan
Founder & Culinary Content Creator
Expertise
Recipe Development, Traditional Irish and European Cuisines, Food Styling and Photography, Culinary Education
Education
Dublin Institute of Technology (DIT) – School of Culinary Arts and Food Technology
Ballymaloe Cookery School
Isabella brings a global spark to the Craft Meats table. Born in Florence and trained at the Apicius International School of Hospitality, she blends classic Italian flavor with modern writing that’s easy to follow and hard to forget.
Her additional training at the Italian Chef Academy fueled her love for well-crafted dishes, especially ones that spotlight beautiful cuts of meat.
She’s a food writer with heart, and a deep love for storytelling through single recipes. Her goal? To help you cook with more confidence and a little more joy, no matter where you start.