
Chewy Peanut Butter Cookies Recipe for Classic Cookie Lovers
These classic peanut butter cookies spark joy with their irresistible homemade warmth and rich, nutty flavor.
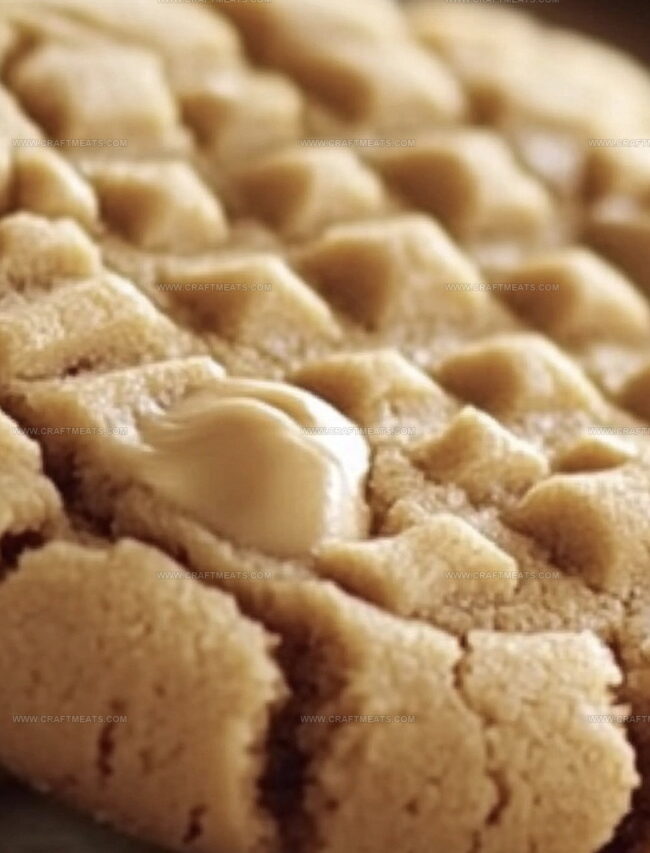
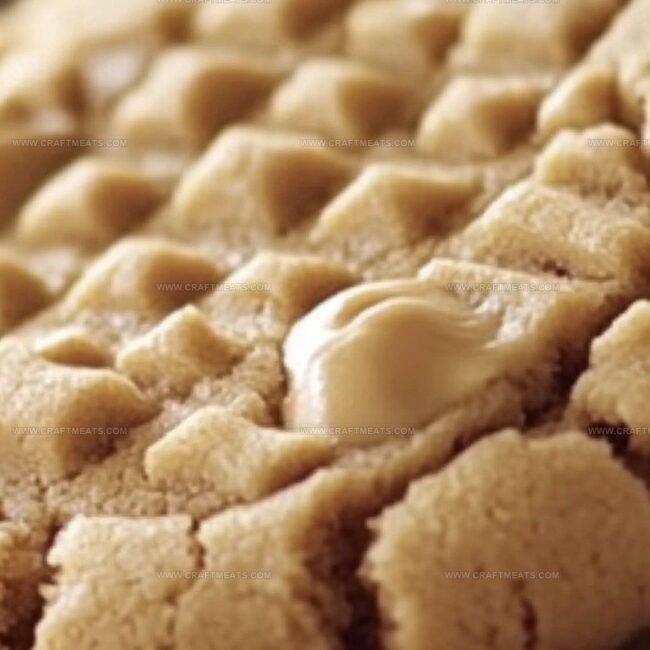
Soft, chewy, and perfectly golden, the classic peanut butter cookies recipe brings comfort straight from your kitchen.
Every bite promises a delightful blend of sweet and savory notes that dance on your palate.
The simple ingredients combine to create a nostalgic treat that connects you to cherished memories.
Crisp edges and tender centers make these cookies an absolute crowd-pleaser for all ages.
Baking these cookies fills your home with an enticing aroma that draws everyone to the kitchen.
Whip up a batch and watch smiles spread with each delectable morsel.
Quick Recipe Overview
Things In Peanut Butter Cookies
For Creamy Base:For Binding and Moisture:For Structure and Texture:Gear You’ll Need For Peanut Butter Cookies
Simple Instructions For Peanut Butter Cookies
Crank up the kitchen’s heart to a cozy 350F. Grab two baking sheets and give them a soft blanket of parchment paper.
Toss butter, peanut butter, and sugars into a mixing bowl. Dance them together until they’re fluffy and dreamy, about 3 minutes of pure kitchen magic.
Crack in an egg and splash of vanilla. Blend until everything hugs together perfectly.
In another bowl, gently mix flour, baking soda, baking powder, and salt. Slowly marry these dry ingredients into your creamy mixture.
Roll small dough balls and place them on prepared sheets. Use a fork to create playful crosshatch patterns on each cookie.
Slide the sheets into the oven. Bake until edges turn a gorgeous golden color, around 10-12 minutes. Keep an eye out to maintain that soft, tender heart.
Let cookies rest on baking sheets for a quick 5-minute breather. Then transfer to a cooling rack for their final relaxation.
Ideas To Try For Peanut Butter Cookies
Ways To Serve Peanut Butter Cookies With Fun
Store Peanut Butter Cookies With Ease
Print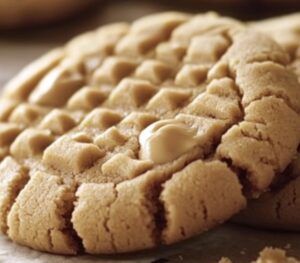
Crispy Peanut Butter Cookies Recipe
- Total Time: 27 minutes
- Yield: 23 1x
Description
Homemade peanut butter cookies offer rich, nostalgic comfort with classic American baking charm. Crisp edges and chewy centers make these treats irresistible for family gatherings and sweet afternoon breaks.
Ingredients
- ½ cup (115 g / 4 oz) peanut butter (creamy or chunky)
- ½ cup (115 g / 4 oz) unsalted butter, softened
- ½ cup (100 g) granulated sugar
- ½ cup (100 g) brown sugar, packed
- 1 large egg
- 1 ¼ cups (155 g) all-purpose flour
- 1 teaspoon vanilla extract
- ½ teaspoon baking soda
- ½ teaspoon baking powder
- ¼ teaspoon salt
Instructions
- Preparation: Preheat oven to 350F (175C) and line baking sheets with parchment paper, establishing an optimal baking environment.
- Creaming: Combine butter, peanut butter, and sugars in a large mixing bowl, whipping until light and fluffy, ensuring complete ingredient integration.
- Liquid Incorporation: Mix in egg and vanilla extract, blending until the mixture becomes smooth and glossy, creating a cohesive wet base.
- Dry Ingredient Synthesis: Whisk flour, baking soda, baking powder, and salt together, forming a uniform dry ingredient mixture.
- Dough Formation: Gently fold dry ingredients into wet mixture, stirring with minimal manipulation to prevent dough toughening, until just combined.
- Shaping and Marking: Roll dough into uniform balls, placing them on prepared baking sheets with ample spacing, then press a classic crisscross pattern using fork tines.
- Baking Process: Transfer sheets to preheated oven, baking for 10-12 minutes until cookie edges turn golden brown, maintaining a soft interior.
- Cooling Technique: Rest cookies on baking sheets for five minutes to stabilize structure, then transfer to a wire rack for complete cooling and optimal texture.
Notes
- Prevent Tough Cookies: Mix dry and wet ingredients just until combined to avoid overworking the dough, which can make cookies dense and chewy.
- Consistent Cookie Size: Use a tablespoon or cookie scoop for uniform balls, ensuring even baking and professional-looking results across the batch.
- Temperature Matters: Let butter and eggs reach room temperature before mixing to create a smoother, more integrated dough that promotes better texture and rise.
- Gluten-Free Adaptation: Swap wheat flour with a 1:1 gluten-free baking blend to make the recipe suitable for those with gluten sensitivities, maintaining the same delicious peanut butter flavor.
- Prep Time: 15 minutes
- Cook Time: 12 minutes
- Category: Desserts, Snacks
- Method: Baking
- Cuisine: American
Nutrition
- Serving Size: 23
- Calories: 143
- Sugar: 10 g
- Sodium: 50 mg
- Fat: 7 g
- Saturated Fat: 4 g
- Unsaturated Fat: 3 g
- Trans Fat: 0 g
- Carbohydrates: 18 g
- Fiber: 0.5 g
- Protein: 3 g
- Cholesterol: 15 mg
Liam O’Sullivan
Founder & Culinary Content Creator
Expertise
Recipe Development, Traditional Irish and European Cuisines, Food Styling and Photography, Culinary Education
Education
Dublin Institute of Technology (DIT) – School of Culinary Arts and Food Technology
Ballymaloe Cookery School
Isabella brings a global spark to the Craft Meats table. Born in Florence and trained at the Apicius International School of Hospitality, she blends classic Italian flavor with modern writing that’s easy to follow and hard to forget.
Her additional training at the Italian Chef Academy fueled her love for well-crafted dishes, especially ones that spotlight beautiful cuts of meat.
She’s a food writer with heart, and a deep love for storytelling through single recipes. Her goal? To help you cook with more confidence and a little more joy, no matter where you start.