
Golden Pulled Pork Pastry Puffs Recipe: Savory Bites of Joy
Comfort meets creativity in these mouthwatering pulled pork pastry puffs that promise to steal the show at any gathering.
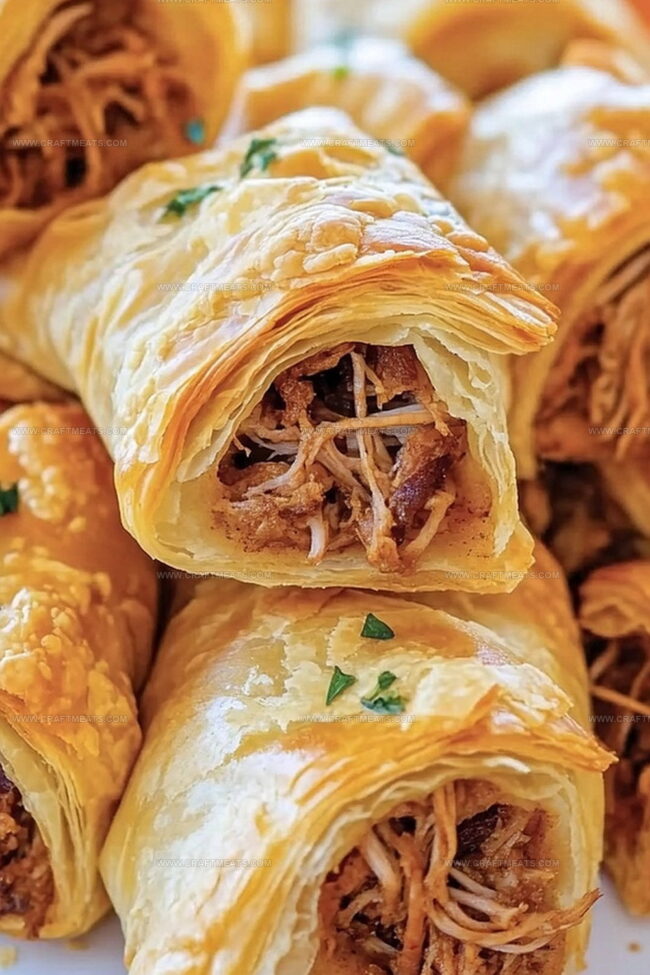
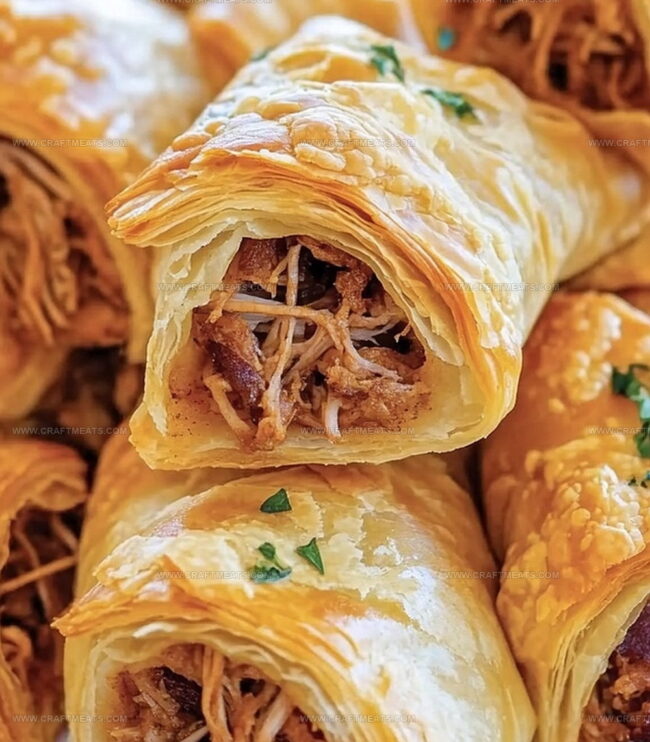
Flaky golden pastry cradles tender, succulent meat seasoned with bold flavors.
Each bite delivers a perfect balance of crispy exterior and juicy interior that melts in your mouth.
These delectable appetizers combine the richness of slow-cooked pork with the delicate layers of buttery pastry.
Simple ingredients transform into an irresistible treat that will have everyone asking for seconds.
Packed with savory goodness, these pastry puffs elevate casual entertaining to a delightful culinary experience.
Dive into this recipe and watch these irresistible bites become the star of your next meal.
Quick Recipe Overview
What Goes In Pulled Pork Pastry Puffs
For Meat Base:For Pastry Wrap:For Flavor Enhancers:Tools Needed For Pulled Pork Pastry Puffs
Steps To Make Pulled Pork Pastry Puffs
Warm up the oven to create the perfect golden environment for your delicious pastry puffs. Set the temperature to ensure a crispy, flaky exterior that will make mouths water.
Unroll the puff pastry sheets and cut them into squares, creating the perfect canvas for your pulled pork masterpiece. The pastry will be the delicate, buttery wrapper that holds all the savory goodness inside.
Scoop generous portions of tender pulled pork onto each pastry square. The succulent meat will be the star of these delightful little parcels, promising a burst of flavor in every bite.
Carefully fold the pastry corners over the pulled pork, creating little packages that look like edible gifts. Pinch the edges to seal in all the delicious juices and create a neat, compact shape.
Brush the tops of the pastry puffs with a golden egg wash, which will transform them into shiny, appetizing treats that gleam with promise when they emerge from the oven.
Slide the prepared puffs into the preheated oven and let the magic happen. Bake until the pastry turns a gorgeous golden brown and becomes irresistibly crisp and flaky.
Remove the puffs from the oven and let them cool slightly. Arrange on a platter and watch as everyone reaches for these mouthwatering pulled pork pastry parcels.
Tips And Options For Pulled Pork Pastry Puffs
How To Plate Pulled Pork Pastry Puffs
Store Pulled Pork Pastry Puffs Properly
Print
Crispy Pulled Pork Pastry Puffs Recipe
- Total Time: 28 minutes
- Yield: 7 1x
Description
Savory pulled pork pastry puffs merge tender meat with flaky pastry for an irresistible appetizer. Guests will devour these crisp, flavor-packed bites that promise a delightful culinary experience you cannot resist.
Ingredients
- 1 sheet (8 oz or 225 g) puff pastry, thawed
- 1 cup (150 g) cooked pulled pork
- ½ cup (60 g) shredded cheddar cheese
- ¼ cup (60 ml) barbecue sauce
- 1 large egg, beaten
- 1 tbsp sesame seeds (optional)
Instructions
- Preparation: Preheat oven to 400°F and line a baking sheet with parchment paper for optimal pastry release.
- Pastry Crafting: Unfold puff pastry sheets and slice into precise squares, creating uniform bases for the delectable parcels.
- Filling Assembly: Layer pulled pork centrally on each pastry square, distributing meat evenly and ensuring consistent coverage.
- Flavor Enhancement: Generously scatter shredded cheese over pulled pork and drizzle barbecue sauce to amplify the savory profile.
- Parcel Formation: Elegantly fold pastry corners toward the center, transforming squares into delicate triangular packages that securely encase the succulent filling.
- Glazing Technique: Delicately brush pastry exteriors with beaten egg to achieve a lustrous, golden-brown finish during baking.
- Baking Process: Carefully position assembled pastry puffs on prepared baking sheet, maintaining space between each parcel, and bake for 15-20 minutes until achieving a crisp, amber-brown appearance.
- Serving Preparation: Allow pastry puffs to rest momentarily after removing from oven, permitting flavors to harmonize and filling to stabilize before serving.
Notes
- Control Meat Moisture: Pat pulled pork dry before adding to pastry to prevent soggy bottoms and maintain crisp pastry texture.
- Cheese Distribution Technique: Grate cheese finely and spread evenly to ensure consistent melting and flavor throughout each pastry puff.
- Prevent Pastry Sticking: Use parchment paper or lightly grease baking sheet to guarantee easy removal and clean presentation.
- Temperature Precision: Allow pastry to reach room temperature before filling to ensure even baking and optimal rise.
- Prep Time: 10 minutes
- Cook Time: 18 minutes
- Category: Appetizer, Snacks
- Method: Baking
- Cuisine: American
Nutrition
- Serving Size: 7
- Calories: 260
- Sugar: 2 g
- Sodium: 480 mg
- Fat: 15 g
- Saturated Fat: 6 g
- Unsaturated Fat: 7 g
- Trans Fat: 0 g
- Carbohydrates: 24 g
- Fiber: 1 g
- Protein: 9 g
- Cholesterol: 50 mg
Liam O’Sullivan
Founder & Culinary Content Creator
Expertise
Recipe Development, Traditional Irish and European Cuisines, Food Styling and Photography, Culinary Education
Education
Dublin Institute of Technology (DIT) – School of Culinary Arts and Food Technology
Ballymaloe Cookery School
Isabella brings a global spark to the Craft Meats table. Born in Florence and trained at the Apicius International School of Hospitality, she blends classic Italian flavor with modern writing that’s easy to follow and hard to forget.
Her additional training at the Italian Chef Academy fueled her love for well-crafted dishes, especially ones that spotlight beautiful cuts of meat.
She’s a food writer with heart, and a deep love for storytelling through single recipes. Her goal? To help you cook with more confidence and a little more joy, no matter where you start.