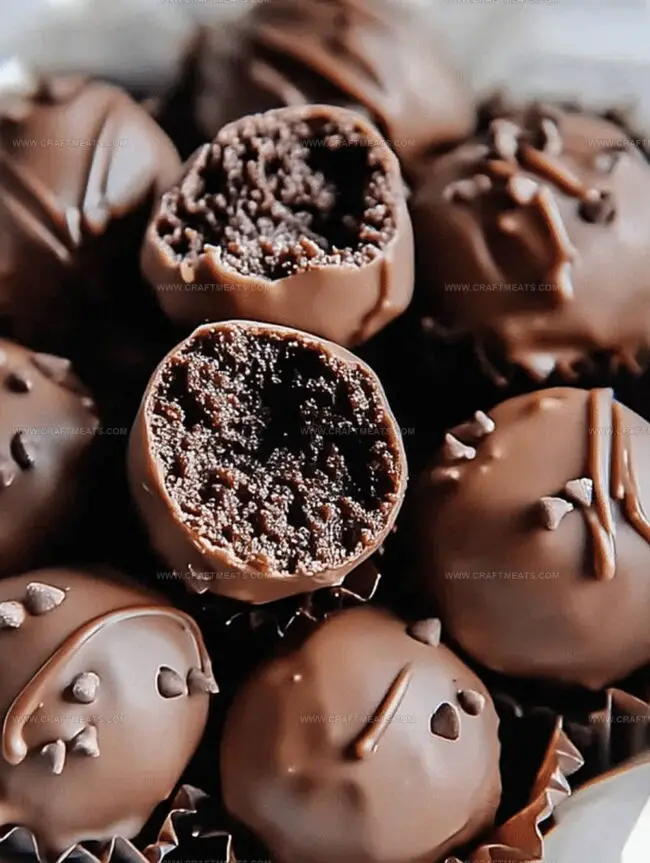
Chocolate lovers can’t resist these decadent easy brownie truffles that melt in your mouth with rich, fudgy goodness.
These bite-sized delights combine the best of brownies and truffles in one irresistible treat.
Crafted with simple ingredients, the recipe requires minimal effort but delivers maximum flavor.
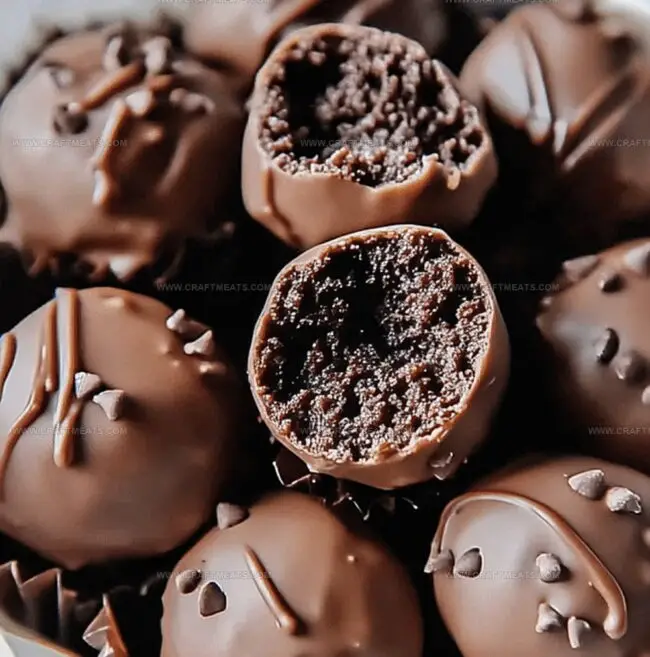
Every truffle promises a perfect balance of intense chocolate and smooth texture.
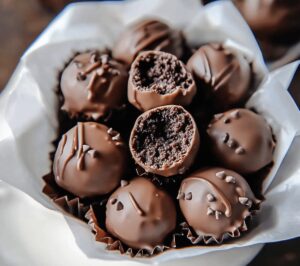
Rolled in cocoa powder or sprinkled with powdered sugar, these truffles make an elegant dessert for any occasion.
The recipe works like magic, transforming basic ingredients into a sophisticated sweet bite.
Quick Recipe Overview
Prep Time: 15 minutes
Cook Time: 30 minutes
Total Time: 1 hour 15 minutes
Calories: 150 kcal
Servings: 23
What Goes In Easy Brownie Truffles
For Base Ingredients:
Brownie Mix: Provides the rich, fudgy foundation for the truffles, ensuring a decadent chocolate base.
Cream Cheese or Frosting: Helps bind the crumbly brownies, creating a smooth, moldable texture for perfect truffle formation.
For Coating and Decoration:
Semi-Sweet Chocolate or Dark Chocolate: Creates a glossy, luxurious exterior that complements the intense brownie interior.
Sprinkles, Crushed Nuts, or Cookies: Adds delightful crunch and visual appeal, elevating the truffles from simple to spectacular.
For Optional Garnish:
Sea Salt, Cocoa Powder, or Edible Glitter: Provides a final touch of sophistication and unexpected flavor contrast.
Gear To Use For Easy Brownie Truffles
Mixing Bowl: Large, sturdy bowl for crumbling brownies and mixing ingredients.
Parchment Paper: Needed for lining trays and preventing truffles from sticking.
Microwave-Safe Bowl: Used for melting chocolate smoothly and evenly.
Fork or Dipping Tool: Essential for coating truffles in melted chocolate with precision.
Baking Tray: Flat surface for chilling and setting truffles.
Measuring Tablespoon: Perfect for scooping consistent truffle sizes.
Steps To Make Easy Brownie Truffles
Brownie Base Fresh baked brownies transform into delectable little treats. Crumble cooled brownies into soft, moist crumbs that’ll make your taste buds dance. A handful of cream cheese helps bind the mixture into perfect bite-sized balls.
Truffle Transformation Gently roll the brownie mixture into smooth, round spheres. These delightful morsels need a quick chill in the refrigerator to firm up and hold their shape beautifully.
Chocolate Magic Melt chocolate until it’s silky smooth and glossy. Lovingly dip each brownie ball, letting excess chocolate drip away. Sprinkle with fun toppings like crunchy nuts or colorful sprinkles while the chocolate is still wet.
Sweet Finale Let the chocolate coating set completely. These irresistible brownie truffles are ready to wow friends and family. Store in a cool place or serve immediately for maximum deliciousness.
Quick Tips For Easy Brownie Truffles
Brownie Truffle Pro Tips & Delicious Twists
Moisture Magic: Keep brownies slightly underbaked for extra fudgy truffles that hold together perfectly without requiring additional binding ingredients.
Chocolate Coating Trick: Use room temperature truffles when dipping to prevent chocolate from cracking and ensure a smooth, glossy finish that looks professionally made.
Flavor Explosion: Experiment with different chocolate coatings like white chocolate, milk chocolate, or even colored candy melts to create visually stunning and uniquely flavored truffles.
Dietary Friendly Swap: For gluten-free versions, use gluten-free brownie mix or homemade brownies. Vegans can substitute dairy-free cream cheese and use plant-based chocolate for coating.
Storage Secrets: Store truffles in an airtight container in the refrigerator for up to one week. For longer preservation, freeze uncoated brownie balls for up to three months and coat when ready to serve.
Serving Easy Brownie Truffles With Style
Decadent Dessert Companion: Pair these brownie truffles with a scoop of vanilla ice cream or a dollop of whipped cream for an extra indulgent treat.
Elegant Beverage Match: Serve alongside a rich espresso or a smooth cappuccino to complement the chocolate’s deep flavor and provide a delightful contrast.
Gift-Worthy Presentation: Package these truffles in small decorative boxes with parchment paper, perfect for holiday gifts or special occasion treats that will wow friends and family.
Party Platter Perfection: Arrange the truffles on a beautiful platter with fresh berries or mint leaves for a stunning dessert display that will impress guests at any gathering.
How To Store Easy Brownie Truffles
Quick Cooling Strategy: Let truffles rest on parchment-lined baking sheet in refrigerator for 30-45 minutes to guarantee perfect texture and prevent melting. Chill them in single layer to maintain shape and prevent sticking.
Airtight Container Care: Store completed truffles in sealed glass or plastic container with tight-fitting lid. Place wax paper between layers to prevent chocolate coating from scratching or breaking during storage.
Temperature Control Zone: Keep chocolate truffles in refrigerator for maximum freshness, maintaining quality for 5-7 days. Remove from cold storage 10-15 minutes before serving to soften chocolate coating slightly and enhance flavor profile.
Smart Freezing Technique: Wrap individually in plastic wrap, then place in freezer-safe container. Frozen truffles remain delicious for up to 3 months. Thaw overnight in refrigerator before enjoying, preventing condensation and maintaining original texture.
Chocolate lovers will adore these easy brownie truffles nestled between rich fudge and creamy ganache. Elegant dessert bites combine classic brownie texture with smooth chocolate coating, offering irresistible indulgence for ultimate sweet satisfaction.
Ingredients
Scale
200 grams (7 oz) semi-sweet or dark chocolate
1 box (18-20 oz/500 g) brownie mix
3 tablespoons (45 ml) cream cheese or frosting
Sprinkles
Chopped nuts
Cocoa powder
Crushed cookies
Instructions
Preparation: Pulverize cooled brownies into fine crumbs within a large mixing bowl. Blend cream cheese or frosting until the mixture achieves a malleable, cohesive texture that holds together seamlessly.
Shaping: Mold uniform truffle spheres by scooping and rolling the brownie mixture between palms. Arrange on a parchment-lined tray and chill for 30 minutes to firm the delicate orbs.
Coating: Melt chocolate using microwave technique, stirring at intervals to create a smooth, glossy finish. Completely submerge each chilled brownie sphere, allowing excess chocolate to drip off elegantly.
Decoration: Immediately adorn chocolate-covered truffles with optional garnishes like chopped nuts, sprinkles, or crushed cookies while the coating remains wet. Position on parchment paper to set.
Finishing: Allow chocolate shell to fully crystallize at room temperature or in refrigerator. Transfer to a serving platter or store in an airtight container to preserve the truffles’ luxurious texture and rich flavor profile.
Notes
Precision in Brownie Crumbling: Ensure brownies are completely cooled before crumbling to prevent sticky, unmanageable texture that compromises truffle formation.
Temperature Control for Coating: Maintain chocolate melting temperature between 86-90°F to achieve glossy, smooth coating without seizing or becoming grainy.
Moisture Management: Add cream cheese or frosting incrementally to prevent overly wet mixture that could collapse during shaping and coating processes.
Garnish Timing: Apply decorative toppings immediately after chocolate coating while surface remains wet, ensuring maximum adherence and visual appeal.
Recipe Development, Traditional Irish and European Cuisines, Food Styling and Photography, Culinary Education
Education
Dublin Institute of Technology (DIT) – School of Culinary Arts and Food Technology
Degree: Bachelor of Arts in Culinary Arts
Focus: Comprehensive training in classical and modern cooking techniques, kitchen management, and menu development.
Ballymaloe Cookery School
Program: 12-Week Certificate Course
Focus: Intensive, hands-on experience emphasizing farm-to-table cooking and sustainable practices.
Isabella brings a global spark to the Craft Meats table. Born in Florence and trained at the Apicius International School of Hospitality, she blends classic Italian flavor with modern writing that’s easy to follow and hard to forget.
Her additional training at the Italian Chef Academy fueled her love for well-crafted dishes, especially ones that spotlight beautiful cuts of meat.
She’s a food writer with heart, and a deep love for storytelling through single recipes. Her goal? To help you cook with more confidence and a little more joy, no matter where you start.

Liam O’Sullivan
Founder & Culinary Content Creator
Expertise
Recipe Development, Traditional Irish and European Cuisines, Food Styling and Photography, Culinary Education
Education
Dublin Institute of Technology (DIT) – School of Culinary Arts and Food Technology
Ballymaloe Cookery School
Isabella brings a global spark to the Craft Meats table. Born in Florence and trained at the Apicius International School of Hospitality, she blends classic Italian flavor with modern writing that’s easy to follow and hard to forget.
Her additional training at the Italian Chef Academy fueled her love for well-crafted dishes, especially ones that spotlight beautiful cuts of meat.
She’s a food writer with heart, and a deep love for storytelling through single recipes. Her goal? To help you cook with more confidence and a little more joy, no matter where you start.