
Creamy No-Bake Oreo Mud Pie Recipe for Chocolate Lovers
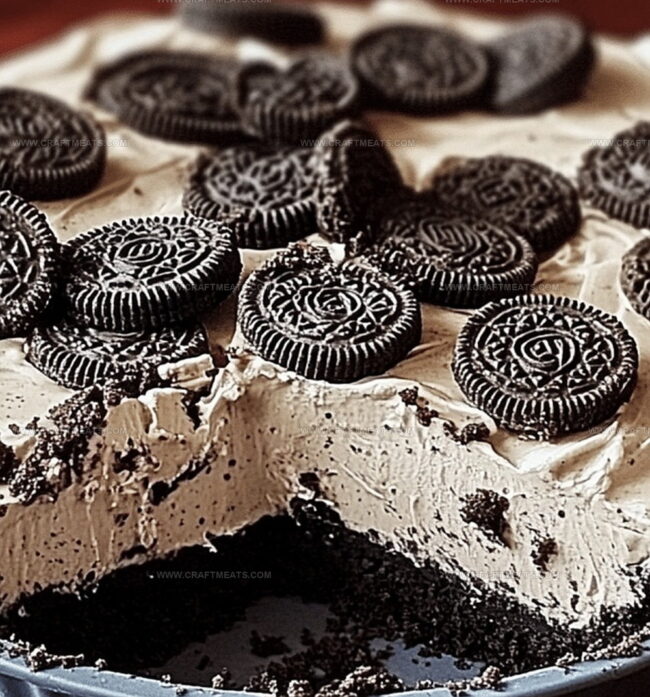
Creamy, decadent layers of chocolatey bliss await in this no-bake oreo mud pie that will make dessert lovers weak at the knees.
Rich chocolate pudding mingles with crushed oreo cookies, creating a dreamy texture that melts in your mouth.
Every spoonful promises pure indulgence without ever touching an oven.
The simple yet irresistible combination of ingredients ensures anyone can craft this delightful treat.
Chilled to perfection, this mud pie delivers a knockout dessert experience that requires minimal effort.
Whip up this crowd-pleasing masterpiece and watch as everyone asks for seconds.
Dive into a slice of pure chocolate paradise that will definitely become your new favorite dessert.
Quick Recipe Overview

What Goes Into No-Bake Oreo Mud Pie
For Crust Ingredients:For Filling Ingredients:For Topping Ingredients:Tools For No-Bake Oreo Mud Pie
How To Assemble No-Bake Oreo Mud Pie
Crush chocolate sandwich cookies into fine particles using a food processor or a rolling pin. Blend cookie dust with melted butter until it forms a compact mixture. Press this delectable base into a pie dish, creating a sturdy foundation. Refrigerate while preparing the next delicious layer.
Whisk chocolate pudding with cold milk until silky and smooth. Gently incorporate whipped cream, creating a luxurious texture. Fold in additional cookie fragments for delightful crunch. Pour this velvety mixture over the chilled crust, spreading evenly with a gentle touch.
Whip heavy cream with a hint of sweetness and vanilla until it transforms into billowy peaks. Delicately spread this fluffy cloud over the chocolate layer, creating an irresistible canvas.
Drizzle rich chocolate sauce across the top. Scatter crushed cookies as a playful garnish. Allow the entire creation to chill and set, letting flavors meld and textures harmonize.
Slice into decadent portions. Serve cold and savor each heavenly bite of this no-bake sensation.
Extra Notes For No-Bake Oreo Mud Pie
Serve No-Bake Oreo Mud Pie In Style
Store No-Bake Oreo Mud Pie And Keep It Cool
Print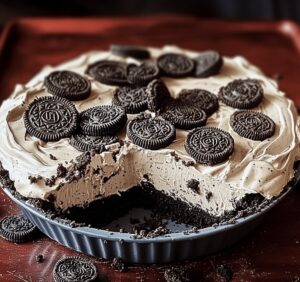
Decadent Oreo Mud Pie
- Total Time: 2 hours 20 minutes
- Yield: 7 1x
Description
Indulgent no-bake oreo mud pie delights dessert enthusiasts with its rich chocolate layers and creamy filling. Cool chocolate crumbs and velvety cream combine for a delectable treat you’ll crave again and again.
Ingredients
- 24 Oreo cookies (whole, including the filling)
- 5 tbsps (75 grams) unsalted butter, melted
- 1 package (3.9 oz / 110 grams) instant chocolate pudding mix
- 2 cups (475 ml) cold milk
- 1 ½ cups (360 ml) whipped cream
- ½ cup (120 ml) heavy cream, whipped
- ½ cup (90 grams) crushed Oreos
- 2 tbsps powdered sugar
- 1 tsp vanilla extract
- Chocolate sauce (optional)
- Extra crushed Oreos or chocolate shavings
Instructions
- Crust Creation: Pulverize Oreo cookies into fine crumbs, blending thoroughly with melted butter. Press the mixture firmly and evenly into a 9-inch pie dish, creating a compact base. Chill in the refrigerator for 15-20 minutes to solidify.
- Pudding Preparation: Whisk chocolate pudding mix with cold milk until smooth and thickened. Gently fold in whipped cream and additional crushed Oreo pieces, maintaining a light, airy consistency.
- Filling Assembly: Spread the chocolate pudding mixture evenly over the chilled Oreo crust, ensuring a uniform layer. Return to the refrigerator for 30 minutes to set the filling.
- Cream Topping: Whip heavy cream with powdered sugar and vanilla extract until stiff peaks form. Delicately layer the whipped cream over the chocolate pudding, covering the entire surface with a smooth finish.
- Final Touches: Drizzle chocolate sauce and sprinkle crushed Oreo cookies or chocolate shavings for visual appeal. Refrigerate the mud pie for a minimum of 2 hours to ensure complete setting and flavor melding.
- Serving: Slice into generous portions and serve chilled, revealing the decadent layers of cookie, chocolate, and cream.
Notes
- Crush Cookies Precisely: Use a food processor for uniform, fine crumbs to create a smooth, compact crust that holds together perfectly.
- Prevent Watery Filling: Whisk pudding mix thoroughly to avoid lumps and ensure a thick, creamy consistency that sets properly.
- Fold Cream Gently: Use a light, folding technique when mixing whipped cream to maintain an airy, delicate texture without deflating the mixture.
- Chill for Maximum Flavor: Allow sufficient refrigeration time to let flavors meld and ensure the pie sets completely, enhancing overall taste and texture.
- Prep Time: 20 minutes
- Cook Time: 23 hours
- Category: Desserts, Snacks
- Method: Mixing
- Cuisine: American
Nutrition
- Serving Size: 7
- Calories: 410
- Sugar: 32 g
- Sodium: 210 mg
- Fat: 24 g
- Saturated Fat: 13 g
- Unsaturated Fat: 8 g
- Trans Fat: 0 g
- Carbohydrates: 45 g
- Fiber: 2 g
- Protein: 4 g
- Cholesterol: 35 mg
Liam O’Sullivan
Founder & Culinary Content Creator
Expertise
Recipe Development, Traditional Irish and European Cuisines, Food Styling and Photography, Culinary Education
Education
Dublin Institute of Technology (DIT) – School of Culinary Arts and Food Technology
Ballymaloe Cookery School
Isabella brings a global spark to the Craft Meats table. Born in Florence and trained at the Apicius International School of Hospitality, she blends classic Italian flavor with modern writing that’s easy to follow and hard to forget.
Her additional training at the Italian Chef Academy fueled her love for well-crafted dishes, especially ones that spotlight beautiful cuts of meat.
She’s a food writer with heart, and a deep love for storytelling through single recipes. Her goal? To help you cook with more confidence and a little more joy, no matter where you start.