Oreo Truffle Recipe with Creamy Centers and Chocolate Shells
Sweet chocolate oreo truffles bring pure bliss to every dessert lover’s heart.
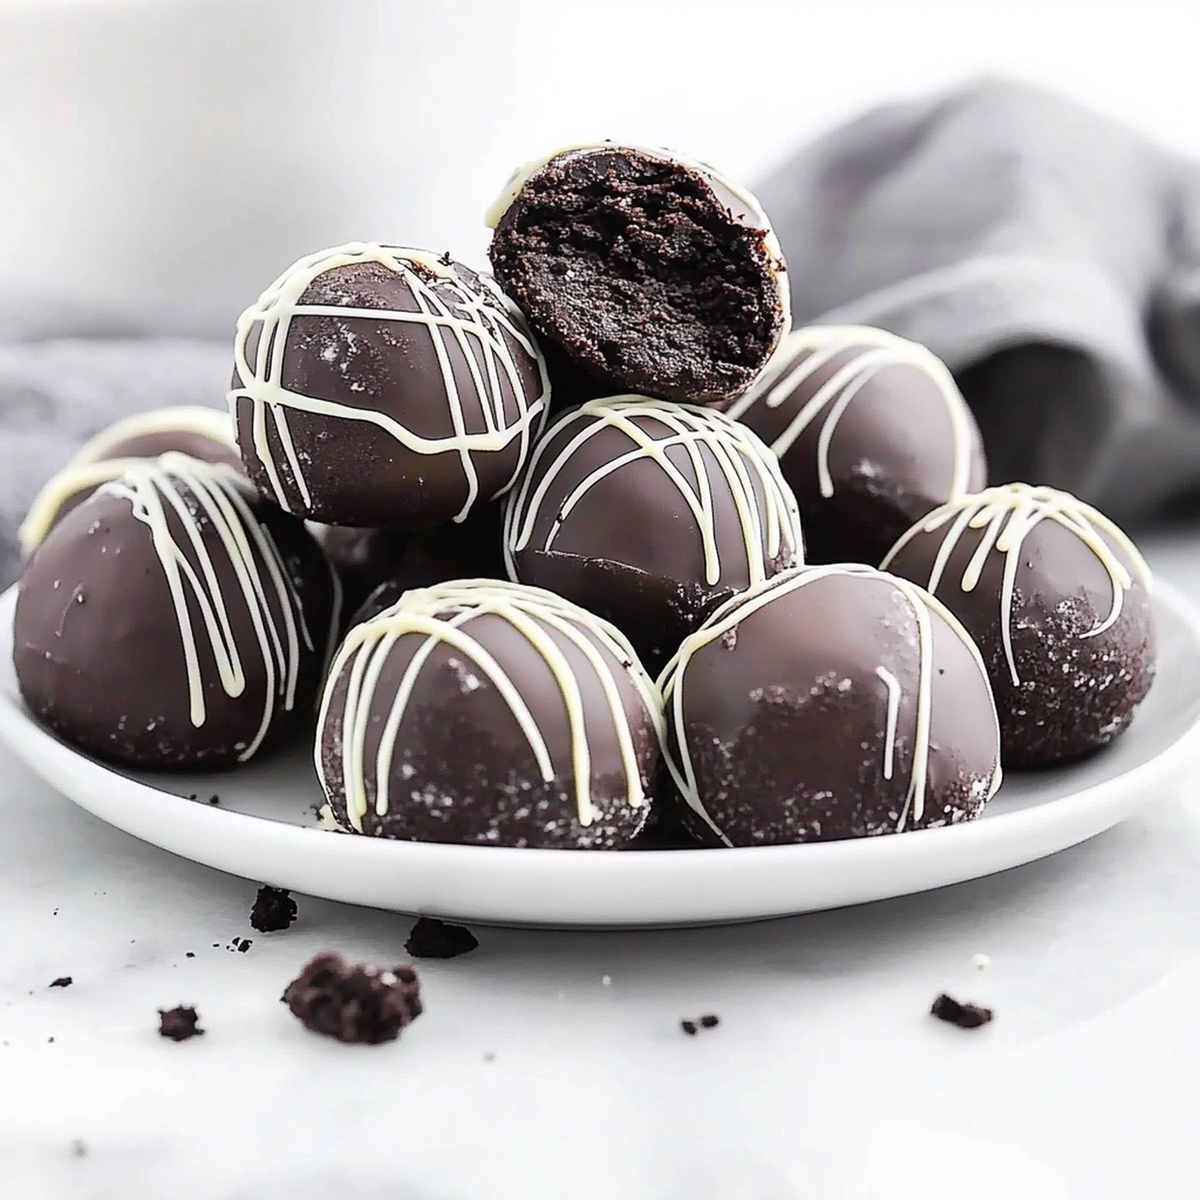
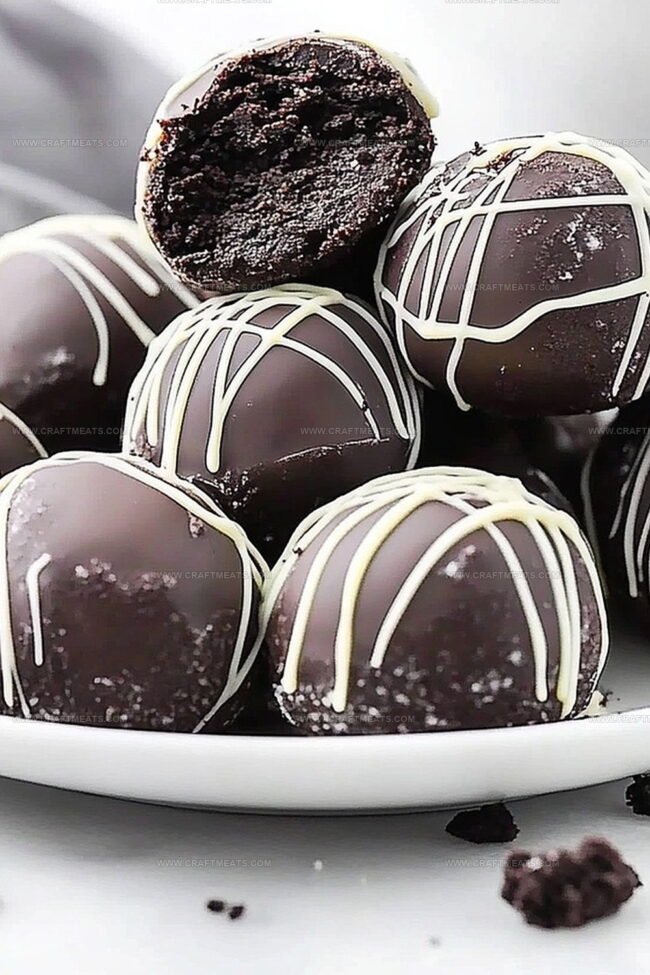
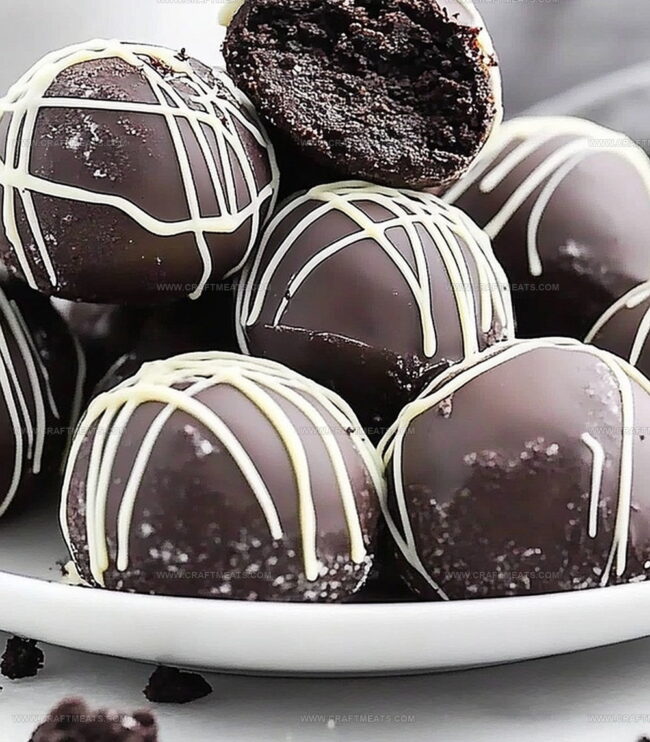
These decadent bite-sized treats combine rich cream cheese with crumbled chocolate cookies.
Crushed oreos create an irresistible texture that melts in your mouth.
Dark chocolate coating adds a luxurious finish to each delicate truffle.
No baking skills required means anyone can whip up these delightful confections.
Simple ingredients and minimal prep time make these truffles perfect for spontaneous dessert cravings.
Indulge in these heavenly morsels that promise to delight every chocolate enthusiast.
Quick Recipe Overview
What’s In Every Bite Of Oreo Truffles
For Base Ingredients:For Coating Ingredients:For Decoration Ingredients:Kitchen Tools That Make Oreo Truffles Easy
Steps To Shape And Chill Oreo Truffles
Transform those Oreos into a delightful powder using a food processor. Crush them until they become a fine, magical dust that’ll make your taste buds dance.
Mix the Oreo crumbs with velvety cream cheese. Blend until the mixture becomes a smooth, irresistible treat that promises pure indulgence.
Roll the dreamy mixture into adorable little balls. Pop them onto a parchment-lined tray and send them to chill in the refrigerator for a quick cool-down.
Melt chocolate into a silky river of deliciousness. Gently bathe each truffle in this liquid gold, letting excess chocolate drip away like magic.
Sprinkle some reserved Oreo crumbs or get creative with decorative touches. Let the truffles set in the refrigerator until they’re perfectly firm and ready to steal the show.
Tips To Make Oreo Truffles Extra Smooth
Best Ways To Share Oreo Truffles With Friends
Storing Oreo Truffles The Chill Way
Print
Decadent Oreo Truffles Recipe
- Total Time: 1 hour 20 minutes
- Yield: 35 1x
Description
Creamy Oreo truffles blend rich chocolate cookies with smooth cream cheese for an irresistible dessert. Sweet indulgence reveals simple ingredients and easy preparation, delighting chocolate enthusiasts with minimal kitchen effort.
Ingredients
- 36 Oreo cookies (about 1 standard package)
- 8 oz (225 g) cream cheese, softened
- 12 oz (340 g) semi-sweet or white chocolate, melted
- sprinkles
- crushed Oreos
- melted chocolate
Instructions
- Pulverize Preparation: Transform Oreo cookies into ultra-fine powder using a food processor, reserving a small portion for garnishing. This foundational step ensures a smooth, consistent base for the truffles.
- Binding Blend: Incorporate softened cream cheese with the Oreo crumbs, mixing thoroughly to create a cohesive, moldable mixture that promises rich, indulgent flavor and perfect texture.
- Shaping Phase: Craft compact, uniform spheres approximately one inch in diameter using clean hands. Arrange these delicate truffles on a parchment-lined tray, preparing them for their transformative journey.
- Chocolate Transformation: Melt chocolate in a microwave-safe container, stirring periodically to achieve a silky, uniform consistency without scorching. This crucial step sets the stage for a glossy, professional finish.
- Coating Technique: Immerse each chilled truffle into the melted chocolate, using a fork to ensure complete, elegant coverage. Gently tap to remove excess coating, creating a sleek, professional appearance.
- Decorative Finale: While the chocolate remains wet, sprinkle reserved Oreo crumbs or decorative elements across the surface, adding visual intrigue and textural contrast to the truffles.
- Setting and Storing: Refrigerate the completed truffles for approximately 60 minutes until fully solidified. Transfer to an airtight container, where they’ll maintain optimal flavor and texture for up to seven days.
Notes
- Crush Carefully: Use a food processor for ultra-fine Oreo crumbs, ensuring no large chunks disrupt the smooth truffle texture.
- Chill Strategically: Refrigerate truffles before and after coating to maintain shape and prevent chocolate from sliding off during dipping.
- Melt Gently: Microwave chocolate in short intervals, stirring frequently to prevent burning and achieve a perfectly smooth coating consistency.
- Customize Creatively: Experiment with alternative coatings like white chocolate, dark chocolate, or sprinkle with different crushed cookies for unique flavor variations.
- Prep Time: 20 minutes
- Cook Time: 1 hour
- Category: Desserts, Snacks
- Method: Mixing
- Cuisine: American
Nutrition
- Serving Size: 35
- Calories: 110
- Sugar: 10 g
- Sodium: 90 mg
- Fat: 7 g
- Saturated Fat: 4 g
- Unsaturated Fat: 2 g
- Trans Fat: 0 g
- Carbohydrates: 12 g
- Fiber: 0.5 g
- Protein: 1 g
- Cholesterol: 15 mg
Liam O’Sullivan
Founder & Culinary Content Creator
Expertise
Recipe Development, Traditional Irish and European Cuisines, Food Styling and Photography, Culinary Education
Education
Dublin Institute of Technology (DIT) – School of Culinary Arts and Food Technology
Ballymaloe Cookery School
Isabella brings a global spark to the Craft Meats table. Born in Florence and trained at the Apicius International School of Hospitality, she blends classic Italian flavor with modern writing that’s easy to follow and hard to forget.
Her additional training at the Italian Chef Academy fueled her love for well-crafted dishes, especially ones that spotlight beautiful cuts of meat.
She’s a food writer with heart, and a deep love for storytelling through single recipes. Her goal? To help you cook with more confidence and a little more joy, no matter where you start.