Heaven Cake Recipe with Layers of Sweet Fluff
Decadent and light as a cloud, this heavenly angel food cake recipe promises pure indulgence with every slice.
Soft, pillowy angel food cake nestled in a dreamy landscape of sweetness will transport dessert lovers to pure bliss.
The delicate texture melts effortlessly on your tongue, creating an ethereal experience that defies ordinary desserts.
Whipped egg whites form the magical foundation of this classic treat, ensuring a cloud-like consistency that feels almost weightless.
Each perfectly crafted bite delivers a subtle sweetness that dances between airy and rich.
Simple ingredients combine to create an extraordinary dessert that shines at any gathering.
Prepare to fall in love with this timeless, melt-in-your-mouth confection that turns an ordinary moment into something extraordinary.
Quick Recipe Overview
What’s In Heaven Cake
For Cake Base:For Creamy Filling:For Topping and Garnish:Tools That Help With Heaven Cake Baking
How To Prepare Heaven Cake With Ease

Warm up the kitchen and get ready for a delightful baking adventure. Set the oven to a cozy temperature that will help your cake rise perfectly.
Mix together the cake ingredients with love and care. Pour the smooth batter into a waiting pan, ensuring every corner is covered with delicious potential.
Slide the pan into the preheated oven and let the transformation begin. Watch as your cake slowly rises and turns a beautiful golden color.
Whip up a dreamy cream mixture that will make taste buds dance. Blend cream cheese and sweet clouds of whipped cream until they become a silky smooth layer of happiness.
Spread a generous layer of vibrant fruit filling across the cake. This will add a burst of color and excitement to your heavenly creation.
Let the cake rest in the cool embrace of the refrigerator. This allows all the flavors to mingle and create a symphony of taste.
Cut into your masterpiece and watch as everyone’s eyes light up with anticipation. Each slice is a moment of pure joy and deliciousness.
Tips To Perfect Your Heaven Cake
Heaven Cake Serving Made Easy
How To Store Heaven Cake Soft
Print
Dreamy Heaven Cake Recipe
- Total Time: 2 hours 45 minutes
- Yield: 11 1x
Description
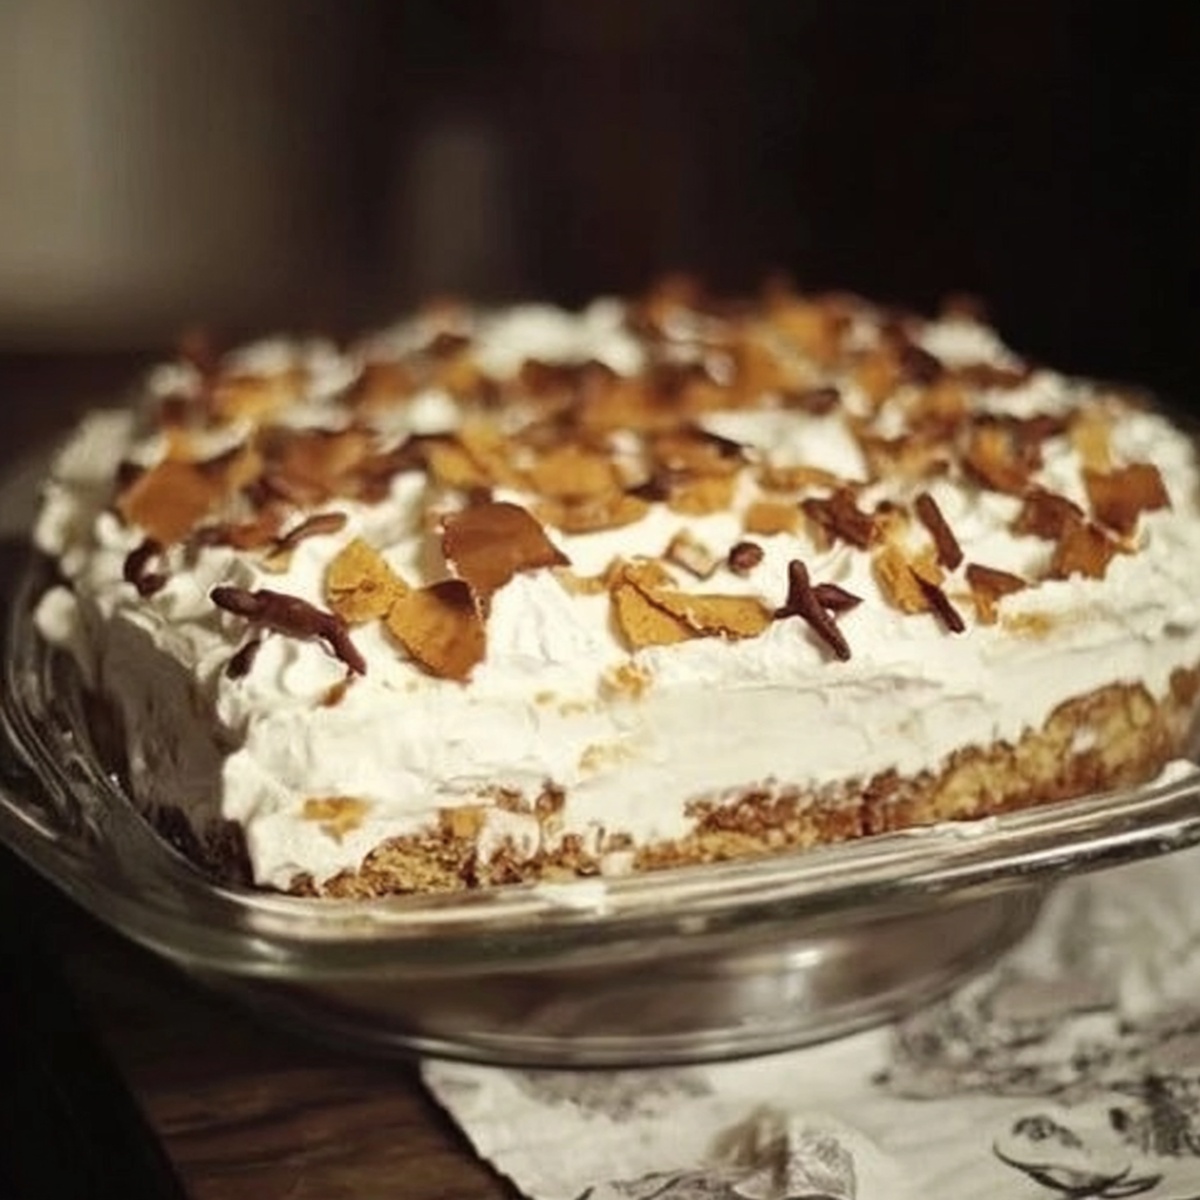
Heavenly Brazilian heaven cake blends rich chocolate layers with silky coconut cream. Delicate textures and intense flavors complete this sublime dessert that will delight you with its luxurious tropical essence.
Ingredients
- 1 box (15.25 oz / 432 g) white or yellow cake mix
- Ingredients required by cake mix box instructions
- 1 package (8 oz / 225 g) cream cheese, softened
- 1 cup (240 ml) heavy whipping cream
- 1 cup (120 g) powdered sugar, sifted
- 2 tsps vanilla extract
- 1 can (21 oz / 595 g) cherry, blueberry, or pineapple pie filling
- Optional: shredded coconut
- Optional: crushed graham crackers
- Optional: toasted almonds
Instructions
- Preparation: Preheat oven to 350F (175C) and lightly grease the baking pan to ensure smooth cake release.
- Batter Creation: Mix cake ingredients according to package instructions, incorporating vanilla extract for depth of flavor, then pour into prepared pan.
- Baking Process: Bake until the cake surface turns golden and a toothpick inserted emerges clean, then remove from oven and allow to cool completely in the pan.
- Cream Cheese Filling: Whip cream cheese in a large bowl until smooth and fluffy, gradually blending in powdered sugar to create a velvety consistency.
- Whipped Cream Layer: In a separate bowl, whip heavy cream with vanilla extract until soft peaks form, then gently fold into the cream cheese mixture to maintain lightness.
- Assembly: Once cake has reached room temperature, spread the cream cheese mixture evenly across the entire surface.
- Topping Application: Distribute pie filling uniformly over the cream layer, creating an attractive and flavorful design.
- Garnish and Chill: Sprinkle toasted almonds, crushed graham crackers, or shredded coconut for added texture, then refrigerate for at least two hours to allow flavors to meld.
- Serving: Remove from refrigerator, slice, and present a delightful heaven-inspired dessert that promises to tantalize taste buds.
Notes
- Precise Oven Temperature: Ensure accurate heat settings by using an oven thermometer to guarantee consistent baking results and prevent uneven cake texture.
- Cream Cheese Preparation: Allow cream cheese to soften at room temperature for 30 minutes before blending to achieve a smoother, lump-free mixture that integrates seamlessly.
- Whipping Cream Technique: Chill mixing bowl and whisk beforehand to help heavy cream form stiff peaks more quickly and maintain a stable, airy consistency.
- Cake Cooling Strategy: Place cake on a wire rack immediately after baking to prevent moisture buildup and maintain a light, fluffy texture throughout the cooling process.
- Prep Time: 15 minutes
- Cook Time: 25-30 minutes
- Category: Desserts
- Method: Baking
- Cuisine: American
Nutrition
- Serving Size: 11
- Calories: 320
- Sugar: 25 g
- Sodium: 450 mg
- Fat: 20 g
- Saturated Fat: 12 g
- Unsaturated Fat: 8 g
- Trans Fat: 0 g
- Carbohydrates: 35 g
- Fiber: 1 g
- Protein: 3 g
- Cholesterol: 60 mg
Liam O’Sullivan
Founder & Culinary Content Creator
Expertise
Recipe Development, Traditional Irish and European Cuisines, Food Styling and Photography, Culinary Education
Education
Dublin Institute of Technology (DIT) – School of Culinary Arts and Food Technology
Ballymaloe Cookery School
Isabella brings a global spark to the Craft Meats table. Born in Florence and trained at the Apicius International School of Hospitality, she blends classic Italian flavor with modern writing that’s easy to follow and hard to forget.
Her additional training at the Italian Chef Academy fueled her love for well-crafted dishes, especially ones that spotlight beautiful cuts of meat.
She’s a food writer with heart, and a deep love for storytelling through single recipes. Her goal? To help you cook with more confidence and a little more joy, no matter where you start.