Quick Dream Dessert: Nanaimo Bars Recipe for Sweet Lovers
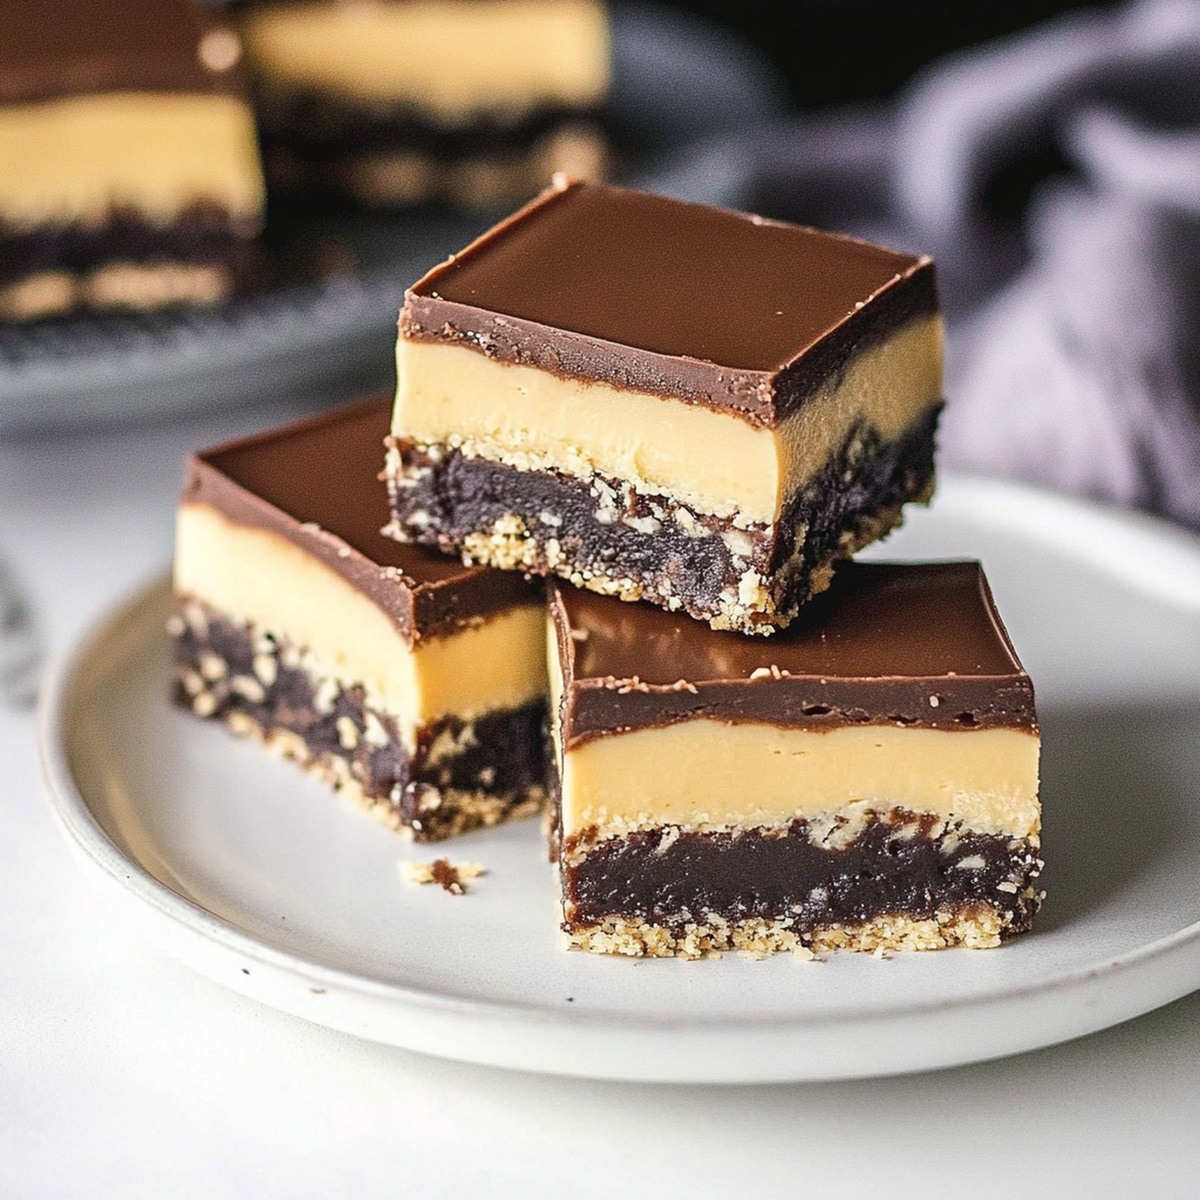
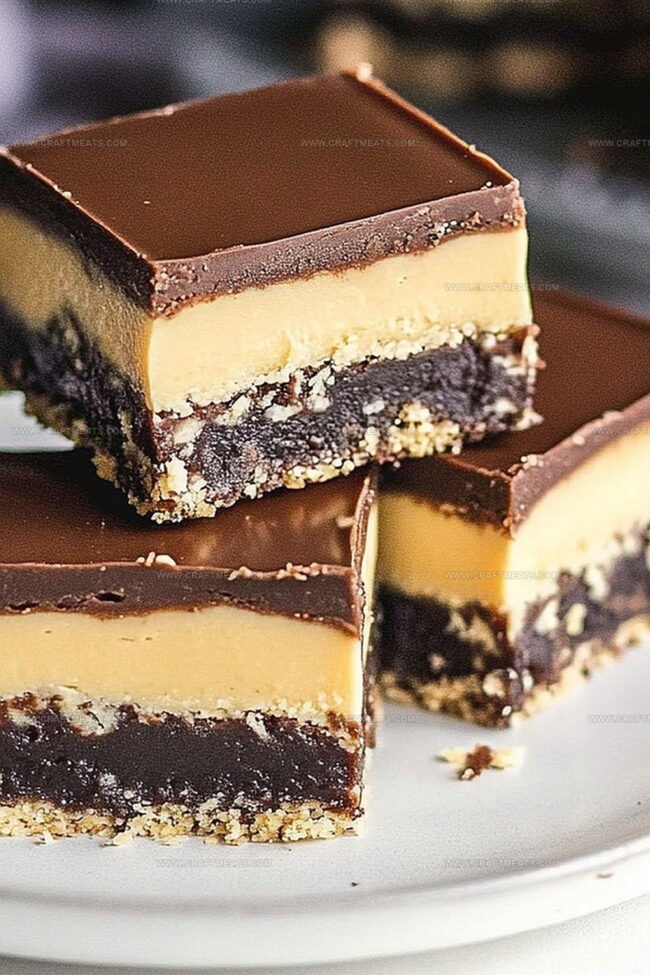
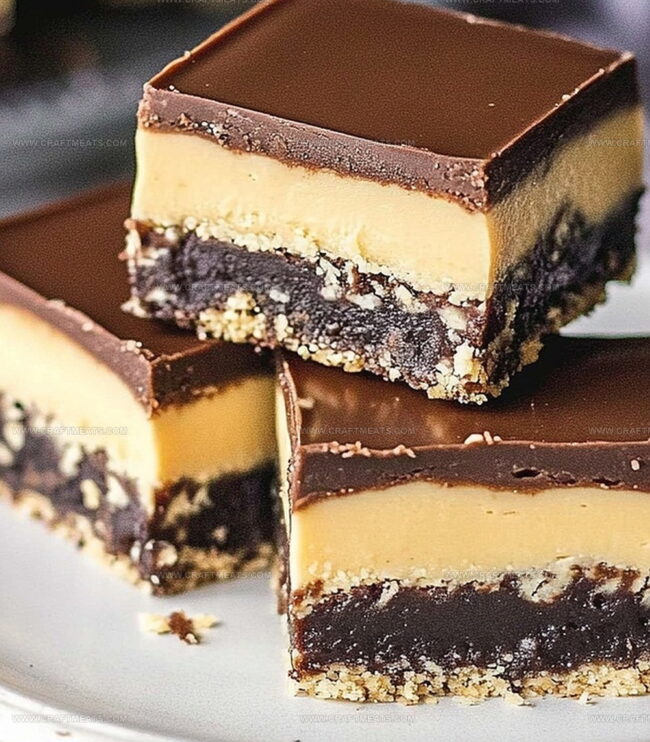
Decadent layers of creamy, no-bake nanaimo bars originate from the charming coastal city in British Columbia.
These sweet Canadian treats combine a crumbly chocolate base with a rich custard middle and smooth chocolate topping.
Each bite promises a delightful texture symphony that melts perfectly on your tongue.
Generations of home bakers have treasured this classic dessert for its irresistible combination of flavors.
The recipe passes through families like a sweet culinary tradition, connecting memories and celebrations.
Chocolate lovers and dessert enthusiasts will find these bars impossible to resist.
Dive into this delectable Canadian confection and experience a slice of sweet nostalgia.
Quick Recipe Overview
Nanaimo Bars Ingredient Breakdown
For Base Layer:For Creamy Middle Layer:For Chocolate Topping Layer:Tools For Making Nanaimo Bars Smooth
Steps To Assemble Nanaimo Bars Right
Craft a rich chocolate base by gently melting butter with cocoa and sugar. Blend in beaten egg, creating a velvety mixture that transforms with a hint of vanilla. Fold in graham cracker crumbs and coconut for a delightful crunch. Press the mixture firmly into a lined baking dish, creating a sturdy foundation that will cradle the creamy layers to come.
Whip up a cloud-like filling that whispers of sweet comfort. Blend butter and powdered sugar until they dance together smoothly, introducing custard powder for that signature creamy touch. Spread this luscious layer across the chilled chocolate base, letting it settle into a perfect blanket of deliciousness.
Unleash a glossy chocolate topping that cascades over the custard layer. Melt chocolate until it shines with silky perfection, then pour and spread with gentle strokes. Allow the bars to rest in the refrigerator, letting the layers meld into a harmonious treat.
Lift the entire creation from its resting place using parchment edges. Let the bars soften slightly, then slice into elegant squares that reveal the magical layers within. Serve and watch as friends and family marvel at your culinary masterpiece.
Flavor Mix-Ins For Nanaimo Bars
Serving Nanaimo Bars With Layers Showing
How To Store Nanaimo Bars Without Cracks
Print
Dreamy Nanaimo Bars Recipe
- Total Time: 2 hours
- Yield: 11 1x
Description
Nanaimo bars showcase Canadian culinary heritage with layers of chocolatey, nutty goodness. Rich chocolate ganache, creamy custard filling, and graham cracker base create a delightful dessert we can’t resist.
Ingredients
- 1 large egg (beaten)
- ½ cup (113 g / 4 oz) unsalted butter (melted)
- ½ cup (113 g / 4 oz) unsalted butter (softened)
- 2 tbsps custard powder (or instant vanilla pudding mix)
- 2 tbsps heavy cream
- 2 cups graham cracker crumbs
- 2 cups (240 g / 8.5 oz) powdered sugar
- 1 cup semi-sweet chocolate chips
- 1 cup shredded coconut (sweetened or unsweetened)
- ½ cup chopped walnuts or pecans (optional)
- ½ cup (50 g) granulated sugar
- ⅓ cup (33 g) cocoa powder
- 1 tsp vanilla extract
- 2 tbsps (28 g / 1 oz) unsalted butter
Instructions
- Foundation Layer: Melt butter, cocoa, and sugar in a saucepan, creating a smooth base. Whisk in beaten egg until the mixture thickens luxuriously.
- Base Construction: Integrate vanilla, graham cracker crumbs, coconut, and chopped nuts into the mixture. Press firmly into a parchment-lined baking dish, forming a compact foundational layer.
- Creamy Filling Preparation: Blend butter, powdered sugar, and custard powder until light and airy. Incorporate cream gradually to develop a silky, spreadable consistency.
- Layer Assembly: Distribute the custard filling evenly across the chilled base. Refrigerate to allow the layer to set completely.
- Chocolate Topping: Combine chocolate chips and butter, melting into a glossy mixture. Pour over the custard layer, ensuring uniform coverage by gently tilting the dish.
- Final Chilling: Refrigerate the entire dessert until the chocolate topping solidifies and layers meld together seamlessly.
- Serving Preparation: Extract the dessert from the pan using parchment edges. Let rest briefly at room temperature, then slice into precise, elegant squares.
Notes
- Butter Melting Technique: Melt butter slowly over low heat to prevent burning and ensure smooth, even consistency.
- Egg Incorporation Tip: Temper the egg by gradually adding hot mixture while whisking constantly to prevent scrambling.
- Texture Balance: Press the bottom layer firmly and evenly to create a compact, stable foundation for subsequent layers.
- Chilling Strategy: Allow each layer to set completely in the refrigerator before adding the next, ensuring clean, distinct layer separation.
- Prep Time: 30 minutes
- Cook Time: 1 hour 30 minutes
- Category: Desserts, Snacks
- Method: Mixing
- Cuisine: Canadian
Nutrition
- Serving Size: 11
- Calories: 295
- Sugar: 20 g
- Sodium: 40 mg
- Fat: 20 g
- Saturated Fat: 10 g
- Unsaturated Fat: 8 g
- Trans Fat: 0 g
- Carbohydrates: 29 g
- Fiber: 1 g
- Protein: 3 g
- Cholesterol: 30 mg
Liam O’Sullivan
Founder & Culinary Content Creator
Expertise
Recipe Development, Traditional Irish and European Cuisines, Food Styling and Photography, Culinary Education
Education
Dublin Institute of Technology (DIT) – School of Culinary Arts and Food Technology
Ballymaloe Cookery School
Isabella brings a global spark to the Craft Meats table. Born in Florence and trained at the Apicius International School of Hospitality, she blends classic Italian flavor with modern writing that’s easy to follow and hard to forget.
Her additional training at the Italian Chef Academy fueled her love for well-crafted dishes, especially ones that spotlight beautiful cuts of meat.
She’s a food writer with heart, and a deep love for storytelling through single recipes. Her goal? To help you cook with more confidence and a little more joy, no matter where you start.