
Light No-Bake Eggnog Pie Recipe for Holiday Ease
Creamy holiday desserts have a special place at our festive gatherings, and this no-bake eggnog pie recipe brings pure magic to the table.
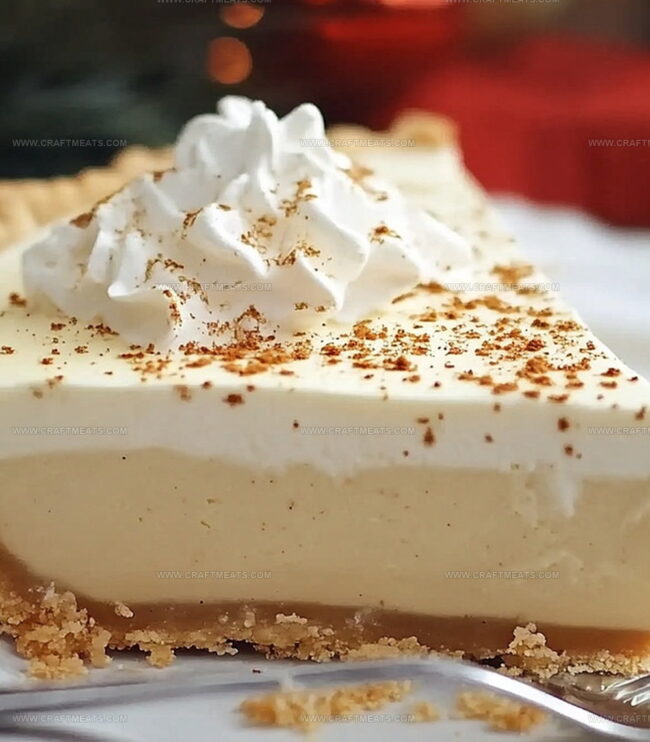
Rich, velvety eggnog blends perfectly with a buttery graham cracker crust to create an irresistible treat.
The silky smooth filling captures the quintessential flavors of the season in every single bite.
Cold and dreamy, this pie requires zero oven time, making it a stress-free dessert for busy cooks.
Whipped cream and a sprinkle of nutmeg add the perfect finishing touch to this decadent holiday classic.
Chilled and ready in just minutes, this pie promises to become your new favorite Christmas dessert.
Dive into a slice of pure holiday bliss that will have everyone asking for seconds.
Quick Recipe Overview

What You Need For No-Bake Eggnog Pie
For Crust:For Filling:For Topping:Basic Tools For No-Bake Eggnog Pie
Simple Steps To No-Bake Eggnog Pie
Crush graham crackers into fine crumbs and blend with melted butter. Press the mixture into a pie pan, creating a smooth, even base. Chill in the refrigerator to set the foundation for your delightful dessert.
Whip cream cheese until silky smooth, then blend with festive eggnog and warm spices. The mixture should become light and dreamy, capturing the essence of holiday cheer.
Sprinkle gelatin over cool water, allowing it to bloom and become magical. Gently warm until completely dissolved, creating a secret ingredient that helps the pie set perfectly.
Whip heavy cream until it forms beautiful, soft peaks. Carefully fold the cream into the eggnog mixture, creating a cloud-like texture that melts in your mouth.
Pour the luscious filling into the chilled crust, smoothing the top with a gentle touch. Refrigerate until the pie becomes firm and irresistible.
Garnish with a sprinkle of nutmeg and a dollop of whipped cream. Serve chilled and watch your guests’ eyes light up with holiday delight.
No-Bake Eggnog Pie Tips To Try
Easy Ways To Serve No-Bake Eggnog Pie
Keeping No-Bake Eggnog Pie Fresh
Print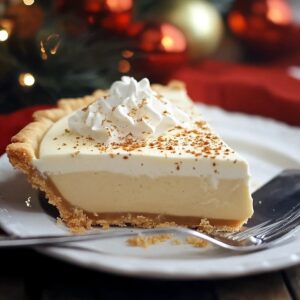
Dreamy No-Bake Eggnog Pie Recipe
- Total Time: 4 hours 20 minutes
- Yield: 7 1x
Description
Creamy no-bake eggnog pie delivers holiday cheer with minimal effort. Rich custard filling and graham cracker crust provide a delightful seasonal dessert you can easily enjoy at festive gatherings.
Ingredients
- 1 ½ cups (360 mL / 12 fl oz) eggnog
- 1 cup (240 mL / 8 fl oz) heavy whipping cream
- 1 package (8 oz / 226 g) cream cheese, softened
- ½ cup (100 g) granulated sugar
- 1 ½ cups (180 g) graham cracker crumbs
- 6 tbsps (85 g) unsalted butter, melted
- 1 envelope (about 2 ½ tsps / 7 g) unflavored gelatin
- 3 tbsps (45 mL) cold water
- 1 tsp vanilla extract
- ½ tsp ground nutmeg (plus extra for garnish)
- 1 tsp ground cinnamon
- 2 tbsps (25 g) granulated sugar
- whipped cream for garnish
- ground nutmeg or cinnamon for garnish
Instructions
- Crust Creation: Pulverize graham crackers with melted butter and sugar until mixture resembles damp sand, then press firmly into pie dish, covering bottom and sides evenly. Refrigerate to solidify.
- Cream Cheese Preparation: Blend cream cheese and sugar using electric mixer until silky smooth, then incorporate eggnog, vanilla, nutmeg, and cinnamon. Whisk until ingredients fully combine.
- Gelatin Activation: Sprinkle gelatin over cool water, allowing it to bloom for several minutes. Gently warm and stir until completely dissolved, then seamlessly integrate into eggnog base.
- Cream Incorporation: Whip heavy cream to stiff peaks, then delicately fold into eggnog mixture, creating a light, airy filling with uniform consistency.
- Pie Assembly: Pour creamy filling into chilled crust, smoothing surface to eliminate air pockets. Refrigerate for minimum four hours until filling sets completely.
- Final Touches: Prior to serving, crown pie with generous whipped cream layer and dust with warming spices like nutmeg or cinnamon for elegant presentation.
Notes
- Stabilize Gelatin Properly: Ensure gelatin blooms correctly by sprinkling it evenly over cool water, avoiding clumps that can create lumpy texture in the pie filling.
- Whip Cream Precision: Achieve perfect whipped cream by chilling the mixing bowl and whisk beforehand, stopping when soft peaks form to prevent over-beating and separation.
- Temperature Control Matters: Keep ingredients slightly cool when mixing to prevent cream cheese from becoming runny and maintain the pie’s structural integrity during preparation.
- Spice Customization Option: Adjust nutmeg and cinnamon quantities to personal taste, or experiment with alternative warming spices like cardamom or ginger for a unique flavor profile.
- Prep Time: 20 minutes
- Cook Time: 4 hours
- Category: Desserts, Drinks
- Method: Mixing
- Cuisine: American
Nutrition
- Serving Size: 7
- Calories: 400
- Sugar: 24 g
- Sodium: 210 mg
- Fat: 28 g
- Saturated Fat: 17 g
- Unsaturated Fat: 9 g
- Trans Fat: 0 g
- Carbohydrates: 36 g
- Fiber: 1 g
- Protein: 4 g
- Cholesterol: 90 mg
Liam O’Sullivan
Founder & Culinary Content Creator
Expertise
Recipe Development, Traditional Irish and European Cuisines, Food Styling and Photography, Culinary Education
Education
Dublin Institute of Technology (DIT) – School of Culinary Arts and Food Technology
Ballymaloe Cookery School
Isabella brings a global spark to the Craft Meats table. Born in Florence and trained at the Apicius International School of Hospitality, she blends classic Italian flavor with modern writing that’s easy to follow and hard to forget.
Her additional training at the Italian Chef Academy fueled her love for well-crafted dishes, especially ones that spotlight beautiful cuts of meat.
She’s a food writer with heart, and a deep love for storytelling through single recipes. Her goal? To help you cook with more confidence and a little more joy, no matter where you start.