Reeses Butterfinger Cheesecake Bars Recipe for Fans
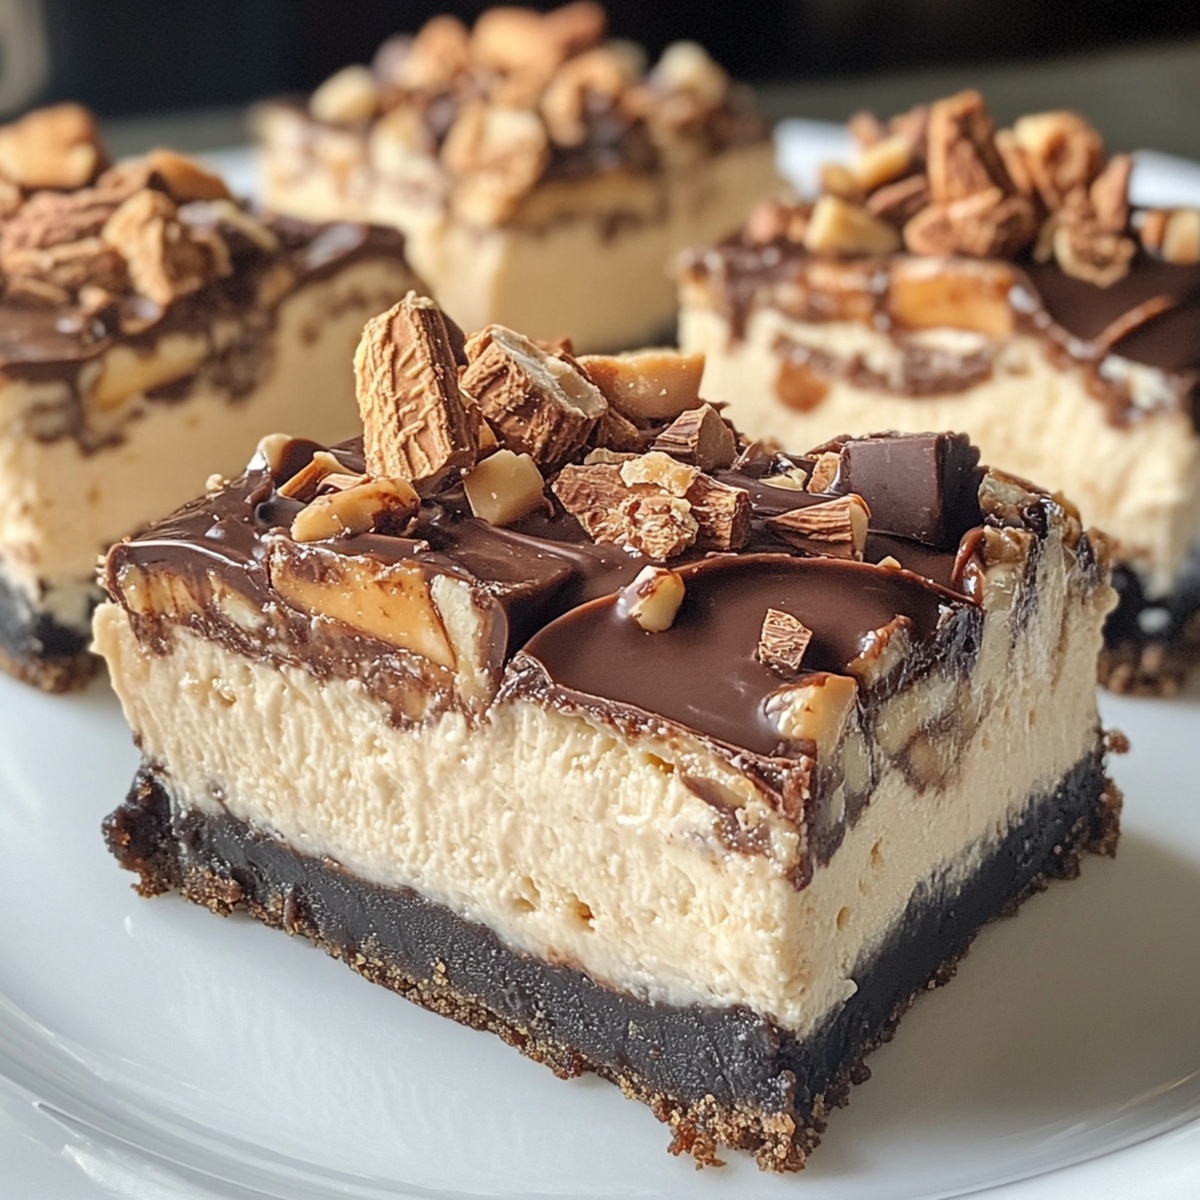
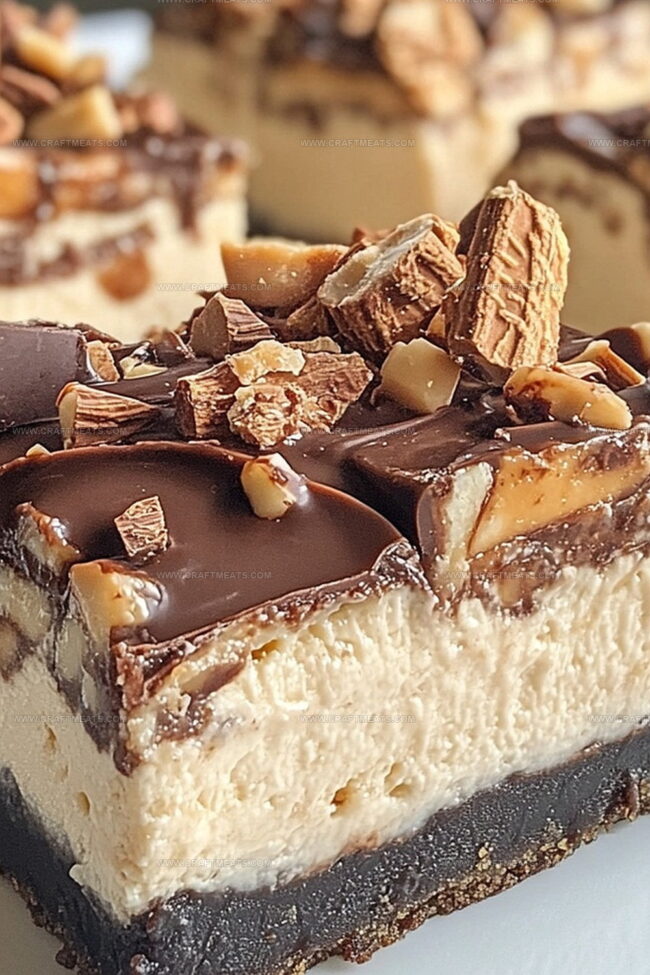
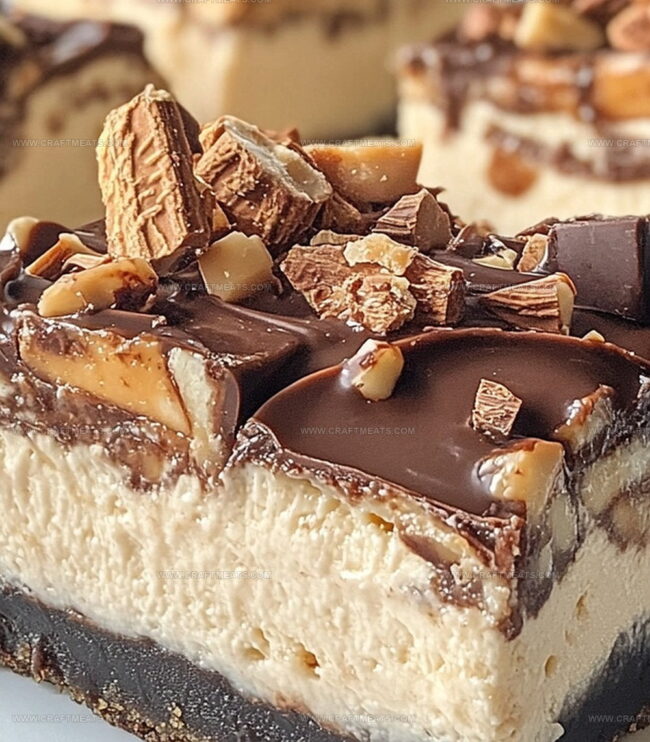
Sweet and creamy Reeses butterfinger cheesecake bars combine decadent chocolate and peanut butter in every delectable bite.
Layers of rich, velvety filling sit atop a crumbly graham cracker crust that melts in your mouth.
Chunks of butterfinger candy add a delightful crunch to the smooth cheesecake base.
The chocolate drizzle on top brings an extra touch of indulgence to these irresistible bars.
No baking skills are required to create this crowd-pleasing dessert that looks and tastes like a professional bakery treat.
Chocolate and peanut butter lovers will absolutely swoon over these sinfully delicious bars.
Prepare to impress everyone at your next gathering with this show-stopping dessert.
Quick Recipe Overview
Reeses Butterfinger Cheesecake Bars Recipe Ingredient Breakdown
For Crust Base:For Cheesecake Filling:For Topping and Decoration:Tools That Help You Bake Reeses Butterfinger Cheesecake Bars Recipe
Making Reeses Butterfinger Cheesecake Bars Recipe From Scratch
Craft a sturdy base by blending graham cracker crumbs with butter and sugar. Press the mixture into a lined baking pan, creating a golden landscape that will cradle the creamy filling. Briefly bake to set the foundation, allowing it to cool and develop a subtle crunch.
Whip cream cheese into a silky smooth canvas, introducing peanut butter for rich depth. Gently fold in eggs and vanilla, transforming the mixture into a luxurious layer that will blanket the crust with decadent softness. Pour this luscious blend evenly across the prepared surface.
Slide the pan into a warm oven, allowing gentle heat to coax the cheesecake into a delicate set. Watch for subtle signs of readiness – a slight jiggle at the center signals perfect texture. Remove and let the creation settle to room temperature, developing its complex personality.
Scatter chopped Reeses and Butterfinger across the cooled cheesecake, creating a landscape of sweet, crunchy jewels. If desired, drizzle melted chocolate in elegant streams, adding another layer of indulgence.
Place the pan in the refrigerator, allowing the bars to firm and meld their flavors. After a patient wait, lift the creation from its pan, slice into tempting squares, and serve a dessert that promises pure bliss.
Fun Tweaks For Reeses Butterfinger Cheesecake Bars Recipe
Best Ways To Serve Reeses Butterfinger Cheesecake Bars Recipe
Keeping Reeses Butterfinger Cheesecake Bars Recipe Fresh
Print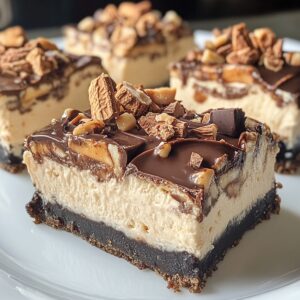
Dreamy Reeses Butterfinger Cheesecake Bars Recipe
- Total Time: 2 hours 55 minutes
- Yield: 11 1x
Description
Reeses Butterfinger cheesecake bars combine creamy chocolate with crunchy peanut butter candy in a dreamy dessert. Chocolate lovers will savor this rich, indulgent treat that blends classic flavors into a memorable sweet experience.
Ingredients
- 16 oz (454 g) cream cheese, softened
- ½ cup creamy peanut butter
- 2 large eggs
- ½ cup granulated sugar
- ½ cup chopped Reeses (peanut butter cups or Reeses pieces)
- ½ cup chopped Butterfinger candy bars
- 1 ½ cups graham cracker crumbs
- 6 tbsps unsalted butter, melted
- ¼ cup granulated sugar
- ¼ cup chocolate chips, melted (optional, for drizzling)
- 1 tsp vanilla extract
Instructions
- Preparation: Line a 9×9-inch baking pan with parchment paper, allowing excess to hang over edges for easy removal.
- Crust Formation: Mix graham cracker crumbs, sugar, and melted butter into a compact mixture. Press firmly into the pan’s bottom, creating an even layer. Bake until lightly golden, then cool completely.
- Cheesecake Filling: Cream cheese and sugar until smooth, incorporating peanut butter seamlessly. Fold in eggs and vanilla extract, mixing until just combined to maintain a silky texture.
- Baking Process: Pour cheesecake mixture over cooled crust, spreading evenly with a spatula. Bake in a preheated oven until the center shows a subtle jiggle while edges appear set, indicating perfect doneness.
- Topping and Decoration: Allow cheesecake to cool to room temperature. Sprinkle chopped Reeses and Butterfinger pieces generously across the surface, pressing gently to adhere.
- Chocolate Finish: Melt chocolate chips and drizzle artistically over the decorated cheesecake, creating elegant swirls that enhance both visual appeal and flavor complexity.
- Chilling and Serving: Refrigerate for at least two hours to firm up and intensify flavors. Remove from pan using parchment paper edges and slice into precise, uniform squares for serving.
Notes
- Achieve Creamy Perfection: Ensure cream cheese is at room temperature to prevent lumps and create a smooth, velvety filling. Avoid over-mixing to maintain a delicate texture.
- Prevent Crust Crumbling: Press graham cracker mixture firmly and evenly into the pan, creating a compact base that holds together when cut. Briefly baking the crust helps set its structure.
- Control Baking Precision: Watch for the subtle jiggle in the cheesecake’s center – it should wobble slightly but not be liquid. Overbaking leads to dry, cracked surface, while underbaking results in runny texture.
- Customize Dietary Needs: Substitute graham crackers with gluten-free alternatives or use almond flour for a low-carb version. Replace regular cream cheese with dairy-free options for lactose-sensitive individuals.
- Prep Time: 20 minutes
- Cook Time: 35 minutes
- Category: Desserts
- Method: Baking
- Cuisine: American
Nutrition
- Serving Size: 11
- Calories: 350
- Sugar: 20 g
- Sodium: 250 mg
- Fat: 22 g
- Saturated Fat: 10 g
- Unsaturated Fat: 10 g
- Trans Fat: 0 g
- Carbohydrates: 30 g
- Fiber: 1 g
- Protein: 6 g
- Cholesterol: 70 mg
Liam O’Sullivan
Founder & Culinary Content Creator
Expertise
Recipe Development, Traditional Irish and European Cuisines, Food Styling and Photography, Culinary Education
Education
Dublin Institute of Technology (DIT) – School of Culinary Arts and Food Technology
Ballymaloe Cookery School
Isabella brings a global spark to the Craft Meats table. Born in Florence and trained at the Apicius International School of Hospitality, she blends classic Italian flavor with modern writing that’s easy to follow and hard to forget.
Her additional training at the Italian Chef Academy fueled her love for well-crafted dishes, especially ones that spotlight beautiful cuts of meat.
She’s a food writer with heart, and a deep love for storytelling through single recipes. Her goal? To help you cook with more confidence and a little more joy, no matter where you start.