Easy Festive Chocolate Chip Celebration Cookies Recipe
Sweet chocolate chip celebration cookies bring pure joy to any gathering with their irresistible charm and delightful crunch.
These remarkable treats spark instant happiness and connection among everyone around the table.
Bakers of all skill levels can create magical moments through simple ingredients and creative mixing techniques.
Soft, warm, and perfectly balanced, these cookies promise comforting indulgence that feels like a warm embrace.
Small details make these treats extraordinary, from carefully selected chocolate to precise baking temperatures.
Each bite tells a story of passion, love, and shared experiences.
You will absolutely adore how these cookies upgrade ordinary ingredients into something extraordinary.
Explore this delectable recipe and let the celebration begin.
Chocolate Chip Cookies With Party Energy
Grab These Ingredients for a Sweet Bash
Dry Ingredients:Wet Ingredients:Mix-In Ingredients:Instructions for These Festive Cookies
Step 1: Prepare the Baking Station
Warm up your oven to 350°F (177°C). Grab a cookie sheet and cover it with parchment paper. This magical barrier prevents cookies from sticking and makes cleanup a breeze.
Step 2: Mix Dry Ingredients
Grab a small bowl and whisk together:Blend these ingredients until they’re perfectly combined and look like a festive powder mix.
Step 3: Create Wet Ingredient Magic
In a larger bowl, mix:Stir until the mixture looks smooth and glossy. Crack in an egg and splash some vanilla extract. Whisk everything together until it looks creamy and dreamy.
Step 4: Combine Wet and Dry Ingredients
Slowly add the dry ingredient mixture to the wet ingredients. Gently stir until everything is just combined. Be careful not to overmix – you want light and fluffy cookies!
Step 5: Add Delightful Extras
Fold in with love:Use a rubber spatula to distribute these goodies evenly throughout the dough.
Step 6: Shape and Bake
Use a cookie scoop to drop 2-tablespoon mounds of dough onto the prepared sheet. Space them generously to allow room for spreading. Slide the sheet into the preheated oven and bake for 11-12 minutes.
Step 7: Cool and Enjoy
Let the cookies rest on the baking sheet for 10 minutes. This helps them set and become perfectly chewy. Transfer to a wire rack to cool completely.
Expert Advice for Even Baking
Best Way to Store for Events
Treat Pairings for These Colorful Cookies
Add Holiday Spirit With Variations
Cookie Celebration FAQs
The cookies stay fresh in an airtight container at room temperature for up to 5 days. For longer storage, you can freeze them for 2-3 weeks.
Yes, but reduce or omit the added salt in the recipe to prevent the cookies from becoming too salty. Unsalted butter is recommended for better flavor control.
Letting the cookies rest allows them to firm up and finish cooking from the residual heat, preventing them from breaking when transferred to a cooling rack. This helps achieve a perfect, soft texture.
Absolutely! You can prepare the cookie dough and refrigerate it for up to 3 days before baking, or freeze the dough balls for up to 1 month. Just add 1-2 extra minutes to baking time if baking from frozen.
Print
Festive Chocolate Chip Celebration Cookies Recipe
- Total Time: 27 minutes
- Yield: 24 1x
Description
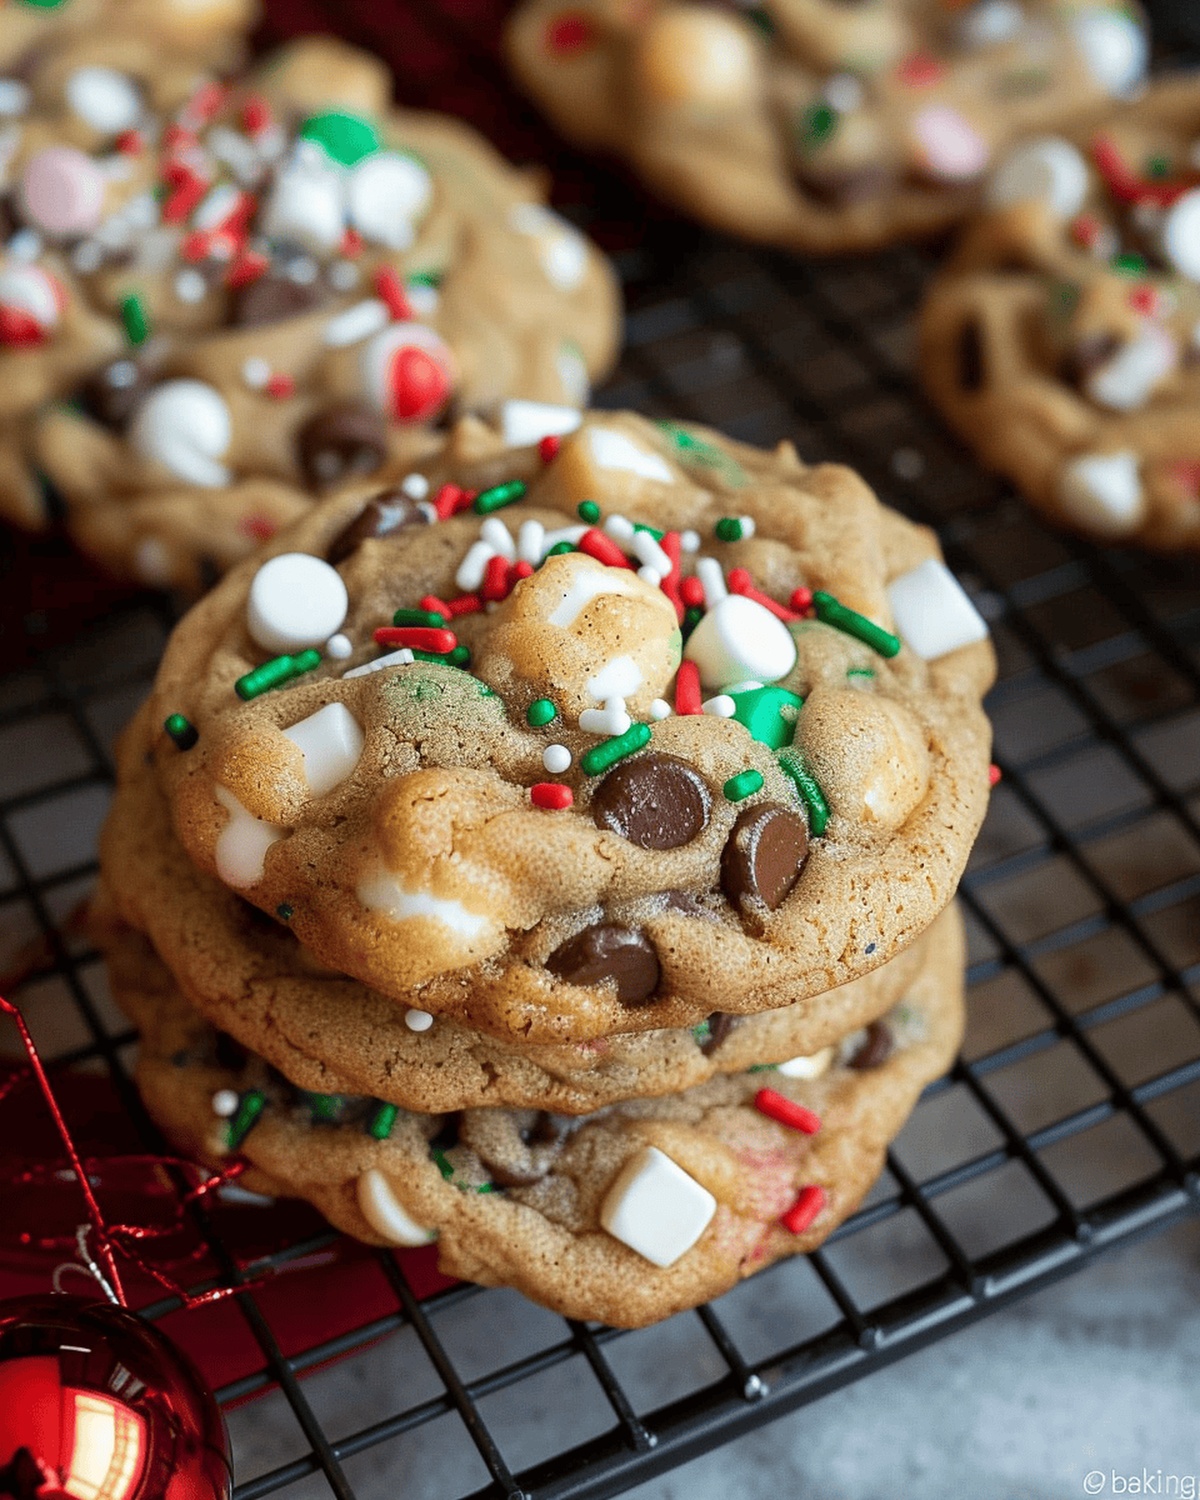
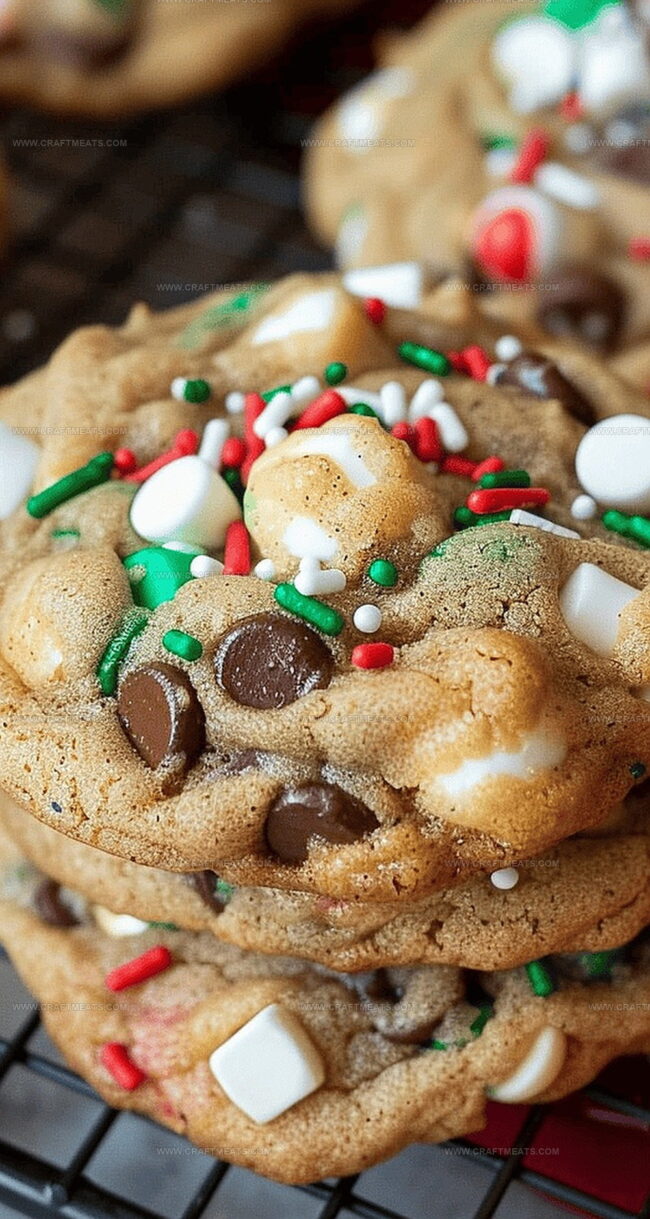
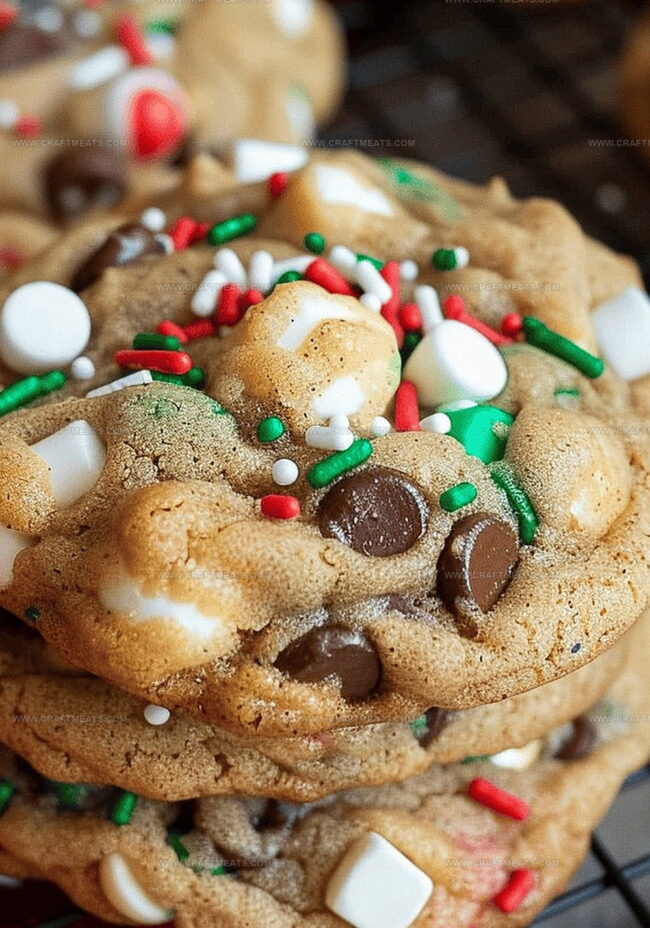
Chocolate chip celebration cookies bring pure joy to dessert tables with classic comfort and festive flair. Sweet morsels of chocolate nestled in buttery dough invite you to savor each delightful bite of happiness.
Ingredients
Main Ingredients:
- 1 large egg
- 1 stick (½ cup or 113 grams) salted butter, melted
- 1⅔ cups all-purpose white flour
- ½ cup mini semi-sweet chocolate chips
- ½ cup white chocolate chips
Sweeteners and Flavor Enhancers:
- ½ cup light brown sugar
- ¼ cup white sugar
- 2 teaspoons vanilla extract
- ¼ cup Christmas red/green/white mix sprinkles
Spices and Leavening Agents:
- 1 teaspoon ground cinnamon
- 1 teaspoon baking soda
- ½ teaspoon salt
Instructions
- Assemble all ingredients and equipment, creating a festive baking workspace with a clean, organized countertop.
- Calibrate the oven to 350°F (177°C), ensuring precise temperature for optimal cookie performance.
- Prepare a baking sheet with parchment paper, creating a non-stick surface for perfect cookie release.
- Combine flour, cinnamon, baking soda, and salt in a mixing bowl, whisking thoroughly to distribute spices and leavening agents evenly.
- In a separate large bowl, cream melted butter with brown and white sugars until the mixture becomes smooth and slightly glossy.
- Incorporate egg and vanilla extract into the sugar mixture, blending until the ingredients form a uniform, silky consistency.
- Gradually integrate the dry ingredient mixture into the wet ingredients, stirring gently to maintain a tender cookie texture.
- Delicately fold chocolate chips and sprinkles throughout the dough, ensuring a balanced distribution of festive elements.
- Portion the dough using a cookie scoop, creating uniform mounds that will bake evenly and maintain a consistent shape.
- Arrange cookie mounds on the prepared baking sheet, leaving sufficient space between each to allow for spreading during baking.
- Slide the cookie sheet into the preheated oven, baking for 11-12 minutes until edges turn golden and centers remain slightly soft.
- Remove cookies from the oven and allow them to rest on the baking sheet for 10 minutes, enabling them to set and firm up.
- Transfer cookies to a wire cooling rack, letting them cool completely to develop their final texture and flavor profile.
Notes
- Festive cookies burst with celebratory colors and rich chocolate flavors, perfect for special occasions or spontaneous sweet moments.
- Chilling the dough for 30 minutes before baking helps prevent excessive spreading and creates a more structured, thicker cookie.
- Mix chocolate chips and sprinkles gently to maintain their vibrant colors and prevent bleeding into the dough.
- Watch baking time closely; 11 minutes yields softer centers, while 12 minutes creates slightly crispier edges for varied texture preferences.
- Room temperature ingredients ensure smoother mixing and more consistent cookie development, especially with butter and eggs.
- Store cooled cookies in an airtight container at room temperature for up to 5 days, maintaining their delightful softness and flavor.
- Prep Time: 15 minutes
- Cook Time: 12 minutes (per batch)
- Category: Desserts, Snacks
- Method: Baking
- Cuisine: American
Nutrition
- Serving Size: 24
- Calories: 150
- Sugar: 10 g
- Sodium: 100 mg
- Fat: 7 g
- Saturated Fat: 4 g
- Unsaturated Fat: 2 g
- Trans Fat: 0 g
- Carbohydrates: 20 g
- Fiber: 1 g
- Protein: 2 g
- Cholesterol: 15 mg
Isabella Rossi
Founder & Culinary Content Creator
Expertise
Recipe Development, Traditional Irish and European Cuisines, Food Styling and Photography, Culinary Education
Education
Dublin Institute of Technology (DIT) – School of Culinary Arts and Food Technology
Ballymaloe Cookery School
Liam is the voice behind many of Craft Meats’ most flavorful features. With roots in Dublin’s smoky barbecue scene and a culinary degree from the Dublin Institute of Technology, he brings time-tested cooking techniques to life.
His training at Ballymaloe Cookery School sharpened his farm-to-table approach, giving him a deep respect for every ingredient he writes about.
He’s not about overcomplicating the process, just helping you cook meat that’s worth talking about. When he’s not writing or grilling, he’s out foraging or nerding out on regional spice blends to add to his next recipe.