Chocolate Peppermint Cookie Cups Recipe to Celebrate
Decadent chocolate peppermint cookie cups burst with festive flavor that melts in your mouth.
Creamy chocolate meets cool peppermint in every delightful bite.
These miniature desserts pack a serious punch of rich, indulgent goodness.
The perfect holiday treat combines sweet and refreshing notes that dance across your palate.
Sophisticated yet simple, these cookie cups promise to wow even the most discerning dessert lovers.
You’ll fall head over heels for this crowd-pleasing recipe that transforms an ordinary cookie into something extraordinary.
Prepare to delight your taste buds with this irresistible chocolate peppermint sensation.
Quick Recipe Overview
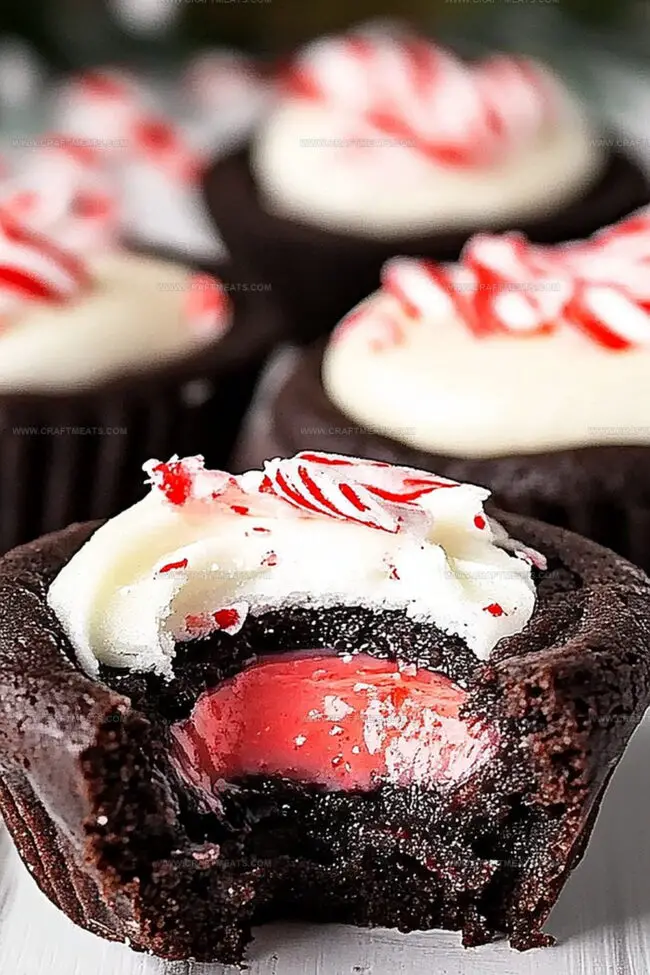
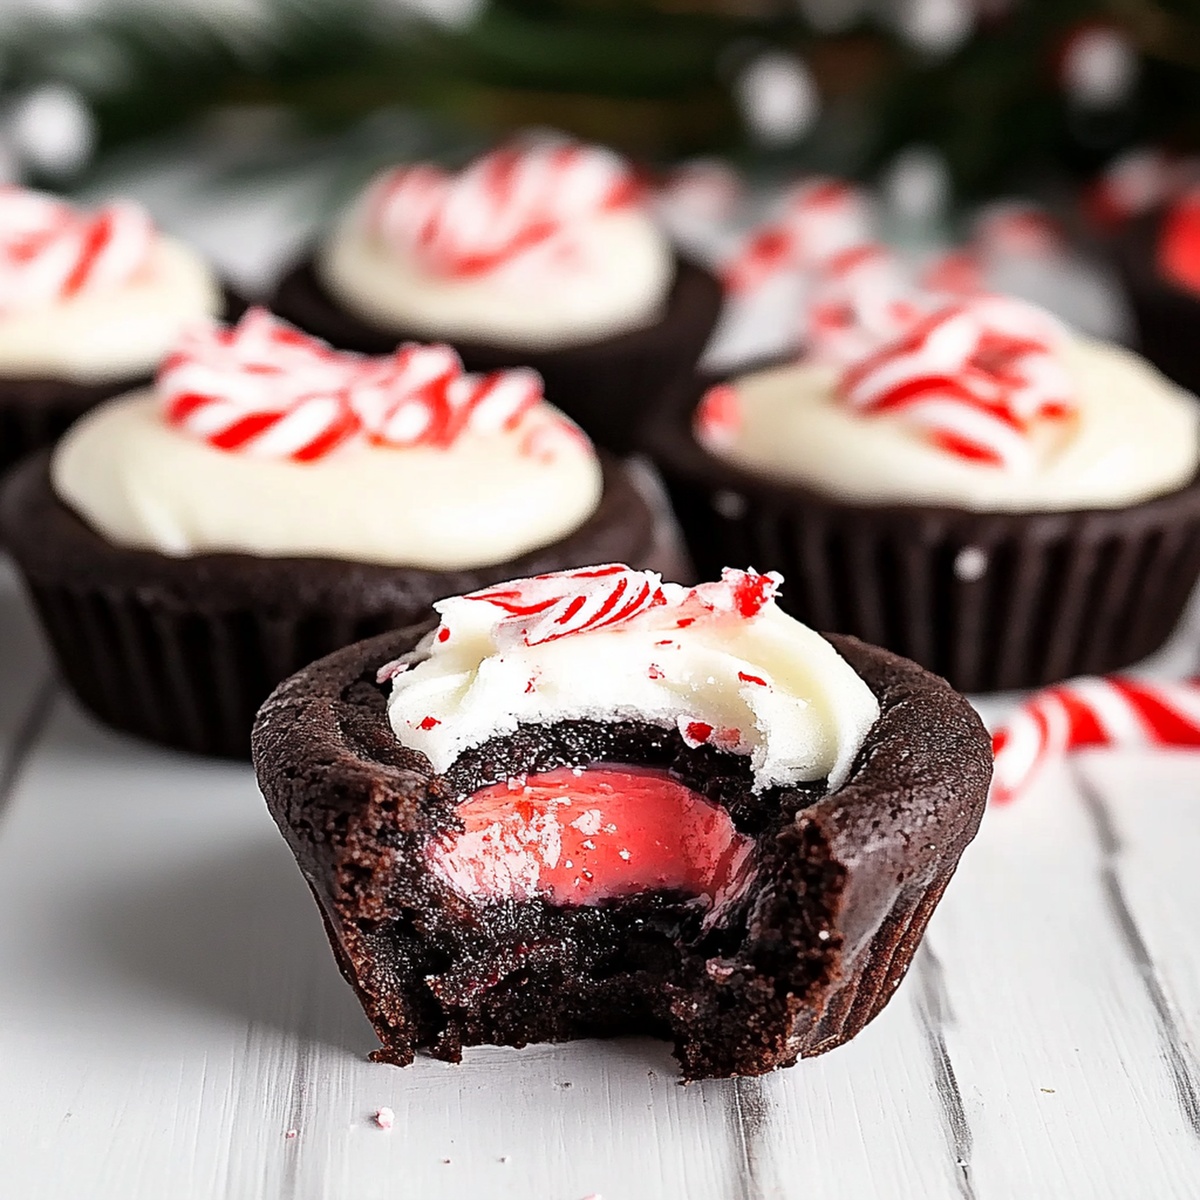
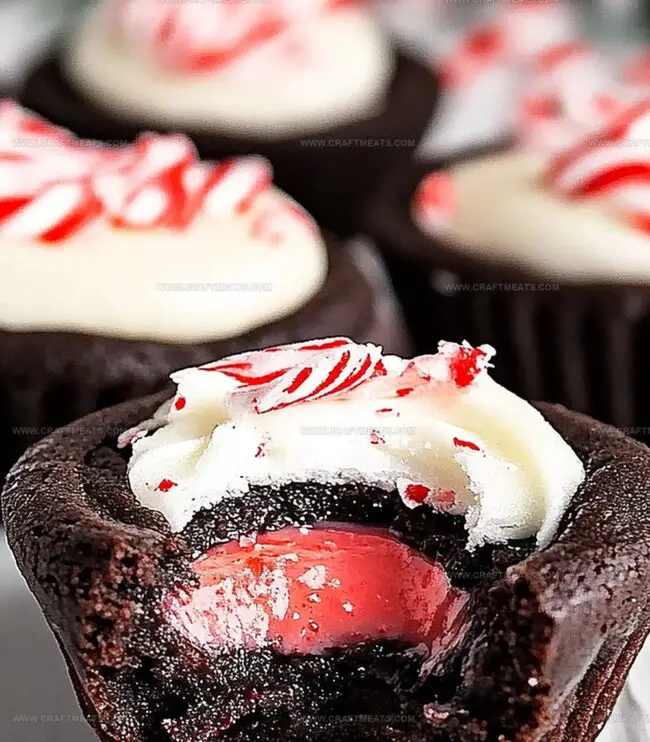
Everything Sweet In Chocolate Peppermint Cookie Cups
For Cookie Base Ingredients:For Wet Ingredients:For Filling and Topping:Kitchen Gear For Chocolate Peppermint Cookie Cups
Steps To Bake Chocolate Peppermint Cookie Cups Fast
Warm up the oven and get your mini muffin tin ready for a delightful baking adventure.
Mix soft butter with sugars until they become light and dreamy. Add eggs and flavor extracts, blending them into a smooth mixture. Separately combine dry ingredients, then gently fold them into the wet mixture until a soft dough forms.
Roll small dough balls and nestle them into muffin tin wells. Bake until edges look set and golden. While still warm, create gentle wells in each cookie using a spoon, giving them a cozy cup-like shape.
Melt chocolate with cream in short bursts, stirring until silky and smooth. Stir in a touch of peppermint for an extra flavor punch.
Pour the rich chocolate mixture into each cookie cup. Sprinkle crushed candy canes on top for a festive crunch and sparkle.
Let the chocolate set and cool, either at room temperature or in the refrigerator. Enjoy these delectable treats that blend chocolatey warmth with minty freshness.
Tips For Peppermint Flavor In Chocolate Cookie Cups
Fun Ways To Serve Chocolate Peppermint Cookie Cups
How To Keep Chocolate Peppermint Cookie Cups Tidy
Print
Festive Chocolate Peppermint Cookie Cups Recipe
- Total Time: 30 minutes
- Yield: 11 1x
Description
Chocolate peppermint cookie cups combine rich chocolate and cool mint in a delightful dessert. Creamy ganache and crushed candy canes crown miniature chocolate cookie shells, creating a festive treat perfect for holiday gatherings.
Ingredients
- ½ cup (113 g) unsalted butter, softened
- ½ cup (100 g) granulated sugar
- ¼ cup (50 g) brown sugar
- 1 large egg
- 1 ¼ cups (156 g) all-purpose flour
- ⅓ cup (35 g) unsweetened cocoa powder
- ½ tsp peppermint extract
- 1 tsp vanilla extract
- ½ tsp baking soda
- ¼ tsp salt
- ½ cup (85 g) semi-sweet or dark chocolate chips
- ¼ cup (60 ml) heavy cream
- ½ tsp peppermint extract
- Crushed candy canes or peppermint candies
Instructions
- Oven Preparation: Preheat oven to 350F (175C) and generously coat mini muffin tin with nonstick spray.
- Dough Creation: Cream butter with granulated and brown sugars until fluffy. Blend in egg, vanilla, and peppermint extracts until fully incorporated.
- Ingredient Fusion: Sift flour, cocoa powder, baking soda, and salt. Gently fold dry ingredients into wet mixture, forming a uniform dough.
- Cookie Shaping and Baking: Roll dough into small balls, placing each in muffin wells. Bake until edges are set and firm, around 8-10 minutes.
- Cup Formation: While cookies are warm, delicately press center of each using a spoon’s rounded back to create cup-like indentations.
- Cooling Process: Transfer cookie bases to wire rack, allowing complete cooling and structural stabilization.
- Chocolate Filling: Microwave chocolate chips with heavy cream in brief intervals, stirring to achieve smooth consistency. Incorporate peppermint extract for enhanced flavor.
- Filling and Garnishing: Pour glossy chocolate mixture evenly into cooled cookie cups. Immediately sprinkle crushed candy canes over warm filling.
- Setting and Serving: Allow chocolate to set at room temperature or expedite chilling in refrigerator for 15-20 minutes before presenting these delectable treats.
Notes
- Temperature Control: Maintain precise oven temperature at 350F to prevent burning and ensure even baking of cookie cups.
- Dough Consistency: Avoid overmixing to keep cookie texture tender and prevent tough, dense results.
- Indentation Technique: Create cup shape immediately after baking while cookies are warm and pliable, using gentle spoon pressure to form perfect wells.
- Chocolate Melting Precision: Use short microwave intervals and continuous stirring to prevent chocolate from seizing or burning, ensuring smooth, glossy filling.
- Prep Time: 20 minutes
- Cook Time: 10 minutes
- Category: Desserts, Snacks
- Method: Baking
- Cuisine: American
Nutrition
- Serving Size: 11
- Calories: 190
- Sugar: 12 g
- Sodium: 75 mg
- Fat: 10 g
- Saturated Fat: 6 g
- Unsaturated Fat: 4 g
- Trans Fat: 0 g
- Carbohydrates: 24 g
- Fiber: 1 g
- Protein: 2 g
- Cholesterol: 30 mg
Liam O’Sullivan
Founder & Culinary Content Creator
Expertise
Recipe Development, Traditional Irish and European Cuisines, Food Styling and Photography, Culinary Education
Education
Dublin Institute of Technology (DIT) – School of Culinary Arts and Food Technology
Ballymaloe Cookery School
Isabella brings a global spark to the Craft Meats table. Born in Florence and trained at the Apicius International School of Hospitality, she blends classic Italian flavor with modern writing that’s easy to follow and hard to forget.
Her additional training at the Italian Chef Academy fueled her love for well-crafted dishes, especially ones that spotlight beautiful cuts of meat.
She’s a food writer with heart, and a deep love for storytelling through single recipes. Her goal? To help you cook with more confidence and a little more joy, no matter where you start.