
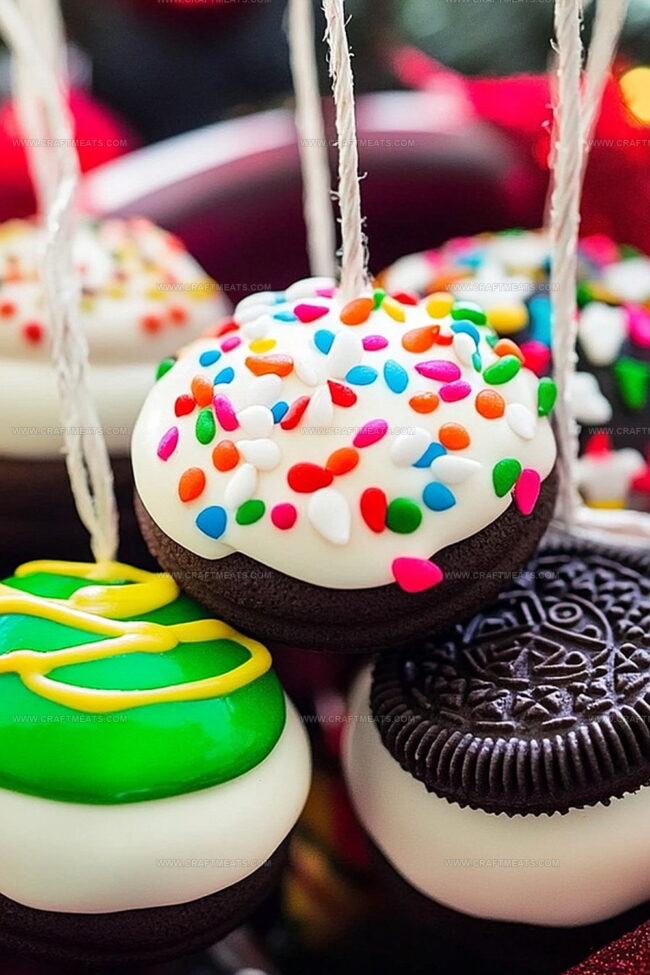
Jolly Christmas Oreo Ornaments Recipe: Fun Festive Treats!
Delightful holiday treats sparkle with christmas oreo ornaments that turn simple cookies into festive masterpieces.
These charming desserts blend sweet creativity with seasonal cheer.
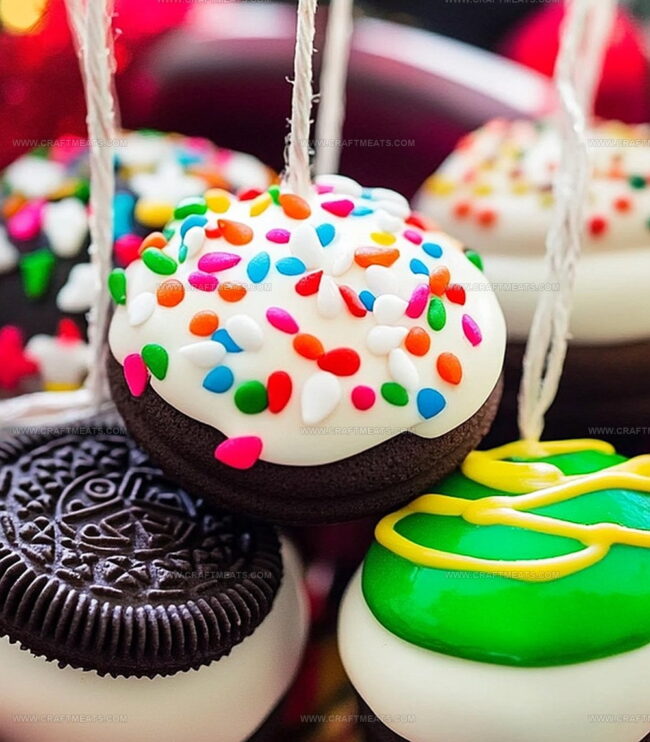
Oreo cookies become magical decorations perfect for tree trimmings or party tables.
Colorful candy melts and sprinkles transform ordinary cookies into edible ornaments.
Kids and adults alike adore crafting these whimsical sweets that capture winter’s playful spirit.
Decorating becomes an interactive experience that brings joy and memories.
Dive into this cheerful recipe and create delectable holiday magic that will delight everyone at your celebration.
Quick Recipe Overview
Sweet Details Inside Christmas Oreo Ornaments
For Coating and Base:For Decorative Elements:For Optional Embellishments:Tools That Help Create Christmas Oreo Ornaments
Steps To Make Your Own Christmas Oreo Ornaments
Prepare a workspace with a parchment-lined baking sheet. This will be your creative station for transforming ordinary Oreos into magical holiday treats.
Gently warm white chocolate in short microwave bursts, stirring between each interval until silky and smooth. The key is patience and gentle heating.
Carefully dunk each Oreo into the glossy white chocolate, ensuring complete coverage. Use a fork to lift and drain excess chocolate, creating a perfect sweet shell.
While chocolate remains wet, attach a small pretzel twist or candy cane fragment to the top of each Oreo, creating a charming ornament-like appearance.
Unleash creativity by drizzling colored candy melts in playful patterns. Sprinkle edible glitter or tiny candies for extra holiday sparkle before the chocolate sets.
Allow your masterpieces to rest and harden at room temperature or speed up the process in the refrigerator for about 15-20 minutes.
Display your festive Oreo creations on a decorative tray or package them in a charming holiday box to share the sweet joy.
Tips To Decorate Christmas Oreo Ornaments Better
Serve Christmas Oreo Ornaments With Holiday Charm
How To Store Christmas Oreo Ornaments Safely
Print
Festive Christmas Oreo Ornaments Recipe
- Total Time: 30 minutes
- Yield: 11 1x
Description
Festive Christmas Oreo ornaments bring holiday cheer with their playful design and sweet chocolate coating. Guests will adore these simple, decorative treats that combine cookie creativity and seasonal joy.
Ingredients
- 12 oreo cookies
- 1.5 cups (300 g) white chocolate or candy melts
- 0.5 cup (100 g) colored candy melts (red, green, blue, etc.)
- sprinkles
- edible glitter
- small candies
- mini pretzel twists
- candy canes
Instructions
- Prepare Hooks: Craft ornament hooks by snapping mini pretzels into curved shapes or trimming candy canes into delicate arcs for later assembly.
- Melt Coating: Gently liquefy white chocolate or candy melts in a microwave-safe bowl, stirring intermittently to prevent burning and achieve a smooth, glossy consistency.
- Dip and Decorate: Submerge each Oreo fully in the molten chocolate, using a fork to drain excess coating, then place on a parchment-lined surface. Immediately position pretzel or candy cane hooks atop each Oreo, ensuring secure attachment.
- Embellish Design: Add artistic drizzles of colored candy melts, creating intricate patterns like elegant swirls or dynamic zigzags. Sprinkle festive decorations such as edible glitter or miniature candies to enhance visual appeal.
- Set and Chill: Allow ornamental treats to solidify at room temperature or accelerate the process by refrigerating for 15-20 minutes until completely set and firm.
- Present and Serve: Arrange the Christmas Oreo Ornaments in a charming gift box or on a decorative platter, ready to enchant and impress holiday guests with their whimsical design.
Notes
- Prevent Chocolate Seizing: Melt chocolate slowly and carefully, stirring frequently to avoid burning, which can cause rough texture and ruin the smooth coating.
- Master Dipping Technique: Use a fork for precise chocolate coating, allowing excess to drip off gently to achieve an even, thin layer without clumping.
- Control Cooling Speed: Room temperature setting allows for gradual chocolate hardening and prevents cracking, but refrigeration can speed up the process if time is limited.
- Decorative Precision: Use squeeze bottles or piping bags for more controlled and intricate candy melt designs, creating professional-looking ornament patterns with clean lines.
- Prep Time: 15 minutes
- Cook Time: 15 minutes
- Category: Desserts, Snacks
- Method: Mixing
- Cuisine: American
Nutrition
- Serving Size: 11
- Calories: 151
- Sugar: 12 g
- Sodium: 40 mg
- Fat: 8 g
- Saturated Fat: 4 g
- Unsaturated Fat: 2 g
- Trans Fat: 0 g
- Carbohydrates: 18 g
- Fiber: 1 g
- Protein: 1 g
- Cholesterol: 0 mg
Liam O’Sullivan
Founder & Culinary Content Creator
Expertise
Recipe Development, Traditional Irish and European Cuisines, Food Styling and Photography, Culinary Education
Education
Dublin Institute of Technology (DIT) – School of Culinary Arts and Food Technology
Ballymaloe Cookery School
Isabella brings a global spark to the Craft Meats table. Born in Florence and trained at the Apicius International School of Hospitality, she blends classic Italian flavor with modern writing that’s easy to follow and hard to forget.
Her additional training at the Italian Chef Academy fueled her love for well-crafted dishes, especially ones that spotlight beautiful cuts of meat.
She’s a food writer with heart, and a deep love for storytelling through single recipes. Her goal? To help you cook with more confidence and a little more joy, no matter where you start.