
Jolly Holiday: Christmas Sugar Cookie Bars Recipe for All
Sweet, buttery christmas sugar cookie bars bring festive cheer to any holiday gathering with their melt-in-your-mouth texture.
Packed with classic seasonal flavors, these bars deliver a delightful twist on traditional cookie recipes.
Soft, chewy, and beautifully decorated, they capture the magic of winter celebrations.
Sparkling with colorful sprinkles and a rich vanilla base, these treats disappear quickly at potlucks and parties.
Baking these bars requires minimal effort but promises maximum deliciousness.
Simple ingredients transform into a crowd-pleasing dessert that spreads joy with every bite.
Quick Recipe Overview
What Goes Into Christmas Sugar Cookie Bars
For Cookie Bars:For Frosting:For Decorations:Tools Needed For Christmas Sugar Cookie Bars
Step-By-Step Guide To Christmas Sugar Cookie Bars

Grab your favorite baking pan and line it with parchment paper. Warming up the oven to a cozy 350F creates the perfect baking environment for these delightful treats.
Blend softened butter and sugar until they become a fluffy cloud of sweetness. Crack in an egg and splash of vanilla, then gently fold in flour, creating a smooth, dreamy mixture that feels like holiday happiness.
Spread the dough evenly across the pan, letting it settle into every corner. Slide the pan into the oven and let the magic happen. After about 20 minutes, you’ll have golden-edged bars that smell like pure joy.
Whip butter into a creamy dream, then fold in powdered sugar and a dash of vanilla. Add a splash of milk to create a silky smooth frosting that’s ready to make these bars sparkle.
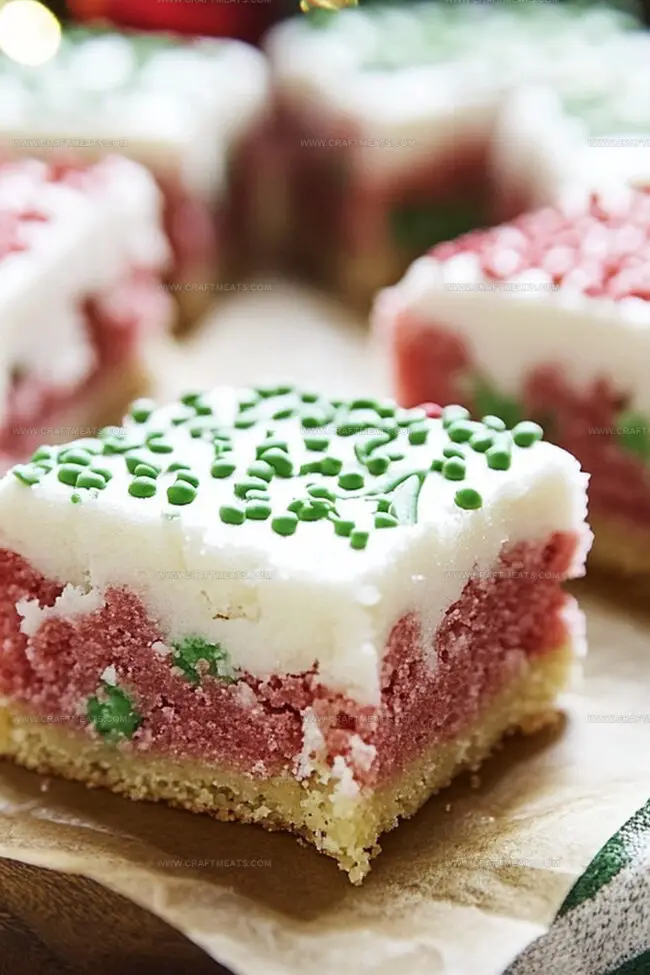
Once the bars cool completely, spread the frosting like a blanket of snow. Sprinkle holiday cheer with colorful decorations that catch the light and make everyone smile.
Slice into squares and watch faces light up with the first delicious bite of these merry, magical cookie bars.
Christmas Sugar Cookie Bars: Tips And Twists
Christmas Sugar Cookie Bars Serving Notes
How To Store Christmas Sugar Cookie Bars
Print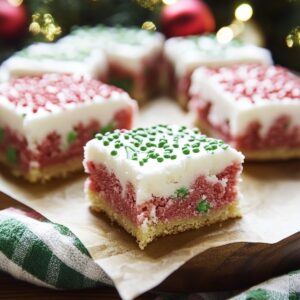
Festive Christmas Sugar Cookie Bars
- Total Time: 35 minutes
- Yield: 11 1x
Description
These delightful Christmas sugar cookie bars blend festive cheer with classic sweetness. Sugary layers and colorful frosting invite holiday celebrations while delivering comfort and joy to your gathering.
Ingredients
- 1 ½ cups (190 g) all-purpose flour
- 1 cup (200 g) granulated sugar
- ½ cup (115 g) unsalted butter, softened (for cookie base)
- 1 large egg
- ½ teaspoon baking powder
- ¼ teaspoon salt
- 1 tsp vanilla extract
- ½ tsp almond extract (optional)
- ½ cup (115 g) unsalted butter, softened (for frosting)
- 2 cups (250 g) powdered sugar
- 1 tsp vanilla extract
- 2–3 tbsps milk
- Food coloring (red, green, or holiday colors)
- Holiday sprinkles
Instructions
- Preparation: Line a 9×9-inch pan with parchment paper, ensuring complete coverage with slight overhang for effortless removal.
- Creaming: Blend softened butter and sugar in a mixing bowl until achieving a light, airy texture with pale coloration.
- Wet Ingredients: Integrate egg, vanilla, and almond extracts into the butter mixture, whisking until completely smooth and homogeneous.
- Dry Ingredients: Combine flour, baking powder, and salt, sifting to eliminate potential clumps and guarantee uniform distribution.
- Dough Formation: Gently fold dry ingredients into wet mixture, mixing minimally to preserve a delicate crumb structure, then transfer to prepared pan and smooth surface evenly.
- Baking: Place pan in a preheated oven at 350F (175C), baking 18-20 minutes until edges turn a delicate golden hue, signaling optimal doneness.
- Cooling: Allow cookie base to cool completely within the pan, preventing potential structural compromise.
- Frosting Preparation: Whip softened butter until creamy, gradually incorporating powdered sugar and vanilla extract to create a luxurious frosting base.
- Frosting Refinement: Adjust consistency by adding milk incrementally, achieving a spreadable yet stable texture. Optional: Introduce festive food coloring for holiday-inspired hues.
- Finishing: Once cooled, generously spread frosting across the surface using an offset spatula, then embellish with holiday sprinkles, pressing gently to secure decorative elements.
- Serving: Utilize parchment paper overhang to lift the entire cookie slab, then slice into symmetrical portions for elegant presentation.
Notes
- Prevent Overmixing: Stir dry ingredients into wet mixture gently to maintain a tender, soft texture and avoid tough, dense cookie bars.
- Temperature Control: Ensure butter is softened at room temperature for smooth creaming and even mixing, which creates a perfect cookie base.
- Check Doneness Carefully: Watch for light golden edges as the key indicator of baking completion, preventing overbaking that leads to dry, crumbly bars.
- Frosting Consistency Hack: Add milk gradually when preparing frosting to control spreadability and achieve a smooth, ideal piping or spreading texture.
- Prep Time: 15 minutes
- Cook Time: 20 minutes
- Category: Desserts, Snacks
- Method: Baking
- Cuisine: American
Nutrition
- Serving Size: 11
- Calories: 300
- Sugar: 25 g
- Sodium: 120 mg
- Fat: 15 g
- Saturated Fat: 9 g
- Unsaturated Fat: 6 g
- Trans Fat: 0 g
- Carbohydrates: 40 g
- Fiber: 0 g
- Protein: 2 g
- Cholesterol: 30 mg
Liam O’Sullivan
Founder & Culinary Content Creator
Expertise
Recipe Development, Traditional Irish and European Cuisines, Food Styling and Photography, Culinary Education
Education
Dublin Institute of Technology (DIT) – School of Culinary Arts and Food Technology
Ballymaloe Cookery School
Isabella brings a global spark to the Craft Meats table. Born in Florence and trained at the Apicius International School of Hospitality, she blends classic Italian flavor with modern writing that’s easy to follow and hard to forget.
Her additional training at the Italian Chef Academy fueled her love for well-crafted dishes, especially ones that spotlight beautiful cuts of meat.
She’s a food writer with heart, and a deep love for storytelling through single recipes. Her goal? To help you cook with more confidence and a little more joy, no matter where you start.