
Decorated Christmas Tree Cookies Recipe for Cookie Swaps
Sweet aromas of cinnamon and sugar dance through kitchens during the holiday season, promising festive christmas tree cookies that sparkle with winter magic.
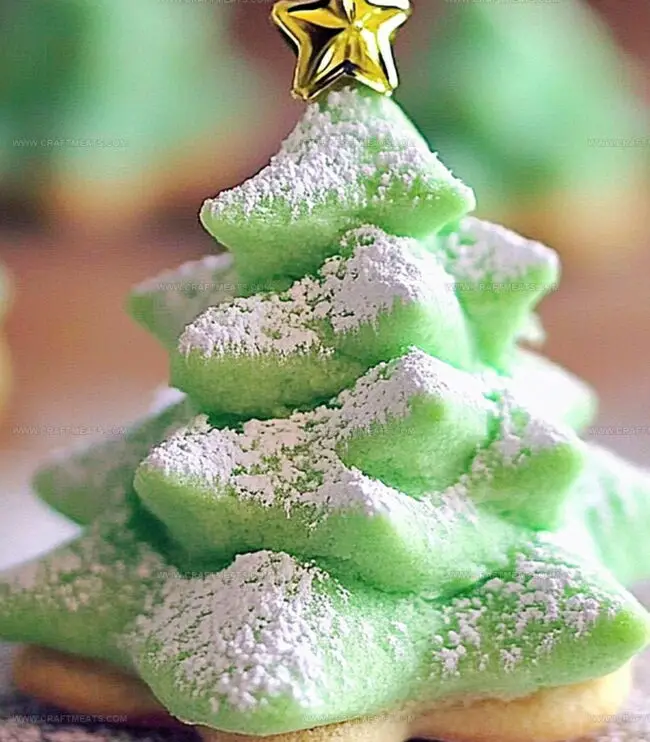
Delicate sugar-dusted edges and crisp buttery textures make these treats a delightful centerpiece for seasonal celebrations.
Bakers of all skill levels can create these charming confections with simple ingredients and easy techniques.
Festive green icing and decorative sprinkles turn ordinary cookies into edible works of art.
Each carefully crafted cookie brings a touch of whimsy and joy to holiday gatherings.
Decorating these treats becomes a cherished moment of connection and creativity.
You’ll love sharing these delightful christmas tree cookies that capture the spirit of the season.
Quick Recipe Overview

Christmas Tree Cookies Ingredient Rundown
For Dry Ingredients:For Wet and Binding Ingredients:For Flavor Enhancers:Tools To Bake And Decorate Christmas Tree Cookies
Easy Steps To Make Christmas Tree Cookies Look Bright
Combine dry ingredients in a mixing bowl, creating a smooth, even mixture that will become the backbone of your festive treats.
Cream butter and sugar until they transform into a cloud-like, pale yellow mixture that promises delightful sweetness.
Introduce eggs and aromatic extracts, gently folding them into the butter mixture. Slowly incorporate the dry ingredients, mixing with a delicate touch to maintain the dough’s tender texture.
Wrap the dough in plastic and let it rest in the refrigerator. This pause allows the flavors to mingle and the texture to become perfectly smooth.
On a lightly floured surface, roll out the chilled dough. Use festive Christmas tree cookie cutters to create whimsical shapes that capture the holiday spirit.
Place the cut-out cookies on a baking sheet, allowing space between each tree. Bake until the edges turn a gentle golden brown, filling your kitchen with a warm, sweet aroma.
Transfer the cookies to a wire rack, letting them cool completely. They’ll crisp up and become the perfect canvas for decorating with icing, sprinkles, or a dusting of powdered sugar.
Creative Decorating Ideas For Christmas Tree Cookies
How To Serve Christmas Tree Cookies At A Cookie Swap
Storage Tips For Christmas Tree Cookies With Icing
Print
Festive Christmas Tree Cookies Recipe
- Total Time: 2 hours 10 minutes
- Yield: 23 1x
Description
Festive Christmas tree cookies bring holiday cheer with delightful peppermint and chocolate flavors. Decorated sugar cookies shaped like evergreen trees promise sweet memories for family gatherings.
Ingredients
- 1 large egg
- 1 cup (225 g) unsalted butter, softened
- 1 cup (200 g) granulated sugar
- 2 ¾ cups (350 g) all-purpose flour
- 1 teaspoon baking powder
- ¼ teaspoon salt
- 1 ½ tsps vanilla extract
- ½ tsp almond extract (optional)
- 3 cups (375 g) powdered sugar, sifted
- 2 large egg whites or 3 tbsps meringue powder + 6 tbsps water
- 1 tsp vanilla extract
- Green gel food coloring
- Assorted sprinkles, edible glitter, or nonpareils
- Star-shaped candies or sprinkles for tree toppers
Instructions
- Dry Ingredient Preparation: Whisk flour, baking powder, and salt in a mixing bowl to create a uniform dry base with evenly distributed ingredients.
- Butter Mixture: Cream butter and sugar using an electric mixer until the mixture becomes light, fluffy, and significantly increased in volume.
- Wet Ingredient Integration: Blend egg and vanilla and almond extracts into the butter mixture, ensuring a smooth and consistent incorporation.
- Dough Formation: Gently fold dry ingredients into the wet mixture, mixing until a uniform dough develops without excessive manipulation.
- Dough Chilling: Encase the dough in plastic wrap and refrigerate, allowing flavor development and structural firmness to occur.
- Baking Preparation: Preheat the oven and dust a work surface with flour for precise dough rolling.
- Cookie Shaping: Roll out chilled dough and cut into festive Christmas tree shapes using a specialized cookie cutter, creating uniform holiday-inspired cookies.
- Baking Process: Arrange cookie cutouts on a lined baking sheet, maintaining adequate spacing to promote even baking and prevent potential merging.
- Cooling and Finishing: Bake until edges achieve a golden-brown tone, then transfer to a wire rack for complete cooling before adorning or serving.
Notes
- Chill Dough Strategically: Refrigerate dough for at least 1 hour to prevent spreading and maintain crisp cookie edges during baking.
- Roll Evenly: Use consistent rolling pin pressure to create uniform cookie thickness, ensuring balanced baking and professional-looking results.
- Prevent Sticking: Lightly flour work surface and cookie cutter to easily release delicate Christmas tree shapes without tearing.
- Decorate Wisely: Wait until cookies are completely cooled before adding frosting or decorations to prevent melting and maintain intricate design details.
- Prep Time: 30 minutes
- Cook Time: 40 minutes
- Category: Desserts, Snacks
- Method: Mixing
- Cuisine: American
Nutrition
- Serving Size: 23
- Calories: 210
- Sugar: 16 g
- Sodium: 50 mg
- Fat: 10 g
- Saturated Fat: 6 g
- Unsaturated Fat: 4 g
- Trans Fat: 0 g
- Carbohydrates: 27 g
- Fiber: 0 g
- Protein: 2 g
- Cholesterol: 30 mg
Liam O’Sullivan
Founder & Culinary Content Creator
Expertise
Recipe Development, Traditional Irish and European Cuisines, Food Styling and Photography, Culinary Education
Education
Dublin Institute of Technology (DIT) – School of Culinary Arts and Food Technology
Ballymaloe Cookery School
Isabella brings a global spark to the Craft Meats table. Born in Florence and trained at the Apicius International School of Hospitality, she blends classic Italian flavor with modern writing that’s easy to follow and hard to forget.
Her additional training at the Italian Chef Academy fueled her love for well-crafted dishes, especially ones that spotlight beautiful cuts of meat.
She’s a food writer with heart, and a deep love for storytelling through single recipes. Her goal? To help you cook with more confidence and a little more joy, no matter where you start.