
Chocolate Chip Ice Cream Pops Recipe for Sweet Smiles
Creamy, dreamy chocolate chip ice cream pops are the ultimate summer treat that will instantly cool you down.
These delightful frozen delicacies combine the rich sweetness of classic chocolate chip ice cream with the fun, portable nature of a pop.
Crafting these treats requires minimal effort and delivers maximum satisfaction.
Each bite promises a delicious blend of smooth, cold ice cream and decadent chocolate chips.
The recipe works perfectly for lazy afternoons or spontaneous dessert cravings.
Kids and adults alike will fall in love with these refreshing, chocolatey frozen delights.
Dive into this simple recipe and transform your ordinary dessert experience into something extraordinary.
Quick Recipe Overview
All The Goods In Creamy Chicken and Rice Casserole
For Ice Cream Base:For Chocolate Shell:For Topping Garnish:Helpful Tools For Creamy Chicken and Rice Casserole
Easy Cooking Creamy Chicken and Rice Casserole
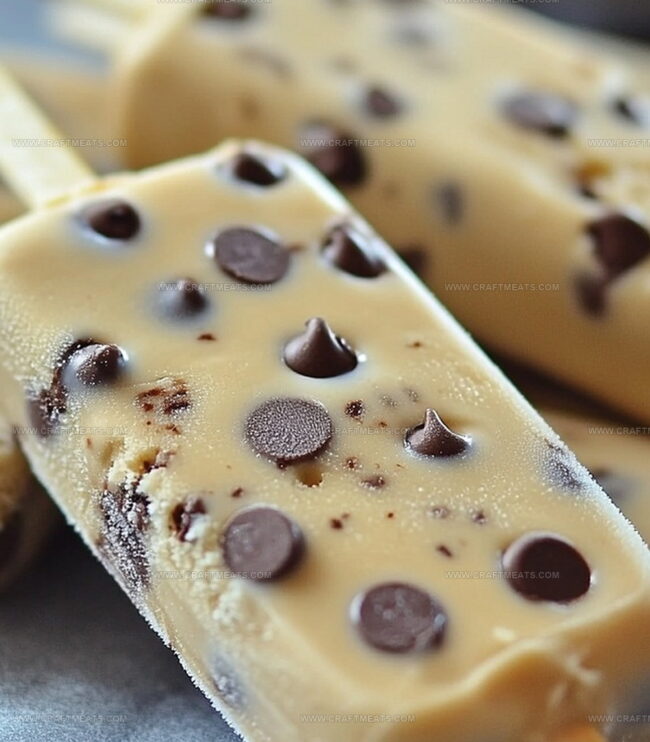
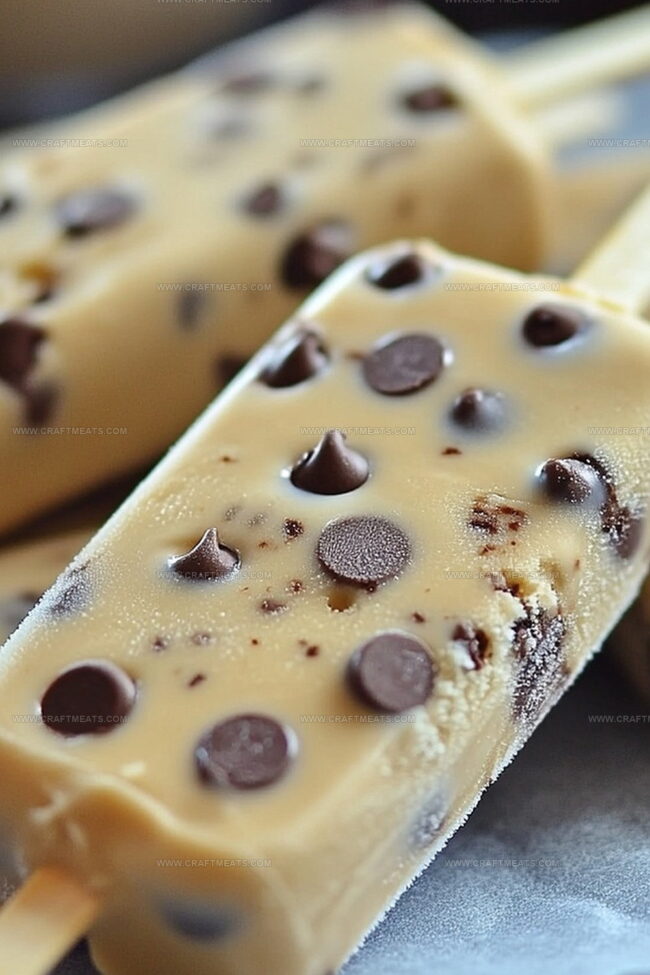
Grab vanilla ice cream and let it soften at room temperature. Gently fold mini chocolate chips throughout the smooth surface, creating delightful scattered pockets of chocolatey goodness.
Pour the dreamy mixture into popsicle molds, making sure each mold gets an even distribution. Slide in popsicle sticks and place the entire tray into the freezer, allowing the magic to happen for several hours.
Create a luxurious chocolate shell by melting chocolate with a touch of coconut oil. Warm slowly, stirring until the mixture transforms into a silky, glossy liquid that begs to be drizzled.
Carefully release frozen pops from their molds. Plunge each one into the molten chocolate, letting excess drip away. Quickly sprinkle with fun toppings before the chocolate sets into a crisp shell.
Place decorated pops on a chilled tray and return to the freezer for a quick final set. When ready, serve these cool treats and watch faces light up with excitement.
Smart Tips For Creamy Chicken and Rice Casserole
How To Serve Creamy Chicken and Rice Casserole Right
Best Way To Save Creamy Chicken and Rice Casserole
Print
Frozen Chocolate Chip Ice Cream Pops Recipe
- Total Time: 6 hours 15 minutes
- Yield: 5 1x
Description
Creamy chocolate chip ice cream pops deliver a cool summer treat with nostalgic charm. Homemade goodness combines simple ingredients for a delightful dessert you’ll savor with pure enjoyment.
Ingredients
- 2 cups (480 ml) vanilla ice cream, softened
- 1 cup (200 g) semi-sweet or dark chocolate chips
- ½ cup (90 g) mini chocolate chips
- 2 tbsps (30 ml) coconut oil
- Sprinkles
- Crushed nuts
- Shredded coconut
Instructions
- Preparation: Soften vanilla ice cream and fold in mini chocolate chips, ensuring even chocolate distribution throughout the mixture.
- Molding: Pack the ice cream blend into popsicle molds, inserting sticks securely. Freeze for 4-6 hours until completely solid.
- Chocolate Coating: Melt chocolate chips with coconut oil in a microwave-safe bowl, stirring periodically to create a smooth, glossy chocolate shell. Allow mixture to cool slightly to prevent ice cream melting.
- Dipping and Decorating: Remove frozen pops from molds with a gentle twist. Dunk each pop into the chocolate coating, letting excess drip off. Quickly sprinkle with desired toppings before chocolate hardens.
- Final Freezing: Place coated pops on a parchment-lined tray. Return to freezer for 10-15 minutes to set the chocolate shell completely. Store in freezer or serve immediately for a cool, decadent treat.
Notes
- Soften Ice Cream Strategically: Allow vanilla ice cream to sit at room temperature for 5-10 minutes to achieve the perfect spreadable consistency without becoming too liquid.
- Prevent Ice Crystals: Mix chocolate chips gently and avoid overstirring to maintain a smooth texture and prevent unwanted ice crystallization in the final product.
- Chocolate Coating Pro Tip: Use room temperature chocolate and maintain a precise melting temperature (around 90°F) to create a quick-hardening, glossy shell that won’t immediately melt the ice cream.
- Customize for Dietary Needs: Substitute dairy-free ice cream and vegan chocolate chips for a plant-based version, ensuring those with dietary restrictions can enjoy these delightful frozen treats.
- Prep Time: 15 minutes
- Cook Time: 4-6 hours
- Category: Desserts, Snacks
- Method: Mixing
- Cuisine: American
Nutrition
- Serving Size: 5
- Calories: 310
- Sugar: 27 g
- Sodium: 60 mg
- Fat: 18 g
- Saturated Fat: 11 g
- Unsaturated Fat: 7 g
- Trans Fat: 0 g
- Carbohydrates: 34 g
- Fiber: 1 g
- Protein: 3 g
- Cholesterol: 30 mg
Liam O’Sullivan
Founder & Culinary Content Creator
Expertise
Recipe Development, Traditional Irish and European Cuisines, Food Styling and Photography, Culinary Education
Education
Dublin Institute of Technology (DIT) – School of Culinary Arts and Food Technology
Ballymaloe Cookery School
Isabella brings a global spark to the Craft Meats table. Born in Florence and trained at the Apicius International School of Hospitality, she blends classic Italian flavor with modern writing that’s easy to follow and hard to forget.
Her additional training at the Italian Chef Academy fueled her love for well-crafted dishes, especially ones that spotlight beautiful cuts of meat.
She’s a food writer with heart, and a deep love for storytelling through single recipes. Her goal? To help you cook with more confidence and a little more joy, no matter where you start.