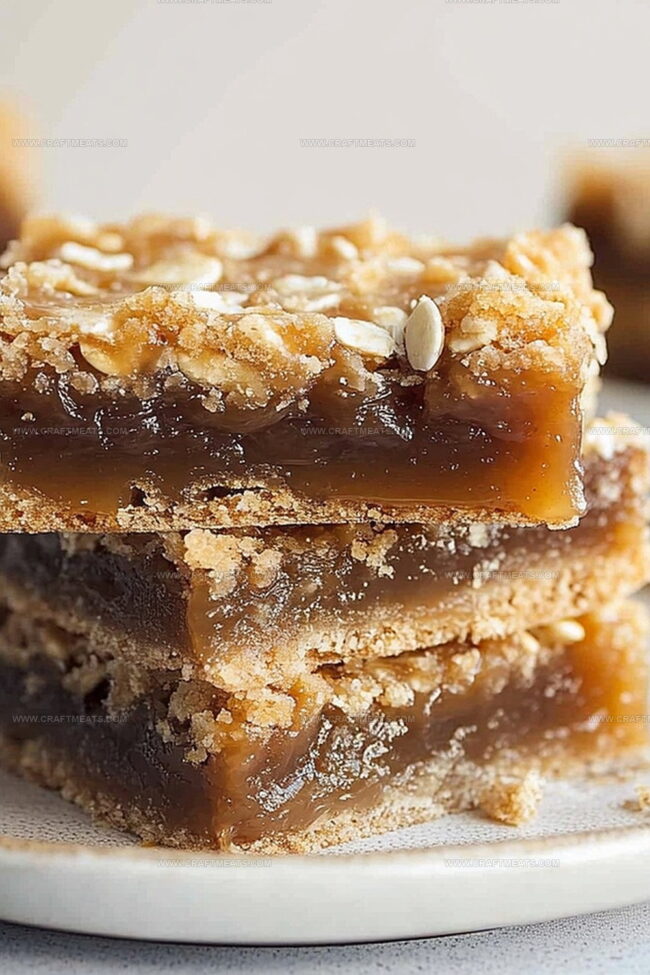
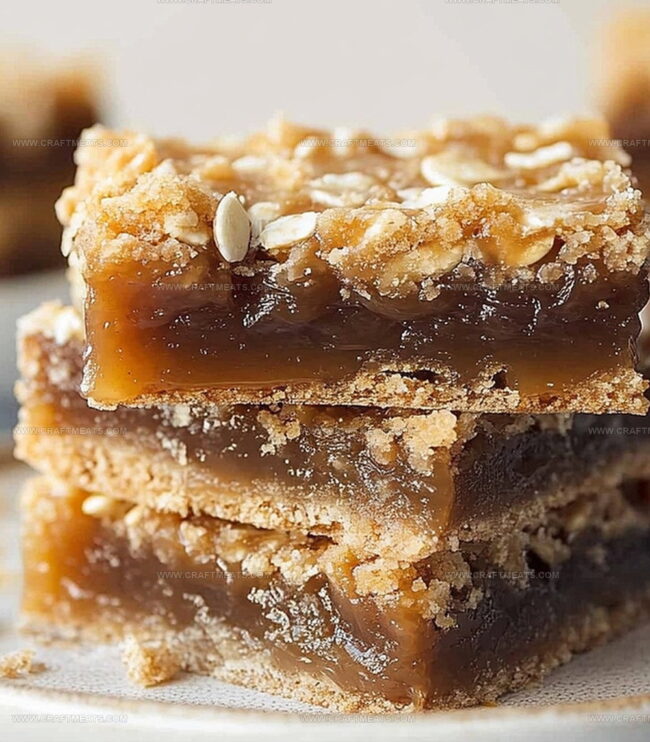
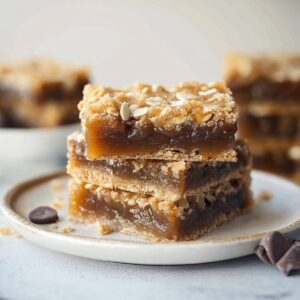
Chocolate and caramel lovers rejoice over these decadent caramelitas that blend rich, gooey layers into pure dessert magic.
Buttery oat crusts create the perfect foundation for these irresistible bars.
Melted chocolate and soft caramel sauce weave through each delightful bite, creating a symphony of sweet indulgence.
The simple yet stunning caramelitas recipe promises a dessert that disappears faster than you can slice them.
Homemade treats like these transform ordinary moments into delectable celebrations.
Every crumbly, sweet morsel delivers a luxurious experience that will have everyone asking for seconds.
Prepare to fall in love with this irresistible dessert that speaks directly to your sweet tooth.
Quick Recipe Overview
Prep Time: 15 minutes
Cook Time: 25-30 minutes
Total Time: 45 minutes
Calories: 325 kcal
Servings: 15
Ingredients That Make Caramelitas So Good
For Base And Crumble:
All-Purpose Flour: Creates the perfect tender and crispy foundation for the bars.
Rolled Oats: Adds delightful texture and wholesome nutty flavor to the crumble.
Brown Sugar: Provides rich, deep sweetness and helps bind the crumble together.
Unsalted Butter: Delivers rich, creamy moisture and helps crisp the base.
For Caramel Layer:
Soft Caramel Candies: Melt into a luxurious, stretchy layer with incredible sweet intensity.
Heavy Cream: Smooths out caramel, creating silky, glossy consistency.
For Chocolate Layer:
Semi-Sweet Chocolate Chips: Offer deep, robust chocolate flavor that complements the caramel perfectly.
Sea Salt: Enhances overall flavor profile, balancing sweetness with a subtle savory touch.
Tools You Need For Baking Caramelitas
9×13-inch baking pan: Essential for creating the perfect caramelitas base and ensuring even baking.
Parchment paper: Helps with easy removal and prevents sticking, making cleanup a breeze.
Measuring cups and spoons: Precise measurements guarantee the right balance of ingredients.
Mixing bowls: Needed for combining dry and wet ingredients smoothly.
Spatula or wooden spoon: Great for mixing and spreading the caramel and oat layers evenly.
Oven mitts: Protect your hands when handling hot baking pans.
Step-By-Step Instructions For Caramelitas
Oven Preparation Warm up your oven to a cozy 350 degrees, creating the perfect baking environment for these delectable treats. Grab a rectangular baking pan and give it a quick spray of cooking oil, then tuck a piece of parchment paper inside, letting the edges peek out for easy lifting later.
Crust Creation Combine your oats, flour, and brown sugar in a mixing bowl, blending them into a crumbly mixture that will form the foundational layer of your bars. Drizzle in melted butter and mix until the ingredients transform into a rich, cohesive dough that will hold everything together.
Base Layer Press the crumbly mixture firmly into the prepared pan, creating an even, compact foundation that will support the upcoming layers of deliciousness. Slide the pan into the preheated oven and bake until the edges turn a lovely golden brown, signaling the perfect level of toasty goodness.
Chocolate and Caramel Magic Sprinkle chocolate chips across the warm, freshly baked crust, creating a tempting blanket of chocolatey potential. Follow this with a generous pour of smooth caramel sauce, allowing it to seep into every delightful crevice.
Final Bake Return the pan to the oven for a few more minutes, letting the chocolate melt and the caramel bubble slightly, creating a mesmerizing swirl of sweet, gooey perfection.
Cooling and Cutting Remove the pan from the oven and let it rest, allowing the layers to set and bond into a harmonious treat. Once completely cooled, lift the bars out using the parchment paper and slice into tantalizing squares ready to be devoured.
Top Tips To Customize Caramelitas Recipe
Baking Perfection Secrets: Chill the caramel-oat mixture in the refrigerator for 15-20 minutes before baking to help maintain a crisp, distinct layer and prevent excessive spreading.
Texture Tip: Use old-fashioned rolled oats instead of quick oats to ensure a heartier, more substantial crust with better structural integrity and a satisfying chew.
Dietary Swap: For a gluten-free version, replace all-purpose flour with a reliable gluten-free flour blend and use certified gluten-free oats to accommodate those with wheat sensitivities.
Chocolate Lover’s Twist: Experiment with different chocolate varieties like dark chocolate, milk chocolate, or even white chocolate to create unique flavor profiles that match your personal taste preferences.
Make-Ahead Magic: These caramelitas can be prepared a day in advance and stored in an airtight container at room temperature, allowing the flavors to meld and intensify for an even more delicious treat.
Fun Ways To Serve Caramelitas Anytime
Chocolate Lover’s Dream: Serve these gooey caramelitas with a scoop of vanilla bean ice cream for a decadent dessert that melts in your mouth, creating a perfect balance of warm, rich bars and cool, creamy sweetness.
Fancy Drizzle Delight: Elevate the presentation by drizzling melted dark chocolate or caramel sauce over the top of the cooled bars, adding an elegant touch that makes each bite even more irresistible.
Picnic Perfect Treat: Cut the caramelitas into neat squares and pack them in a portable container for outdoor gatherings, potlucks, or school lunches – they’re sturdy enough to travel and sure to impress everyone.
Coffee Companion: Pair these bars with a hot espresso or cappuccino, letting the rich caramel and chocolate complement the robust coffee flavors for a sophisticated afternoon indulgence.
Store Caramelitas So They Stay Tasty
Fridge Fresh Technique: Store these gooey caramelitas in an airtight container in the refrigerator for up to 5 days, keeping them cool and preventing the caramel from becoming too sticky.
Make-Ahead Magic: Prepare the entire batch and wrap tightly in plastic wrap, then aluminum foil, to freeze for up to 3 weeks without losing their delicious texture and flavor.
Quick Serving Tip: Let refrigerated caramelitas sit at room temperature for 15-20 minutes before enjoying to restore their soft, melt-in-your-mouth consistency.
Smart Slice Strategy: Cut into individual squares before storing, making it easier to grab a quick treat without disrupting the entire batch’s structure.
Chocolate caramelitas bring together rich layers of buttery oats, melted chocolate, and silky caramel in one irresistible dessert. Midwestern bakers have perfected this sweet treat that combines simple ingredients into a mouthwatering bar you cannot resist.
Ingredients
Scale
1 cup (225 g/8 oz) unsalted butter, melted
1 ½ cups (190 g/6.7 oz) all-purpose flour
1 ½ cups (120 g/4.2 oz) old-fashioned rolled oats
1 cup (200 g/7 oz) packed brown sugar
1 ½ cups (265 g/9.3 oz) semi-sweet chocolate chips
1 cup (300 g/10.6 oz) caramel sauce or dulce de leche
1 tsp vanilla extract
3 tbsps (45 ml/1.5 fl oz) heavy cream
1 tsp baking soda
¼ tsp salt
½ cup (75 g/2.6 oz) chopped pecans or walnuts (optional)
Instructions
Preparation: Preheat oven to 350°F (175°C) and line a baking pan with parchment paper, allowing overhang for easy removal.
Crust Formation: Press two-thirds of the oat mixture firmly and evenly into the prepared pan, creating a solid foundation for the dessert.
Initial Baking: Bake the crust for 10 minutes until it develops a light golden color, establishing a crisp base for the subsequent layers.
Chocolate and Caramel Layer: Distribute chocolate chips evenly across the partially baked crust, then drizzle caramel sauce to cover the entire chocolate surface, ensuring complete and consistent coverage.
Topping Application: Sprinkle the remaining oat mixture delicately over the caramel and chocolate layer, creating a rustic, textured top.
Final Baking: Return the pan to the oven and bake for 15-18 minutes until the top achieves a golden-brown complexion and the layers meld together.
Cooling and Setting: Allow the caramelitas to cool completely in the pan, enabling the layers to set and flavors to harmonize.
Serving Preparation: Lift the entire dessert from the pan using the parchment paper overhang and transfer to a cutting surface.
Portioning: Slice into precise squares, revealing the intricate layers of oats, chocolate, and caramel, ready to be enjoyed.
Notes
Adjust Oat Mixture Consistency: Ensure the crumbly oat mixture is slightly damp and holds together when pressed, preventing a dry or crumbly final texture that might compromise the bar’s structure.
Caramel Sauce Selection: Choose a thick, high-quality caramel sauce or homemade caramel to prevent excessive liquid seepage, maintaining the bars’ structural integrity and preventing soggy layers.
Chocolate Chip Distribution: Spread chocolate chips evenly across the initial crust layer to guarantee consistent chocolate flavor in every bite, avoiding clumpy or sparse chocolate coverage.
Cooling is Crucial: Allow caramelitas to cool completely at room temperature before cutting, enabling the layers to set properly and preventing messy, crumbling squares that fall apart when handled.
Recipe Development, Traditional Irish and European Cuisines, Food Styling and Photography, Culinary Education
Education
Dublin Institute of Technology (DIT) – School of Culinary Arts and Food Technology
Degree: Bachelor of Arts in Culinary Arts
Focus: Comprehensive training in classical and modern cooking techniques, kitchen management, and menu development.
Ballymaloe Cookery School
Program: 12-Week Certificate Course
Focus: Intensive, hands-on experience emphasizing farm-to-table cooking and sustainable practices.
Isabella brings a global spark to the Craft Meats table. Born in Florence and trained at the Apicius International School of Hospitality, she blends classic Italian flavor with modern writing that’s easy to follow and hard to forget.
Her additional training at the Italian Chef Academy fueled her love for well-crafted dishes, especially ones that spotlight beautiful cuts of meat.
She’s a food writer with heart, and a deep love for storytelling through single recipes. Her goal? To help you cook with more confidence and a little more joy, no matter where you start.

Liam O’Sullivan
Founder & Culinary Content Creator
Expertise
Recipe Development, Traditional Irish and European Cuisines, Food Styling and Photography, Culinary Education
Education
Dublin Institute of Technology (DIT) – School of Culinary Arts and Food Technology
Ballymaloe Cookery School
Isabella brings a global spark to the Craft Meats table. Born in Florence and trained at the Apicius International School of Hospitality, she blends classic Italian flavor with modern writing that’s easy to follow and hard to forget.
Her additional training at the Italian Chef Academy fueled her love for well-crafted dishes, especially ones that spotlight beautiful cuts of meat.
She’s a food writer with heart, and a deep love for storytelling through single recipes. Her goal? To help you cook with more confidence and a little more joy, no matter where you start.