
Golden Frontier Cowboy Cookies Recipe: Rustic Sweet Bites
Crisp autumn winds and sweet memories collide in this irresistible cowboy cookies recipe that promises pure comfort in every bite.
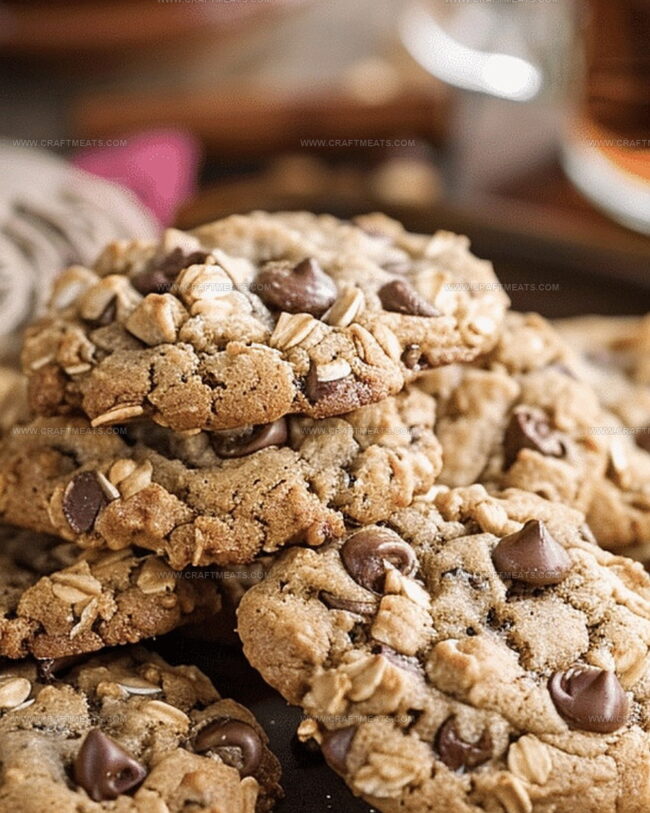
Packed with hearty oats, rich chocolate chips, and a hint of crunch, these cookies capture the rugged spirit of the American Southwest.
Generations of home bakers have cherished this classic treat that blends simple ingredients into something extraordinary.
Warm from the oven, they deliver a perfect balance of chewy texture and deep, satisfying flavors.
Pecans add a delightful nutty undertone that elevates these cookies from ordinary to exceptional.
Each batch tells a story of home, warmth, and culinary tradition.
Dive into this recipe and let your kitchen fill with the most inviting aroma of freshly baked love.
Quick Recipe Overview
Everything Needed For Cowboy Cookies
For Wet Ingredients:For Dry Ingredients:For Mix-Ins:Tools Used For Cowboy Cookies
How To Make Cowboy Cookies

Mix softened butter with sugars in a spacious bowl until the mixture turns fluffy and light, creating a creamy base that sets the stage for delicious cookies.
Gently incorporate eggs and vanilla, stirring with smooth, consistent movements to ensure a silky, well-integrated batter.
Whisk flour, baking soda, cinnamon, and salt together in a separate container, creating a harmonious blend of dry components that will give the cookies their perfect texture.
Slowly fold the dry ingredients into the wet mixture, stirring until just combined. Add oats, chocolate chips, coconut, and nuts, mixing everything with a gentle touch to distribute ingredients evenly.
Warm the oven to 350F and line baking sheets with parchment. Roll dough into small balls and place them with plenty of space between each. Bake until edges turn golden and centers look slightly soft, about 10-12 minutes.
Allow cookies to rest on the baking sheet for a few minutes, then transfer to a cooling rack, letting them settle into their delightful, chewy form.
Tips And Twists For Cowboy Cookies
How To Serve Cowboy Cookies
How To Store And Plan Cowboy Cookies
Print
Hearty Cowboy Cookies Recipe
- Total Time: 27 minutes
- Yield: 23 1x
Description
Hearty cowboy cookies deliver a rustic Texas-style treat packed with chocolate chips, oats, and pecans. Crisp edges and chewy centers make these cookies a delightful snack you’ll want to share with friends and family.
Ingredients
- 2 large eggs
- 1 cup (230 g / 8 oz) unsalted butter, softened
- 2 cups (250 g / 8.8 oz) all-purpose flour
- 2 cups (180 g / 6.3 oz) old-fashioned oats
- 1 cup (200 g / 7 oz) granulated sugar
- 1 cup (220 g / 7.7 oz) brown sugar, packed
- 1 cup (170 g / 6 oz) semisweet chocolate chips
- ¾ cup (75 g / 2.6 oz) shredded sweetened coconut
- ¾ cup (90 g / 3.2 oz) chopped pecans or walnuts
- 2 tsps vanilla extract
- 1 tsp baking soda
- ½ tsp baking powder
- ½ tsp ground cinnamon
- ½ tsp salt
Instructions
- Mix Base: Cream butter and sugars until fluffy and pale, blending eggs and vanilla extract into the mixture with smooth, consistent motions to develop rich flavor complexity.
- Combine Dry Elements: Thoroughly integrate flour, baking soda, cinnamon, and salt, ensuring even distribution of dry ingredients to create a harmonious foundational mixture.
- Merge Ingredients: Delicately fold dry components into butter mixture, incorporating rolled oats, chocolate chips, coconut, and nuts with gentle strokes to maintain dough’s airy texture and prevent dense compaction.
- Shape Cookies: Form uniform tablespoon-sized dough balls, positioning them on parchment-lined baking sheets with ample spacing to accommodate natural spreading during baking.
- Bake and Cool: Roast cookies in a 350F oven for 10-12 minutes until edges turn golden brown, allowing them to rest briefly on baking sheet before transferring to a wire rack for complete cooling and texture setting.
Notes
- Butter Softening Technique: Ensure butter is at room temperature but not melting to achieve the perfect creamy base for your cookies.
- Mixing Mastery: Avoid overmixing the dough after adding dry ingredients to prevent tough, dense cookies with a rubbery texture.
- Ingredient Distribution: Gently fold mix-ins like chocolate chips and nuts to prevent them from sinking to the bottom of the cookie.
- Spacing Strategy: Leave ample room between cookie dough balls on the baking sheet to allow for natural spreading and prevent cookies from merging.
- Prep Time: 15 minutes
- Cook Time: 12 minutes
- Category: Snacks, Desserts
- Method: Baking
- Cuisine: American
Nutrition
- Serving Size: 23
- Calories: 250
- Sugar: 17 g
- Sodium: 150 mg
- Fat: 12 g
- Saturated Fat: 7 g
- Unsaturated Fat: 4 g
- Trans Fat: 0 g
- Carbohydrates: 34 g
- Fiber: 2 g
- Protein: 3 g
- Cholesterol: 30 mg
Liam O’Sullivan
Founder & Culinary Content Creator
Expertise
Recipe Development, Traditional Irish and European Cuisines, Food Styling and Photography, Culinary Education
Education
Dublin Institute of Technology (DIT) – School of Culinary Arts and Food Technology
Ballymaloe Cookery School
Isabella brings a global spark to the Craft Meats table. Born in Florence and trained at the Apicius International School of Hospitality, she blends classic Italian flavor with modern writing that’s easy to follow and hard to forget.
Her additional training at the Italian Chef Academy fueled her love for well-crafted dishes, especially ones that spotlight beautiful cuts of meat.
She’s a food writer with heart, and a deep love for storytelling through single recipes. Her goal? To help you cook with more confidence and a little more joy, no matter where you start.