
Oreo Cake Balls Recipe to Please Every Treat Lover
Bite-sized bliss meets creamy chocolate in these decadent oreo cake balls that promise pure indulgence.
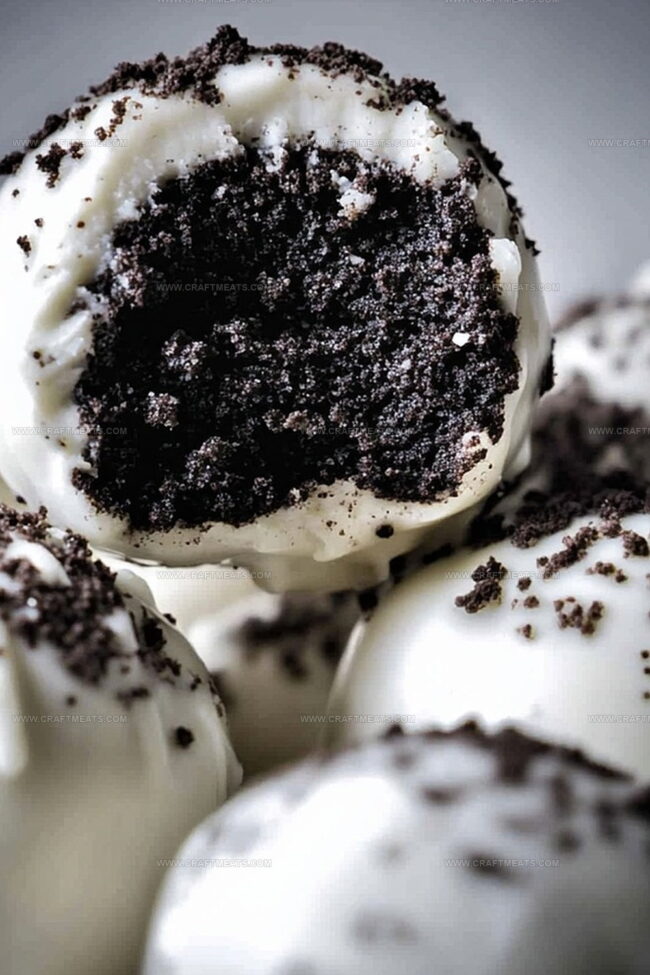
Crushed oreo cookies blend seamlessly with rich cream cheese, creating a melt-in-your-mouth sensation.
Each delightful morsel delivers a perfect balance of sweet and crumbly textures.
No baking required means these treats come together quickly and effortlessly.
Chocolate coating adds a luxurious finish that makes these cake balls irresistible.
Serve them at parties, gatherings, or enjoy as a personal treat that sparks instant joy.
You’ll fall in love with this simple yet impressive dessert that turns ordinary moments into delicious memories.
Quick Recipe Overview
Kitchen Musts For Pineapple Upside-Down Sugar Cookies
For Base and Binding:For Coating and Decoration:For Optional Enhancement:Prep Tools For Pineapple Upside-Down Sugar Cookies
Bake Your Pineapple Upside-Down Sugar Cookies Like This
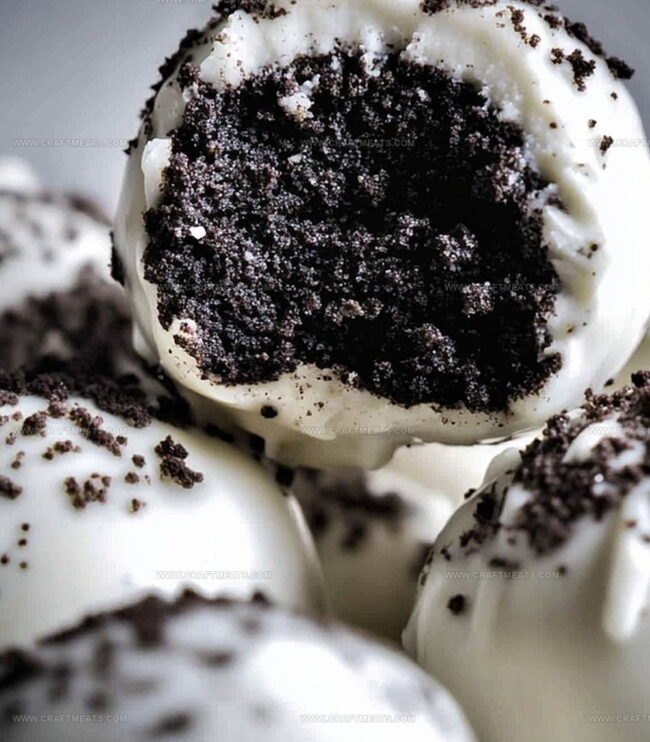
Crush Oreo cookies into fine crumbs using a food processor or by placing them in a sealed bag and rolling with a rolling pin until completely broken down.
Blend crushed cookies with softened cream cheese, mixing thoroughly until the texture becomes smooth and moldable like clay.
Gently roll the mixture into small round shapes, creating uniform bite-sized treats. Place these delicate spheres on a parchment-lined tray and chill in the refrigerator to help them firm up.
Melt chocolate in a microwave, stirring carefully to create a silky liquid. Carefully dunk each chilled ball into the warm chocolate, allowing excess to drip away for a perfect coating.
Add personal touches by sprinkling decorative elements like colorful sprinkles or additional cookie crumbs while the chocolate coating remains wet and glossy.
Refrigerate the completed cake balls until the chocolate sets completely. Serve these delightful treats chilled or at room temperature for a crowd-pleasing dessert.
Fun Tricks For Pineapple Upside-Down Sugar Cookies
Serve Up Pineapple Upside-Down Sugar Cookies With Style
Keep Pineapple Upside-Down Sugar Cookies Tasty Later
Print
Heavenly Oreo Cake Balls Recipe
- Total Time: 1 hour
- Yield: 35 1x
Description
Delightful Oreo cake balls blend creamy cookies and rich chocolate for an irresistible treat. Chocolate lovers will savor each bite of these easy-to-make, no-bake dessert bites that disappear quickly at parties or gatherings.
Ingredients
- 8 oz (225 g) cream cheese, softened
- 1 package (36 cookies, about 300 g) Oreo cookies
- 7 oz (200 g) white or semi-sweet chocolate, melted
- Sprinkles
- Crushed Oreos
- Cocoa powder
Instructions
- Preparation: Pulverize Oreo cookies into fine, uniform crumbs using a food processor or by crushing within a sealed bag with a rolling pin until achieving a consistent, powdery texture.
- Mixing: Blend softened cream cheese with cookie crumbs, kneading thoroughly to create a cohesive, pliable mixture that forms easily and holds its shape without crumbling.
- Shaping: Gently roll the Oreo-cream cheese mixture into compact, uniform spheres approximately one inch in diameter, ensuring consistent size and smooth surfaces.
- Chilling: Arrange formed balls on a parchment-lined tray, then refrigerate for 20-30 minutes to solidify their structure and enhance chocolate coating adherence.
- Chocolate Coating: Melt chocolate using controlled microwave intervals, stirring between cycles to prevent burning and achieve a silky, glossy consistency for dipping.
- Dipping: Submerge each chilled ball completely in melted chocolate, using a fork to lift and drain excess coating, ensuring uniform coverage and a professional finish.
- Decorating: While chocolate remains liquid, embellish cake balls with sprinkles, crushed Oreo fragments, or elegant chocolate drizzles to add visual appeal and texture.
- Setting: Refrigerate decorated cake balls for a minimum of 30 minutes, allowing chocolate to harden and flavors to harmonize, creating a delectable, chilled confection.
Notes
- Crumb Consistency Matters: Ensure Oreo cookies are ground into ultra-fine, uniform crumbs for smooth, cohesive texture without lumps.
- Cream Cheese Temperature: Use room temperature cream cheese to guarantee seamless blending and prevent crumbly mixture.
- Chill Before Coating: Refrigerate cake balls for at least 20-30 minutes before chocolate dipping to prevent cracking and maintain shape during coating process.
- Chocolate Melting Technique: Melt chocolate in short, controlled microwave intervals, stirring frequently to avoid burning and achieve silky, glossy finish.
- Prep Time: 30 minutes
- Cook Time: 30 minutes
- Category: Desserts, Snacks
- Method: Mixing
- Cuisine: American
Nutrition
- Serving Size: 35
- Calories: 90
- Sugar: 7 g
- Sodium: 50 mg
- Fat: 5 g
- Saturated Fat: 3 g
- Unsaturated Fat: 2 g
- Trans Fat: 0 g
- Carbohydrates: 10 g
- Fiber: 0.5 g
- Protein: 1 g
- Cholesterol: 10 mg
Liam O’Sullivan
Founder & Culinary Content Creator
Expertise
Recipe Development, Traditional Irish and European Cuisines, Food Styling and Photography, Culinary Education
Education
Dublin Institute of Technology (DIT) – School of Culinary Arts and Food Technology
Ballymaloe Cookery School
Isabella brings a global spark to the Craft Meats table. Born in Florence and trained at the Apicius International School of Hospitality, she blends classic Italian flavor with modern writing that’s easy to follow and hard to forget.
Her additional training at the Italian Chef Academy fueled her love for well-crafted dishes, especially ones that spotlight beautiful cuts of meat.
She’s a food writer with heart, and a deep love for storytelling through single recipes. Her goal? To help you cook with more confidence and a little more joy, no matter where you start.