
Salted Caramel Butter Bars Recipe with Sweet and Salty Swirl
When it comes to irresistible desserts, these salted caramel butter bars strike the perfect balance between sweet and salty.
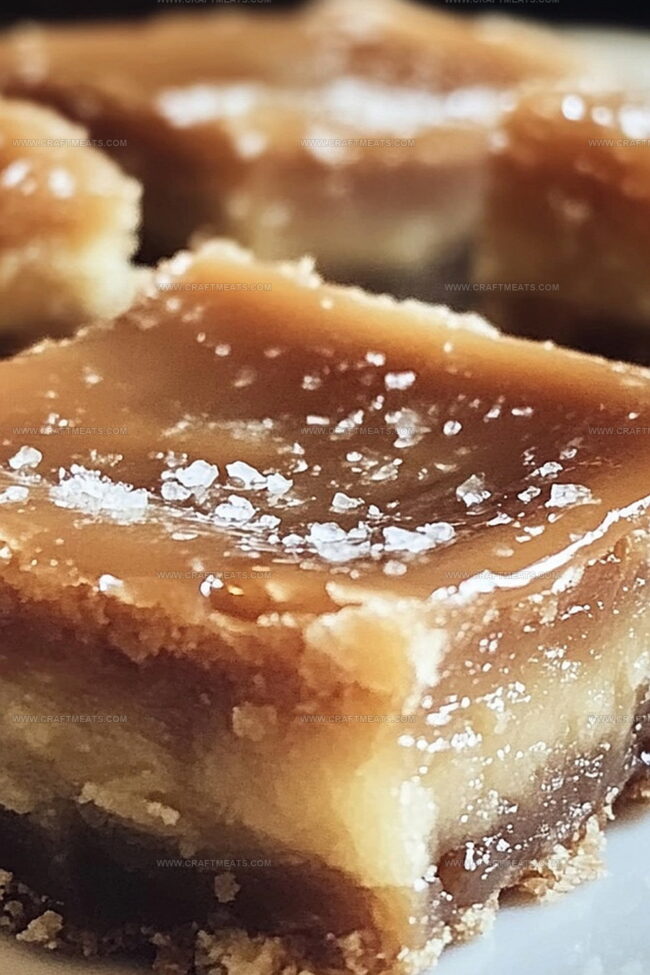
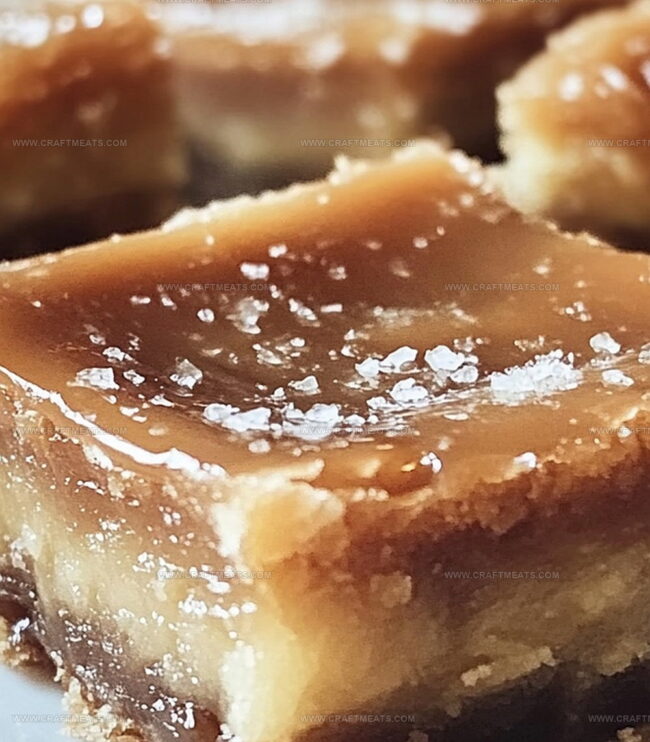
Rich, decadent butter bars infused with gooey caramel create a mouthwatering treat that melts in your mouth.
Each bite delivers a luxurious blend of creamy textures and deep, complex flavors.
The golden, buttery crust provides a stunning foundation for the luscious caramel layer that follows.
Sprinkled with just the right amount of sea salt, these bars elevate a simple dessert into a gourmet experience.
Prepare to fall in love with this indulgent recipe that promises to become a new favorite for any occasion.
Dive into these heavenly bars and discover pure dessert bliss.
Quick Recipe Overview
What Goes Into Salted Caramel Butter Bars
For The Base And Topping:For The Caramel Layer:For Optional Finishing:Tools That Help With Salted Caramel Butter Bars
Directions For Salted Caramel Butter Bars
Warm up the kitchen with a cozy 325F setting. Grab a baking pan and create a smooth surface with parchment paper or a quick spray of grease.
Blend softened butter with sugars until they transform into a fluffy cloud. Splash in vanilla for a sweet whisper. Gently fold flour and salt, watching the mixture become a crumbly playground of deliciousness.
Spread half the dough across the pan, creating a golden base. Bake until edges turn a delicate honey color, then let it rest and cool down.
Swirl caramel with a hint of sea salt, balancing sweet and salty notes like a culinary symphony.
Drizzle the salted caramel generously over the crust, covering every nook and cranny.
Scatter the remaining dough like a delicate blanket over the caramel, ensuring an even coverage.
Return to the oven, letting the bars transform into a golden masterpiece for 25-30 minutes.
Allow the bars to cool completely. For picture-perfect slices, chill in the refrigerator before cutting into delectable squares.
Tasty Tricks For Salted Caramel Butter Bars
Serving Salted Caramel Butter Bars Sweet And Simple
Store Salted Caramel Butter Bars So They Stay Buttery
Print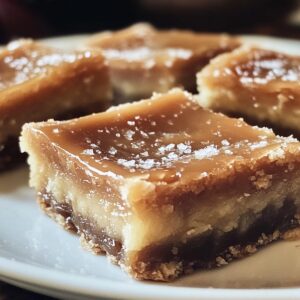
Heavenly Salted Caramel Butter Bars Recipe
- Total Time: 1 hour
- Yield: 15 1x
Description
Salted caramel butter bars offer a rich, indulgent dessert perfect for sweet tooths. Buttery layers meld with caramel’s deep flavor, creating a luxurious treat that delights taste buds and satisfies cravings.
Ingredients
- 1 cup (225 g / 8 oz) unsalted butter, softened
- 2 ½ cups (315 g / 11.1 oz) all-purpose flour
- 1 cup (200 g / 7 oz) granulated sugar
- ¾ cup (150 g / 5.3 oz) light brown sugar, packed
- 2 tsps vanilla extract
- ½ tsp salt
- 1 jar (11 oz / 310 g) caramel sauce
- ¼ tsp sea salt
Instructions
- Prepare Pan: Line a 9×13-inch baking pan with parchment paper, ensuring complete coverage with slight overhang for effortless removal and serving.
- Craft Dough Foundation: Cream butter and sugars until voluminous and pale, integrating vanilla extract to enhance flavor complexity, then delicately fold in flour and salt until a malleable, crumbly texture emerges.
- Create Base Layer: Distribute half the dough across the prepared pan, pressing firmly and uniformly to establish a compact, seamless crust without any vulnerable thin regions.
- Initial Baking Phase: Bake the foundational layer in a preheated oven until edges acquire a golden-bronze shimmer, approximately 15-18 minutes, then allow a brief cooling interval.
- Caramel Enhancement: Blend caramel sauce with sea salt, ensuring thorough incorporation and balanced seasoning, then generously drizzle across the partially cooled crust to create an even, glistening layer.
- Textural Topping: Delicately scatter remaining dough over the caramel, generating a rustic, artisanal appearance that promises textural intrigue and visual appeal.
- Final Baking Stage: Return pan to oven and continue baking until the surface transforms into a luminous golden landscape with elegantly crisp edges.
- Cooling and Setting: Remove from oven and allow bars to cool completely at room temperature, facilitating layer integration and optimal slice definition, then optionally refrigerate for 30 minutes to achieve pristine cutting precision.
Notes
- Choose Quality Butter: Select high-fat, unsalted butter at room temperature for a rich, creamy base that ensures smooth mixing and exceptional texture.
- Press Crust Evenly: Use the back of a measuring cup or flat spatula to create a uniform, compact bottom layer without thin or uneven spots that might cause inconsistent baking.
- Control Caramel Consistency: Warm caramel slightly to achieve a pourable consistency, but avoid overheating to prevent separation or burning of the sauce.
- Chill for Clean Cuts: Refrigerate bars for at least 30 minutes before slicing to stabilize layers and create precise, professional-looking squares without crumbling.
- Prep Time: 15 minutes
- Cook Time: 40-45 minutes
- Category: Desserts, Snacks
- Method: Baking
- Cuisine: American
Nutrition
- Serving Size: 15
- Calories: 270
- Sugar: 22 g
- Sodium: 150 mg
- Fat: 14 g
- Saturated Fat: 9 g
- Unsaturated Fat: 4 g
- Trans Fat: 0 g
- Carbohydrates: 35 g
- Fiber: 1 g
- Protein: 2 g
- Cholesterol: 30 mg
Liam O’Sullivan
Founder & Culinary Content Creator
Expertise
Recipe Development, Traditional Irish and European Cuisines, Food Styling and Photography, Culinary Education
Education
Dublin Institute of Technology (DIT) – School of Culinary Arts and Food Technology
Ballymaloe Cookery School
Isabella brings a global spark to the Craft Meats table. Born in Florence and trained at the Apicius International School of Hospitality, she blends classic Italian flavor with modern writing that’s easy to follow and hard to forget.
Her additional training at the Italian Chef Academy fueled her love for well-crafted dishes, especially ones that spotlight beautiful cuts of meat.
She’s a food writer with heart, and a deep love for storytelling through single recipes. Her goal? To help you cook with more confidence and a little more joy, no matter where you start.