
Easy Homemade Goldfish Crackers Recipe for Snacking
Crafting goldfish crackers at home reimagines an ordinary snack into a delightful culinary adventure.
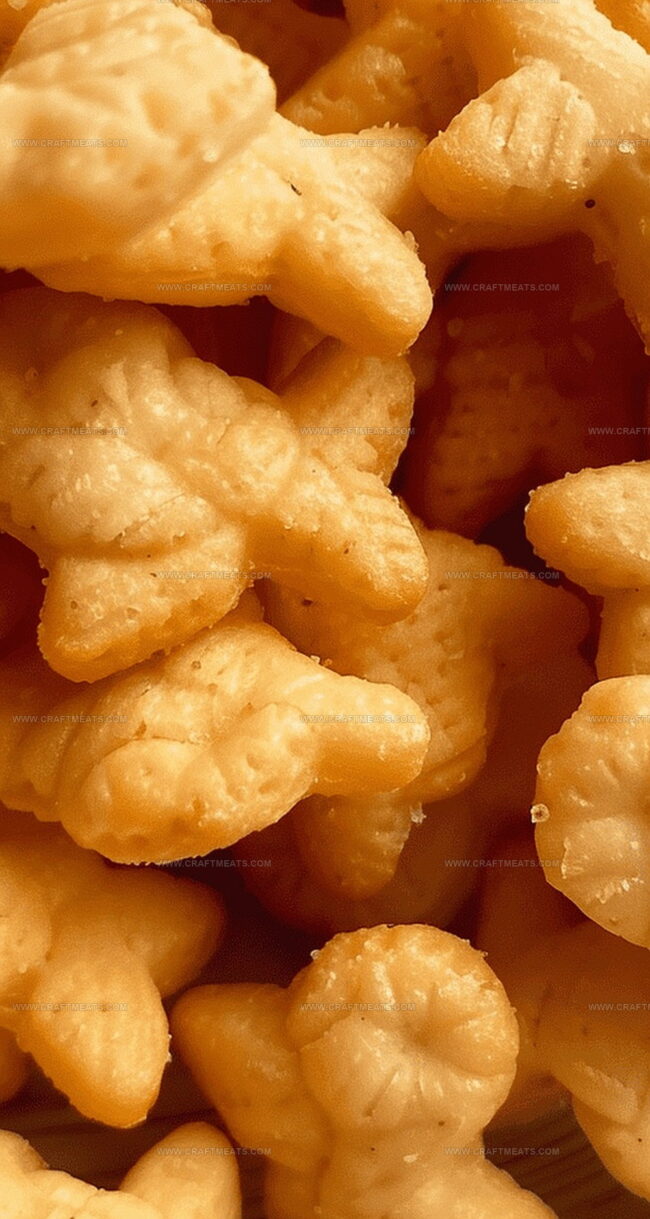
These adorable, cheesy bites offer a playful twist on the classic store-bought version.
Home cooks can easily recreate this beloved childhood treat with simple ingredients and minimal effort.
The process involves mixing, rolling, and cutting dough into charming little fish shapes that delight both kids and adults.
Crisp, golden, and packed with sharp cheddar flavor, these homemade crackers surpass their packaged counterparts in taste and quality.
Nutritious ingredients and complete control over what goes into the recipe make this a smart choice for health-conscious snackers.
Your kitchen will buzz with excitement as these delectable morsels bake to crispy perfection.
Why Homemade Goldfish Crackers Are a Fun Snack for All Ages
Ingredients for Cheesy Homemade Goldfish Crackers
Cheese Base:Dry Ingredients:Liquid Ingredient:How to Make Goldfish Crackers in Your Kitchen
Step 1: Warm Up the Oven
Fire up your oven to 350°F (180°C). Get ready for some baking magic!
Step 2: Blend the Cracker Base
Grab your food processor and toss in these ingredients:Pulse the mixture in quick bursts until it looks like coarse beach sand.
Step 3: Create the Dough Magic
Drizzle in ice water, one tablespoon at a time. Pulse gently until the mixture starts to clump together. Don’t go crazy with mixing- you want just enough to form a soft dough.
Step 4: Chill and Rest the Dough
Transfer the dough onto a clean surface. Knead it tenderly until it comes together smoothly. Shape into a neat disc, wrap in plastic wrap, and send it to the refrigerator for a 30-minute relaxation session.
Step 5: Roll and Shape Your Crackers
Dust your work surface with flour. Roll out the chilled dough to about ⅛ to ¼ inch thickness. Now comes the fun part:Collect the leftover dough, re-roll, and keep cutting until every bit is used.
Step 6: Bake to Crispy Perfection
Arrange your cracker shapes on a parchment-lined baking sheet. Slide into the preheated oven and bake for 10 minutes. Watch them closely- these little guys can turn from golden to burnt in a flash! Let them cool completely before munching.
Tips for Crispy, Savory Homemade Goldfish Crackers
How to Store and Keep Homemade Goldfish Crackers Crunchy
Snacks and Sips to Pair with Goldfish Crackers
Homemade Goldfish Flavors You Can Try
Print
Homemade Goldfish Crackers Recipe
- Total Time: 40 minutes
- Yield: 8 1x
Description
Goldfish crackers bring nostalgic cheesy goodness straight from your kitchen. Crisp, savory squares offer a playful twist on classic snacking that delights both kids and adults with homemade charm.
Ingredients
Main Ingredients:
- 2 cups (226 grams) shredded cheddar cheese
- 1 cup (120 grams) all-purpose flour
- 4 tablespoons (56 grams) unsalted butter, cold
Liquid Ingredient:
- 1–2 tablespoons (15–30 milliliters) ice water, as needed
Seasoning/Optional Ingredients:
None specified in the original recipe
Instructions
- Prepare the base mixture by combining shredded cheese, flour, and chilled butter in a food processor, pulsing until the texture resembles coarse sand.
- Gradually introduce ice water to the mixture, pulsing briefly until the dough begins to coalesce, being mindful not to overwork the mixture.
- Transfer the delicate dough onto a clean surface and gently manipulate it into a cohesive disc, then encase in plastic wrap and allow to rest in the refrigerator for half an hour.
- On a lightly dusted work surface, carefully roll the chilled dough to an even thickness, aiming for a thin, uniform layer approximately ⅛ to ¼ inch thick.
- Utilize a small cookie cutter to create playful fish-shaped crackers, or alternatively slice the dough into precise square segments using a pizza cutter.
- Reassemble the remaining dough scraps, re-roll, and continue cutting until all the mixture is transformed into potential crackers.
- Arrange the shaped crackers onto a parchment-lined baking sheet, ensuring minimal overlap between pieces.
- Slide the baking sheet into a preheated oven set at 350°F (180°C), monitoring closely for 10 minutes or until the edges develop a golden-brown hue.
- Remove from the oven and allow the crackers to cool completely, ensuring a crisp and satisfying texture before serving.
Notes
- Chilling the dough helps develop a crumbly, tender texture that melts in your mouth.
- Leftover crackers stay crispy when stored in an airtight container at room temperature for up to a week.
- Experiment with different cheese varieties like sharp cheddar or smoked gouda to create unique flavor profiles that will surprise your taste buds.
- Prep Time: 30 minutes
- Cook Time: 10 minutes
- Category: Snacks, Appetizer
- Method: Baking
- Cuisine: American
Nutrition
- Serving Size: 8
- Calories: 223
- Sugar: 0.3 g
- Sodium: 159 mg
- Fat: 14 g
- Saturated Fat: 8 g
- Unsaturated Fat: 5 g
- Trans Fat: 0 g
- Carbohydrates: 21 g
- Fiber: 0.6 g
- Protein: 7 g
- Cholesterol: 30 mg
Isabella Rossi
Founder & Culinary Content Creator
Expertise
Recipe Development, Traditional Irish and European Cuisines, Food Styling and Photography, Culinary Education
Education
Dublin Institute of Technology (DIT) – School of Culinary Arts and Food Technology
Ballymaloe Cookery School
Liam is the voice behind many of Craft Meats’ most flavorful features. With roots in Dublin’s smoky barbecue scene and a culinary degree from the Dublin Institute of Technology, he brings time-tested cooking techniques to life.
His training at Ballymaloe Cookery School sharpened his farm-to-table approach, giving him a deep respect for every ingredient he writes about.
He’s not about overcomplicating the process, just helping you cook meat that’s worth talking about. When he’s not writing or grilling, he’s out foraging or nerding out on regional spice blends to add to his next recipe.