
Icebox Cookie Recipe for Sweet Snackers Everywhere
Cool icebox delight cookies bring sweet nostalgia with a chilled twist that melts hearts instantly.
These delectable treats promise a delightful balance between crisp textures and rich flavors.
Refrigerator magic revolutionizes simple ingredients into something spectacular and memorable.
Each bite carries whispers of childhood memories and comfort.
Minimal effort creates maximum satisfaction through strategic preparation and smart chilling techniques.
Smooth, buttery layers promise indulgence without complicated kitchen gymnastics.
You will love how effortlessly these cookies come together with just a few smart moves.
Anticipate a dessert that delivers pure deliciousness in every delicate, melt-in-your-mouth moment.
Icebox Cookies Overview
Ingredients for Icebox Cookies
Dry Ingredients:Wet Ingredients:Optional Finishing Ingredient:Steps to Make Icebox Cookies
Step 1: Create Dry Magic
Grab a medium mixing bowl and whisk together flour, baking powder, and salt. This magical blend will be the secret foundation of your delightful cookies. Set the mixture aside and get ready for the next exciting step.
Step 2: Butter and Sugar Dance
Pull out your mixer or a sturdy mixing bowl. Blend softened butter and sugar until they transform into a fluffy, dreamy cloud-like mixture. Watch as the ingredients become light and creamy, promising deliciousness ahead.
Step 3: Marry the Ingredients
Gently fold the dry ingredients into the buttery sugar mixture. Mix with care, stopping just as everything combines. Overmixing is the enemy of tender cookies, so be gentle and loving with your dough.
Step 4: Shape Cookie Logs
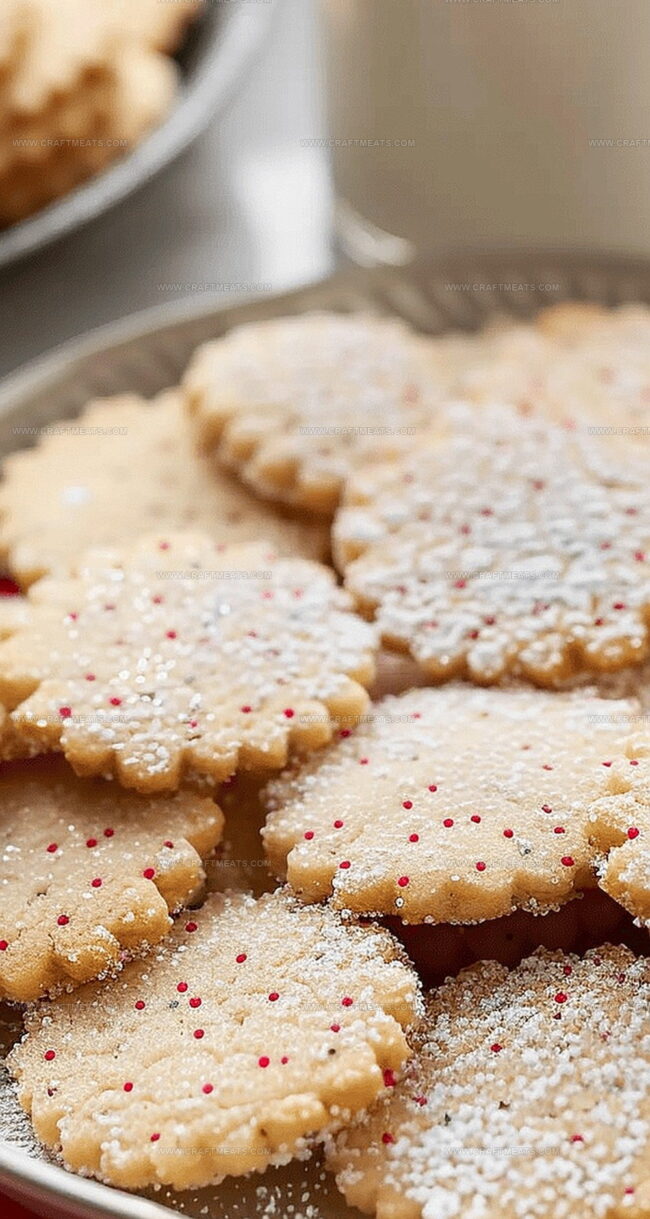
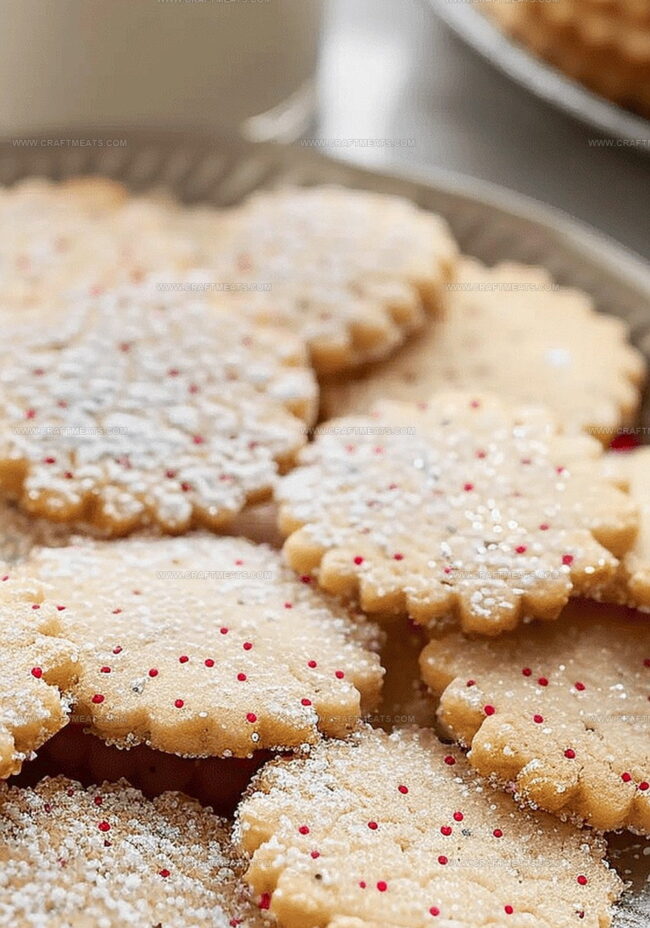
Divide your dough into two equal portions. Roll each piece into a smooth log about 2 inches wide. For extra sparkle, roll the logs in additional sugar – this creates a sweet, crystalized exterior.
Step 5: Chill and Wait
Wrap each dough log tightly in plastic wrap. Tuck them into the refrigerator for at least 2 hours or overnight. This resting time helps develop rich flavors and creates the perfect cookie texture.
Step 6: Prepare the Oven
Heat your oven to 375°F (190°C). Line a baking sheet with parchment paper, getting ready for cookie magic.
Step 7: Slice and Arrange
Remove chilled logs and slice into thin rounds, about 1/4 inch thick. Arrange the cookie slices on your prepared baking sheet, leaving a little space between each.
Step 8: Bake to Golden Perfection
Slide the baking sheet into the oven. Bake for 10-12 minutes until the edges turn a beautiful golden color. Your kitchen will fill with an irresistible aroma!
Step 9: Cool and Enjoy
Let the cookies rest on the baking sheet for 5 minutes. Transfer to a wire rack to cool completely. Now comes the best part – taste testing your delicious creation!
Smart Tips for Icebox Cookies
How to Store and Reheat Icebox Cookies
Pairing Suggestions for Icebox Cookies
Icebox Cookie Recipe Variants
Icebox Cookie FAQs
Yes! These Icebox Delight Cookies are perfect for preparing in advance. You can refrigerate the dough logs for up to 3 days before baking, or freeze them for up to 2 months.
No worries! You can use a hand mixer or even mix by hand with a wooden spoon. The key is to cream the butter and sugar until light and fluffy.
Look for slightly golden edges. The cookies should be just set but not browned. They’ll continue to firm up as they cool on the baking sheet.
Absolutely! Store the cooled cookies in an airtight container at room temperature for up to 5 days. They’ll stay fresh and delicious.
Print
Icebox Delight Cookies Recipe
- Total Time: 32 minutes
- Yield: 24 1x
Description
Sweet memories unfold with these nostalgic icebox delight cookies, blending classic comfort and simple charm. Crisp edges and buttery centers promise a delightful journey you’ll savor with each delectable bite.
Ingredients
Main Ingredients:
- 1 cup unsalted butter, softened
- 1 cup granulated sugar
- 1 large egg
Flour and Leavening Agents:
- 2¼ cups (540 milliliters) all-purpose flour
- 1 teaspoon baking powder
- ½ teaspoon salt
Flavor Enhancer:
- 1 teaspoon vanilla extract
Instructions
- Whisk flour, baking powder, and salt in a medium mixing vessel, creating a uniform dry foundation for the cookies.
- Utilize an electric mixer to transform softened butter and granulated sugar into a billowy, aerated mixture that serves as the cookie’s rich base.
- Gently fold the dry ingredients into the creamed butter-sugar blend, stirring minimally to maintain the dough’s delicate texture.
- Partition the dough into two symmetrical logs, each measuring roughly 2 inches in diameter. Optional: Roll the exterior in additional granulated sugar for enhanced sweetness and crunch.
- Encase each dough log meticulously in plastic wrap, then nestle in the refrigerator for a minimum of 2 hours, allowing flavors to meld and structure to solidify.
- Ignite the oven to 375°F (190°C), preparing a pristine parchment-lined baking sheet for the upcoming cookie transformation.
- Extract chilled logs and slice into precise 1/4-inch rounds, arranging them with calculated spacing on the prepared baking surface.
- Slide the cookie-laden tray into the heated oven, monitoring for a delicate golden-edged transformation during the 10-12 minute baking interval.
- Permit the freshly baked cookies to rest momentarily on the hot tray, then transition them to a cooling rack, where they’ll achieve their final crisp-yet-tender consistency.
Notes
- Chill out and let these cookies develop rich, buttery flavors by refrigerating the dough overnight, which helps intensify their taste and texture.
- Precision matters when slicing the dough logs, keeping each cookie uniform at 1/4 inch thick ensures even baking and a professional-looking result.
- Rolling the dough logs in extra sugar creates a delightful sparkly crust and adds a subtle crunch to the cookie’s exterior.
- Watch the edges closely during baking; golden-brown tips indicate the perfect moment to remove cookies from the oven for a crisp yet tender bite.
- Use parchment paper for effortless cookie removal and minimal cleanup, preventing any potential sticking or burning.
- Store these cookies in an airtight container at room temperature for up to a week, maintaining their delectable freshness and texture.
- Prep Time: 20 minutes (not including refrigeration)
- Cook Time: 12 minutes (per batch)
- Category: Desserts, Snacks
- Method: Baking
- Cuisine: American
Nutrition
- Serving Size: 24
- Calories: 131
- Sugar: 5 g
- Sodium: 45 mg
- Fat: 9 g
- Saturated Fat: 5 g
- Unsaturated Fat: 4 g
- Trans Fat: 0 g
- Carbohydrates: 15 g
- Fiber: 0.5 g
- Protein: 1.5 g
- Cholesterol: 20 mg
Isabella Rossi
Founder & Culinary Content Creator
Expertise
Recipe Development, Traditional Irish and European Cuisines, Food Styling and Photography, Culinary Education
Education
Dublin Institute of Technology (DIT) – School of Culinary Arts and Food Technology
Ballymaloe Cookery School
Liam is the voice behind many of Craft Meats’ most flavorful features. With roots in Dublin’s smoky barbecue scene and a culinary degree from the Dublin Institute of Technology, he brings time-tested cooking techniques to life.
His training at Ballymaloe Cookery School sharpened his farm-to-table approach, giving him a deep respect for every ingredient he writes about.
He’s not about overcomplicating the process, just helping you cook meat that’s worth talking about. When he’s not writing or grilling, he’s out foraging or nerding out on regional spice blends to add to his next recipe.