Golden Pineapple-Filled White Chocolate Cake Recipe
Decadent desserts often spark joy at gatherings, and this white chocolate cake with pineapple filling brings pure magic to the table.
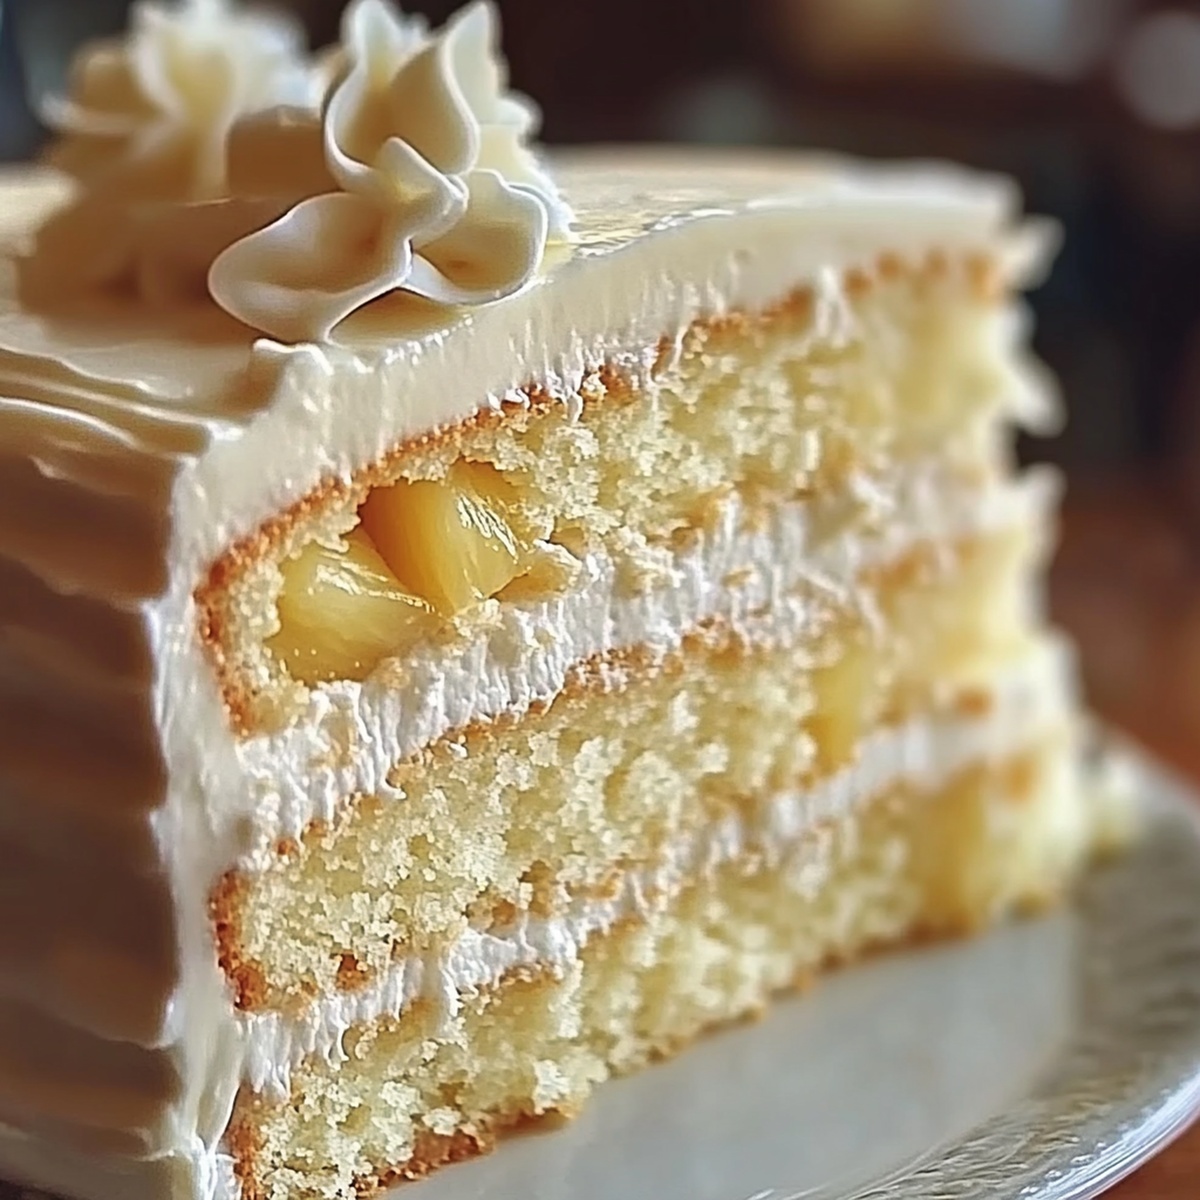
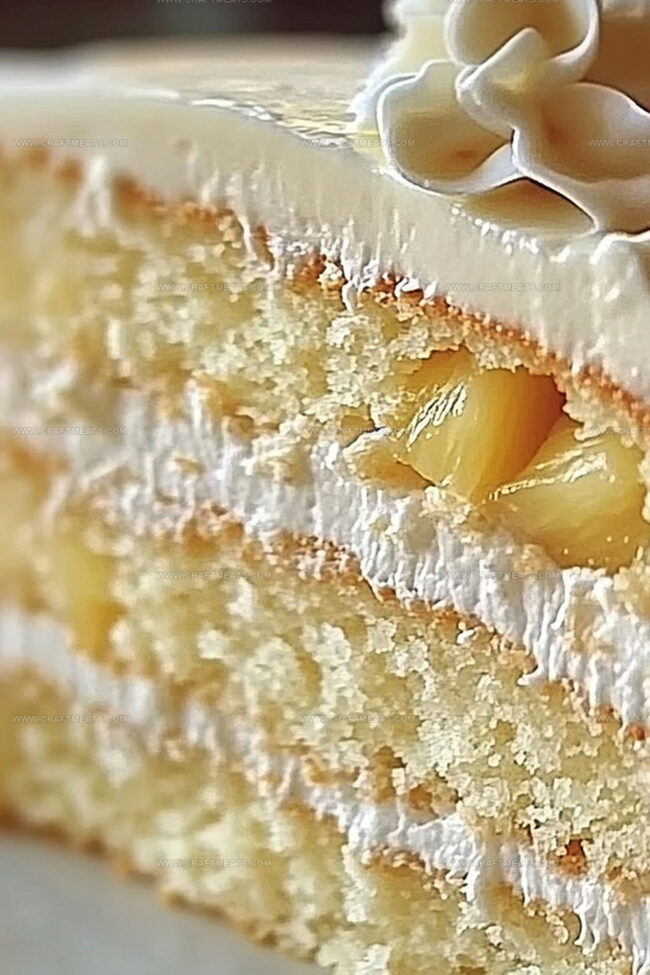
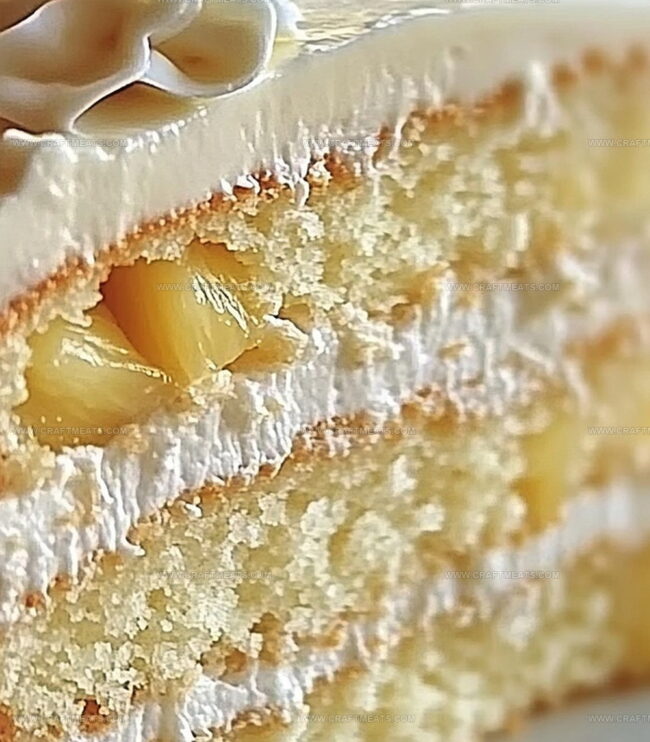
Sweet tropical notes dance brilliantly through this creamy white chocolate cake recipe.
Layers of moist cake embrace tangy pineapple with elegant sophistication.
Each slice promises a delightful balance between rich chocolate undertones and bright fruit essence.
Smooth buttercream frosting adds luxurious texture that complements the cake’s delicate flavor profile.
Bakers craving a show-stopping dessert will adore this crowd-pleasing creation.
Serve this stunning cake and watch everyone’s eyes light up with pure culinary delight.
Quick Recipe Overview
Ingredients In Heavenly White Chocolate Cake With Pineapple Filling
For Cake Base:For Liquid and Fat Components:For Sweetening and Flavoring:Tools That Help Make Heavenly White Chocolate Cake With Pineapple Filling
How To Build Layers For White Chocolate Cake With Pineapple Filling
Cozy up your kitchen by setting the oven to a toasty 350F. Grab your cake pans and give them a quick spritz of cooking spray or butter, then dust with a light layer of flour to help the cake slip out perfectly.
Grab a mixing bowl and whisk together your dry ingredients until they’re blended and ready to create magic. Make sure everything is evenly combined with no lumpy surprises.
In a separate large bowl, whip your butter, oil, and sugar into a fluffy cloud-like mixture. Crack in those eggs one by one, giving each a good mix. Splash in some vanilla for an extra flavor boost.
Gently fold in your dry ingredients, dancing between the flour mixture and milk. When everything looks smooth, swirl in the melted white chocolate until just combined. No overmixing allowed!
Pour your silky batter into the prepared pans, spreading it evenly. Slide into the warm oven and bake for about 25-30 minutes. Your cake is done when a toothpick comes out clean and the top is a gorgeous golden color. Let the cakes cool completely before diving into the next steps.
Tropical Variations For White Chocolate Cake With Pineapple Filling
Serving Suggestions For White Chocolate Cake With Pineapple Filling
How To Store White Chocolate Cake With Pineapple Filling
Keep cake covered in an airtight container at room temperature for 2-3 days to maintain moisture and freshness.
Print
Luscious White Chocolate Cake With Pineapple Filling Recipe
- Total Time: 1 hour 15 minutes
- Yield: 11 1x
Description
Heavenly white chocolate cake with pineapple filling blends tropical sweetness and creamy richness for dessert enthusiasts. Layers of moist cake and tangy pineapple create a memorable tropical experience you’ll savor with pure delight.
Ingredients
- 4 large eggs
- 1 ½ cups (300 g) granulated sugar
- 2 ½ cups (315 g) all-purpose flour
- 1 cup (240 ml) whole milk
- ½ cup (115 g) unsalted butter, softened
- ½ cup (120 ml) vegetable oil
- 4 oz (115 g) white chocolate, melted and slightly cooled
- 2 tsps baking powder
- ½ tsp salt
- 1 tsp vanilla extract
- 1 can (20 oz / 567 g) crushed pineapple, drained with juice reserved
- ½ cup (100 g) granulated sugar
- 2 tbsps cornstarch
- 2 tbsps reserved pineapple juice
- 8 oz (225 g) cream cheese, softened
- ½ cup (115 g) unsalted butter, softened
- 4 oz (115 g) white chocolate, melted and slightly cooled
- 4 cups (500 g) powdered sugar
- 1 tsp vanilla extract
Instructions
- Preheat Oven: Create an ideal baking environment by heating to 350F (175C) and preparing cake pans with a light grease and flour coating to ensure effortless cake release.
- Dry Ingredient Preparation: Combine flour, baking powder, and salt in a mixing bowl, whisking thoroughly to create a uniform dry foundation that will provide structural integrity to the cake.
- Batter Base Development: Cream butter, oil, and sugar until light and fluffy, then incorporate eggs one at a time to maintain a smooth, consistent texture that will ensure a tender crumb.
- Flavor Integration: Blend vanilla extract into the mixture, then alternately fold in dry ingredients and milk, creating a silky, well-incorporated batter that promises exceptional moistness.
- White Chocolate Infusion: Gently melt white chocolate and fold into the batter, ensuring even distribution without compromising the delicate mixture’s airiness.
- Pan Filling and Baking: Evenly distribute batter between prepared pans, then bake for 25-30 minutes until a toothpick inserted into the center comes out clean, indicating perfect doneness.
- Cooling Process: Allow cakes to rest in pans for 10 minutes, then transfer to a wire rack to cool completely, preparing for final assembly and filling with the luscious pineapple mixture.
Notes
- Prevent White Chocolate Seizing: Melt white chocolate slowly using a double boiler or microwave at low power, stirring frequently to maintain smooth consistency and prevent burning.
- Achieve Optimal Cake Texture: Ensure all ingredients are at room temperature before mixing to create a more uniform batter and prevent lumps or uneven mixing.
- Control Moisture with Pineapple Filling: Drain pineapple thoroughly to prevent excess liquid from making cake layers soggy, potentially using a fine-mesh strainer or paper towels.
- Maintain Cake Freshness: Store cake in an airtight container at room temperature for up to 3 days, or refrigerate for extended preservation, bringing to room temperature before serving for best flavor and texture.
- Prep Time: 30 minutes
- Cook Time: 15 minutes
- Category: Desserts
- Method: Baking
- Cuisine: American
Nutrition
- Serving Size: 11
- Calories: 410
- Sugar: 47 g
- Sodium: 210 mg
- Fat: 22 g
- Saturated Fat: 12 g
- Unsaturated Fat: 10 g
- Trans Fat: 0 g
- Carbohydrates: 54 g
- Fiber: 1 g
- Protein: 4 g
- Cholesterol: 70 mg
Liam O’Sullivan
Founder & Culinary Content Creator
Expertise
Recipe Development, Traditional Irish and European Cuisines, Food Styling and Photography, Culinary Education
Education
Dublin Institute of Technology (DIT) – School of Culinary Arts and Food Technology
Ballymaloe Cookery School
Isabella brings a global spark to the Craft Meats table. Born in Florence and trained at the Apicius International School of Hospitality, she blends classic Italian flavor with modern writing that’s easy to follow and hard to forget.
Her additional training at the Italian Chef Academy fueled her love for well-crafted dishes, especially ones that spotlight beautiful cuts of meat.
She’s a food writer with heart, and a deep love for storytelling through single recipes. Her goal? To help you cook with more confidence and a little more joy, no matter where you start.