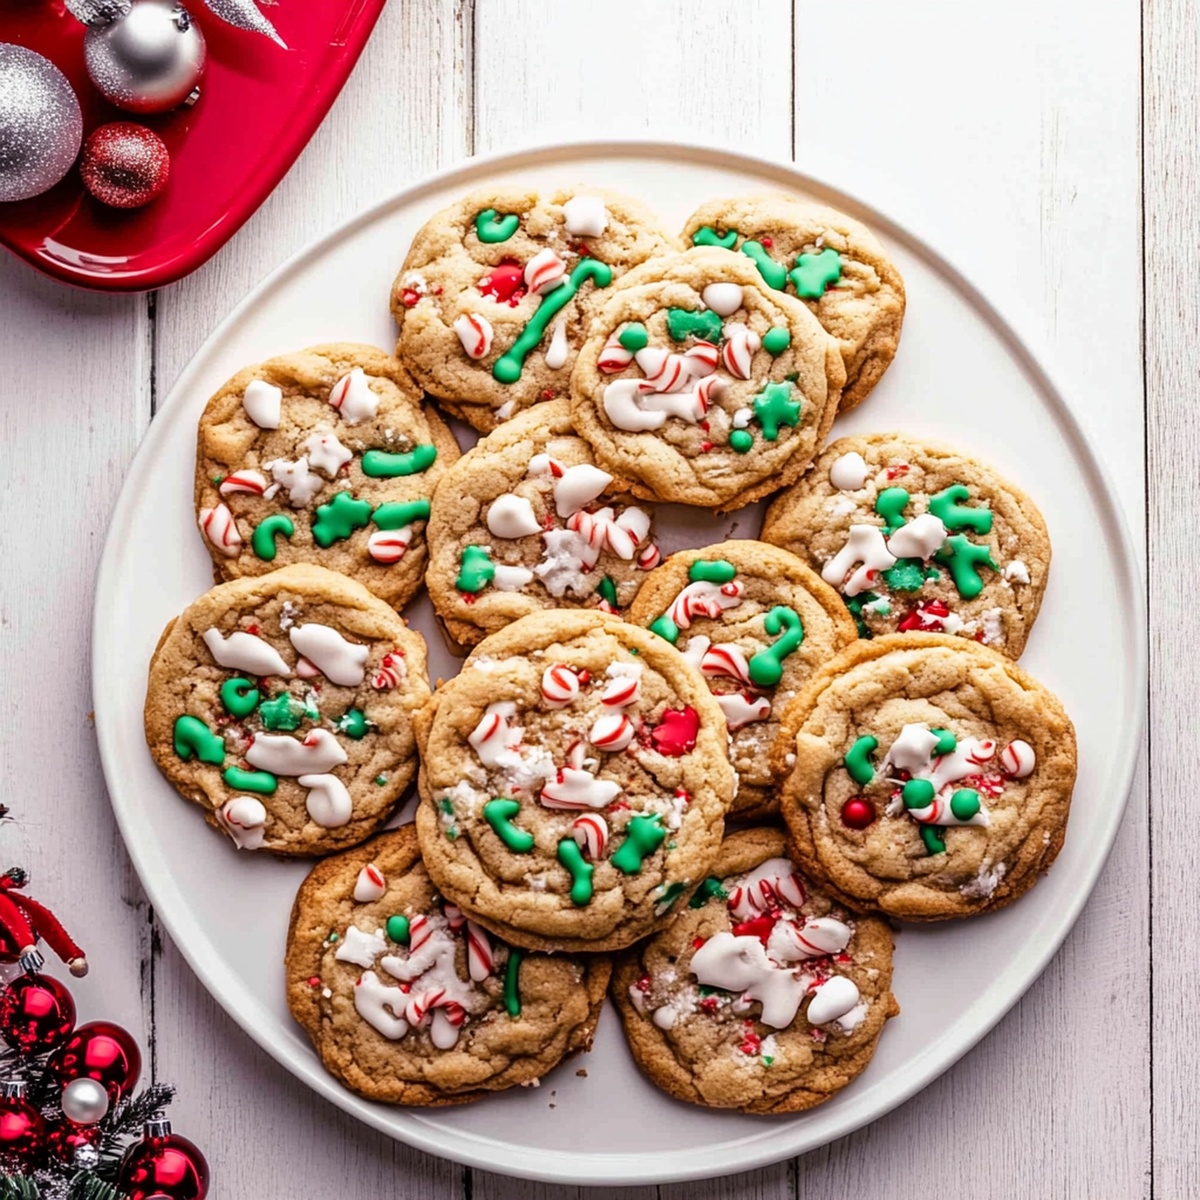
Festive Jumble Joy: Christmas Kitchen Sink Cookies Recipe
Cookies packed with holiday cheer and christmas kitchen sink cookies magic blend every delightful treat into one irresistible bite.
Sweet memories dance through each carefully crafted morsel bursting with unexpected flavors.
These delectable treats capture the essence of festive indulgence and spontaneous baking creativity.
Loaded with chocolate chips, pretzels, nuts, and surprise ingredients, the cookies promise a wild flavor adventure.
No traditional recipe limits this culinary playground where textures and tastes collide.
Each crumbly, crunchy bite tells a story of joyful kitchen experiments.
Dive into this delicious journey and let your taste buds celebrate the season’s most playful cookie creation.
Quick Recipe Overview
What’s Included In Christmas Kitchen Sink Cookies
For Wet Ingredients:For Dry Ingredients:For Mix-Ins:Tools You’ll Need For Christmas Kitchen Sink Cookies
Instructions For Christmas Kitchen Sink Cookies
Crank up the heat to cozy baking temperature. Grab your baking sheets and give them a comfy parchment paper blanket.
In a big mixing bowl, whip butter and sugars into a fluffy cloud. Crack in eggs with a gentle touch, then splash vanilla for extra magic. Separately, blend flour, baking buddy (soda), and salt until they’re best friends.
Time to go wild! Toss in all your favorite goodies – chocolate bits, white chocolate treasures, tangy cranberries, crunchy pretzel pieces, playful sprinkles, and nutty pecans. Fold them in like you’re tucking them into a tasty blanket.
Roll dough into adorable little balls. Place them on your prepared sheets, giving each cookie some personal space.
Slide the sheets into the warm oven. Let them dance and transform for 10-12 minutes until edges look golden and centers stay slightly soft and dreamy.
Let cookies chill on the sheets for a quick moment. Transfer to a cooling rack and get ready to enjoy your delicious creation with a cozy drink.
Tips And Mix-Ins For Christmas Kitchen Sink Cookies
Serving Christmas Kitchen Sink Cookies Anytime
Storage Plan For Christmas Kitchen Sink Cookies
Keep cookies in an airtight container at room temperature for 5-7 days, ensuring maximum freshness and delightful taste.
Print
Festive Christmas Kitchen Sink Cookies Recipe
- Total Time: 30 minutes
- Yield: 23 1x
Description
Christmas kitchen sink cookies blend festive cheer with playful cookie creativity. Rich chocolate chips, holiday sprinkles, and unexpected mix-ins promise a delightful baking adventure you’ll savor with pure joy.
Ingredients
- 2 ¼ cups (280 g) all-purpose flour
- 1 cup (230 g) unsalted butter, softened
- 1 cup (200 g) brown sugar
- ½ cup (100 g) granulated sugar
- 2 large eggs
- ½ cup (85 g) chocolate chips
- ½ cup (85 g) white chocolate chips
- ½ cup (50 g) dried cranberries
- ½ cup (50 g) crushed pretzels
- ¼ cup holiday sprinkles
- ¼ cup chopped pecans (optional)
- 2 tsps vanilla extract
- 1 tsp baking soda
- ½ tsp salt
Instructions
- Oven Preparation: Preheat oven to 350F (175C) and line baking sheets with parchment paper or silicone mats for seamless cookie baking.
- Creaming Process: Whip butter, brown sugar, and granulated sugar until light and fluffy, then introduce eggs individually, blending thoroughly after each addition. Incorporate vanilla extract for enhanced flavor complexity.
- Dry Ingredient Integration: Sift together flour, baking soda, and salt, then delicately fold into the creamy mixture until just combined, maintaining a smooth, consistent texture.
- Mix-In Extravaganza: Gently fold in an eclectic array of chocolate chips (both milk and white), dried cranberries, crushed pretzels, vibrant sprinkles, and crunchy pecans, distributing ingredients evenly throughout the dough.
- Shaping and Positioning: Form dough into uniform balls, placing them strategically on prepared baking sheets with ample spacing to allow for natural spreading during baking.
- Baking Transformation: Bake for 10-12 minutes, achieving golden-brown edges while maintaining a soft, pillowy center. Allow cookies to rest on baking sheets for 5 minutes before transferring to a cooling rack.
- Serving Suggestion: Enjoy at room temperature or slightly warm, paired perfectly with a cold glass of milk or steaming hot cocoa for ultimate indulgence.
Notes
- Optimize Mixing Technique: Cream butter and sugars until light and fluffy, which ensures a soft, chewy cookie texture with perfect air incorporation.
- Customize Mix-Ins Creatively: Feel free to swap or substitute ingredients based on dietary preferences or pantry availability, keeping total volume consistent for balanced texture.
- Control Moisture Balance: Do not overmix dough after adding flour to prevent tough cookies; stop mixing the moment dry ingredients are just incorporated for tender results.
- Strategic Baking Spacing: Leave 2-3 inches between cookie dough balls to allow proper spreading and prevent unexpected merging during baking, ensuring uniform shape and consistent doneness.
- Prep Time: 15 minutes
- Cook Time: 15 minutes
- Category: Desserts, Snacks
- Method: Baking
- Cuisine: American
Nutrition
- Serving Size: 23
- Calories: 200
- Sugar: 12 g
- Sodium: 100 mg
- Fat: 10 g
- Saturated Fat: 6 g
- Unsaturated Fat: 3 g
- Trans Fat: 0 g
- Carbohydrates: 28 g
- Fiber: 1 g
- Protein: 2 g
- Cholesterol: 30 mg
Liam O’Sullivan
Founder & Culinary Content Creator
Expertise
Recipe Development, Traditional Irish and European Cuisines, Food Styling and Photography, Culinary Education
Education
Dublin Institute of Technology (DIT) – School of Culinary Arts and Food Technology
Ballymaloe Cookery School
Isabella brings a global spark to the Craft Meats table. Born in Florence and trained at the Apicius International School of Hospitality, she blends classic Italian flavor with modern writing that’s easy to follow and hard to forget.
Her additional training at the Italian Chef Academy fueled her love for well-crafted dishes, especially ones that spotlight beautiful cuts of meat.
She’s a food writer with heart, and a deep love for storytelling through single recipes. Her goal? To help you cook with more confidence and a little more joy, no matter where you start.