No-Bake Cherry Delight Recipe for Dessert Moments
Sweet, creamy no-bake cherry delight promises a dessert that melts in your mouth with minimal kitchen effort.
Layers of silky smooth ingredients create a dreamy treat perfect for warm summer afternoons.
Cool and refreshing textures blend harmoniously, offering a delightful alternative to traditional baked desserts.
Minimal ingredients and simple assembly make this recipe accessible for novice and experienced cooks alike.
Soft, luscious flavors intertwine to create a dessert that feels both indulgent and light.
Rich cream cheese and fruity notes dance together in a delectable symphony of taste.
The magic happens without turning on your oven, ensuring a stress-free dessert experience.
You can want to savor every spoonful of this heavenly, no-fuss cherry sensation.
No-Bake Cherry Bars with Creamy Layers
Cherry Bar Ingredients for No-Bake Layers
Crust Base:Cheesecake Filling:Topping:Instructions for Cherry Bars with No Oven
Step 1: Craft the Crumbly Base
Create a delightful foundation by crushing graham crackers into fine, sandy texture using a rolling pin inside a sealed plastic bag.
Spread the mixture evenly into a 9×13-inch dish, pressing firmly to form a solid crust.
Step 2: Whip Up the Creamy Filling
Prepare a luscious cream cheese mixture with smooth, pillowy consistency.
Beat cream cheese and sugar until silky. Separately, whip cream with vanilla and sugar until it forms stiff, cloud-like peaks. Gently fold whipped cream into cream cheese mixture, creating a light and airy filling.
Step 3: Layer and Chill the Dessert
Assemble the dreamy layers with precision and care.
Spread half the cream cheese mixture over the crust. Generously distribute cherry pie filling across the layer. Top with remaining cream cheese mixture. Sprinkle reserved graham cracker crumbs for a delightful crunch.
Step 4: Refrigerate and Enjoy
Place the dessert in the refrigerator for a minimum of 3 hours. Allow the layers to set and flavors to meld together. Slice, serve, and savor the cool, creamy cherry delight!
Tips for Chilling and Cutting Clean Layers
How to Store and Keep Cherry Bars Fresh
Pair Cherry Bars with These Drinks and Snacks
Variations of Cherry Bars Using Seasonal Fruit
Questions About No-Bake Cherry Bars
The dessert needs to be refrigerated for at least 3 hours to ensure it sets properly and develops the right texture.
Absolutely! You can substitute cherry pie filling with other fruit fillings like blueberry, strawberry, or peach to create different flavor variations of this dessert.
No special equipment is required. You’ll just need a rolling pin, ziplock bag for crushing graham crackers, mixing bowls, and a 9×13-inch baking dish.
The dessert can be stored in the refrigerator for up to 4-5 days when covered tightly with plastic wrap or aluminum foil, maintaining its delicious taste and texture.
Print
No-Bake Cherry Delight Recipe
- Total Time: 30 minutes
- Yield: 8 1x
Description
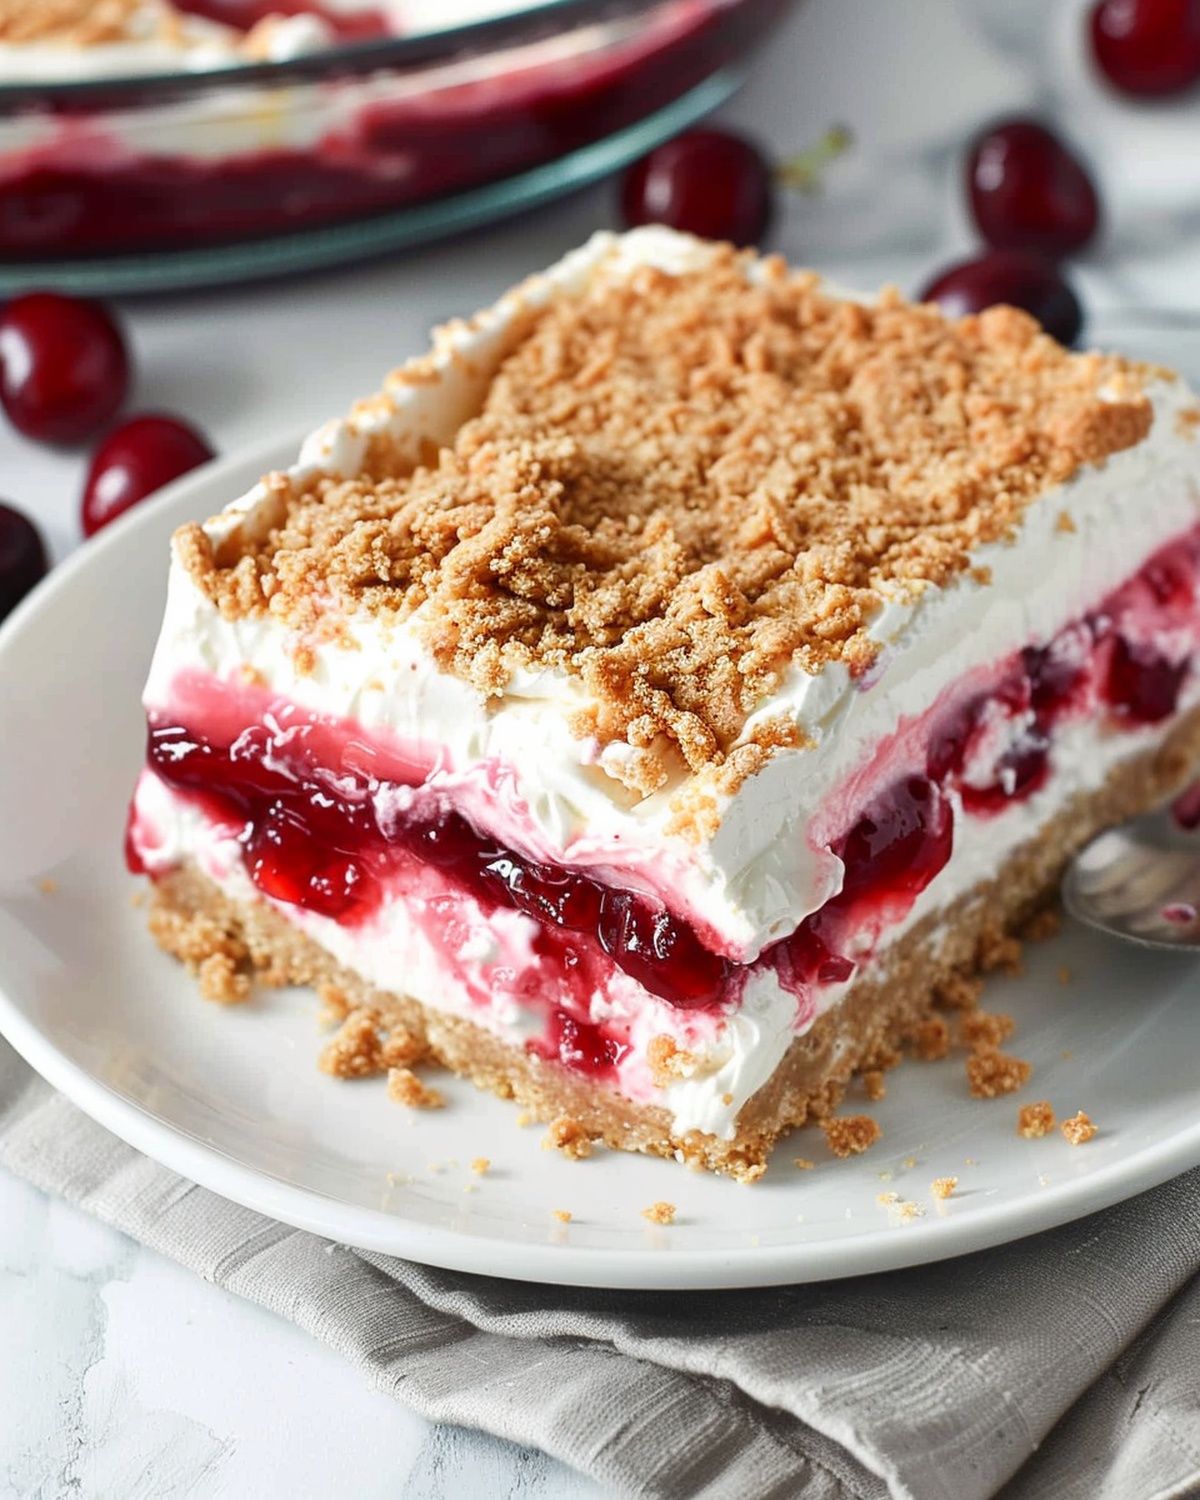
Chilled cherry delight dazzles taste buds with creamy layers of graham cracker crust, luscious cream cheese filling, and sweet cherry topping. Rich flavors and silky textures dance together, offering pure dessert pleasure you can savor in moments.
Ingredients
Main Ingredients:
- 1 package graham crackers
- 1 (21 ounces / 595 grams) can cherry pie filling
- 8 ounces (226 grams) cream cheese, softened and at room temperature
Dairy and Cream Components:
- 2 cups (480 milliliters) heavy whipping cream
- 6 tablespoons salted butter, melted
Sweeteners and Flavoring:
- ½ cup (100 grams) sugar
- 3 tablespoons sugar
- ½ teaspoon vanilla extract
Instructions
- Pulverize graham crackers into ultrafine particles using a rolling pin inside a sealed plastic bag, creating a uniform texture for the crust foundation.
- Incorporate melted butter into the graham cracker crumbs, pressing the mixture meticulously into the bottom of a rectangular baking dish to form a compact base.
- Utilize an electric mixer to transform cream cheese and sugar into a silky, lump-free consistency, ensuring a smooth texture.
- Separately whip heavy cream with vanilla and sugar, creating billowy peaks that stand tall and maintain structural integrity.
- Delicately integrate the whipped cream into the cream cheese mixture, folding gently to preserve the aerated texture and prevent deflation.
- Carefully distribute half of the cream cheese blend across the graham cracker crust, creating an even, luxurious layer.
- Artfully spread cherry pie filling over the initial cream cheese layer, ensuring uniform coverage from edge to edge.
- Crown the dessert with the remaining cream cheese mixture, maintaining a smooth and elegant surface.
- Dust the top with reserved graham cracker crumbs, adding a delightful textural contrast and visual appeal.
- Chill the assembled dessert in the refrigerator for a minimum of three hours, allowing flavors to meld and structure to solidify completely.
Notes
- Crushing graham crackers in a ziplock bag prevents messy kitchen counters and makes cleanup easier.
- Use room temperature cream cheese to ensure a smooth, lump-free mixture when blending with sugar.
- Whip heavy cream to stiff peaks for a light, airy texture that helps create a fluffy cheesecake layer.
- Gently fold whipped cream into cream cheese mixture to maintain its delicate volume and prevent deflating.
- Refrigerate for minimum 3 hours or overnight to allow layers to set and flavors to meld together perfectly.
- Serve chilled for the best taste and most refreshing dessert experience after a meal.
- Prep Time: 30 minutes
- Cook Time: 0 minutes
- Category: Desserts, Snacks
- Method: Mixing
- Cuisine: American
Nutrition
- Serving Size: 8
- Calories: 300
- Sugar: 21 g
- Sodium: 150 mg
- Fat: 22 g
- Saturated Fat: 12 g
- Unsaturated Fat: 8 g
- Trans Fat: 0 g
- Carbohydrates: 25 g
- Fiber: 1 g
- Protein: 3 g
- Cholesterol: 45 mg
Isabella Rossi
Founder & Culinary Content Creator
Expertise
Recipe Development, Traditional Irish and European Cuisines, Food Styling and Photography, Culinary Education
Education
Dublin Institute of Technology (DIT) – School of Culinary Arts and Food Technology
Ballymaloe Cookery School
Liam is the voice behind many of Craft Meats’ most flavorful features. With roots in Dublin’s smoky barbecue scene and a culinary degree from the Dublin Institute of Technology, he brings time-tested cooking techniques to life.
His training at Ballymaloe Cookery School sharpened his farm-to-table approach, giving him a deep respect for every ingredient he writes about.
He’s not about overcomplicating the process, just helping you cook meat that’s worth talking about. When he’s not writing or grilling, he’s out foraging or nerding out on regional spice blends to add to his next recipe.