
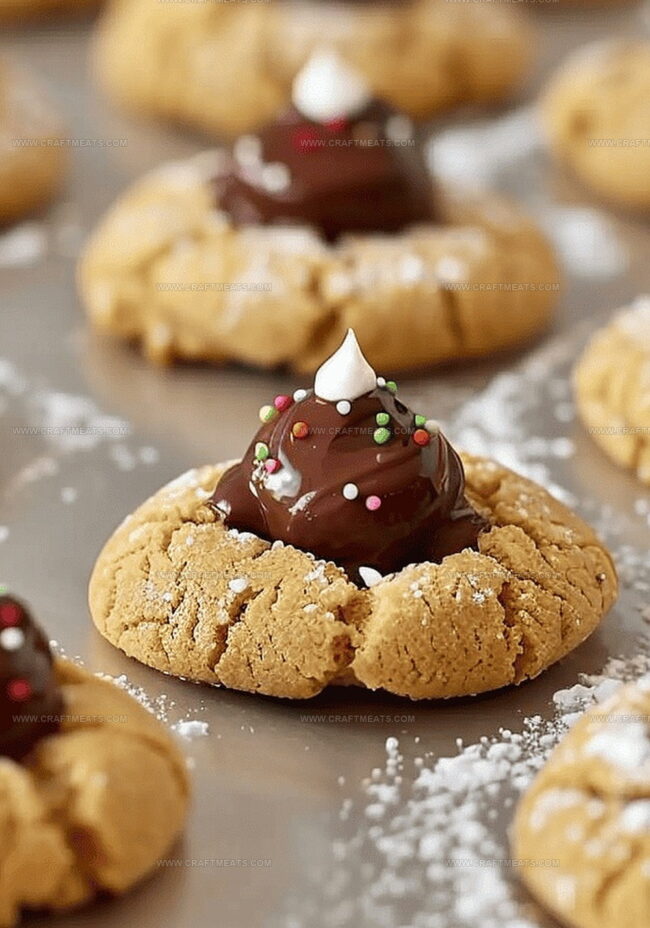
Peanut Butter Chocolate Kiss Cookies Recipe Made Easy
Peanut butter chocolate kiss delight cookies bring pure magic to your dessert table with their irresistible combination of rich flavors.
Sweet meets salty in this classic treat that promises to tantalize every taste bud.
Imagine soft, pillowy cookies melting in your mouth while revealing unexpected chocolate surprises.
Warm kitchen aromas will transport you to childhood memories of comforting homemade goodness.
Delicate textures and decadent ingredients collaborate to create something truly spectacular.
Surprisingly simple yet impressively delicious, these cookies guarantee smiles and satisfied cravings.
You cannot resist the temptation of these mouthwatering morsels that blend classic comfort with gourmet indulgence.
Peanut Butter Chocolate Kiss Cookies Highlights

Ingredients for Peanut Butter Chocolate Kiss Cookies
Cookie Base Ingredients:Coating and Topping Ingredients:Baking Essentials:Steps to Make Chocolate Kiss Cookies
Step 1: Warm Up the Oven & Gather Goodies
Collect all your baking supplies and create a tidy cooking zone. Switch on the oven and set the temperature to 375°F (190°C). Line your baking sheets with parchment paper for easy cleanup.
Step 2: Create the Perfect Dough
In a spacious mixing bowl, blend together:Stir the ingredients until they transform into a smooth, consistent mixture with zero dry patches.
Step 3: Shape Delicious Cookie Balls
Roll the dough into small, round balls using your hands. Each ball should be about the size of a walnut. Gently tumble each ball in granulated sugar, ensuring a complete and even sugar coating that adds a delightful sparkle and crunch.
Step 4: Position Cookies on Baking Sheets
Carefully place the sugar-coated dough balls on the prepared baking sheets. Space them approximately 2 inches apart to give each cookie room to spread and bake beautifully without sticking together.
Step 5: Bake to Golden Perfection
Slide the baking sheets into the preheated oven. Bake for 10 to 12 minutes until the cookie edges turn a lovely light golden brown. The cookies should look soft but set.
Step 6: Crown with Chocolate Kisses
Right after removing the cookies from the oven, quickly press a chocolate kiss into the center of each warm cookie. The residual heat will help the chocolate kiss melt slightly and stick perfectly to the cookie surface.
Step 7: Cool and Enjoy
Let the cookies rest on the baking sheet for 2-3 minutes. Then transfer them to a wire cooling rack. Allow them to cool completely before serving or storing in an airtight container.
Pro Tips for Peanut Butter Cookies
How to Store and Reheat Chocolate Kiss Cookies
Perfect Pairings for Chocolate Kiss Cookies
Variations of Chocolate Kiss Cookies
FAQs About Peanut Butter Kiss Cookies
Yes, you can use a homemade mix or another brand. Just ensure the dry ingredients are similar in proportion.
Store in an airtight container at room temperature for up to 5 days. For longer storage, refrigerate for up to a week.
Absolutely! Shape the dough balls, place them on a baking sheet, freeze until solid, then transfer to a freezer bag. They’ll keep for about 3 months.
Don’t worry. Let the cookies cool slightly for 1-2 minutes before adding the kiss. This prevents cracking and melting too quickly.
Print
Peanut Butter Chocolate Kiss Delight Cookies Recipe
- Total Time: 22 minutes
- Yield: 36 1x
Description
Irresistible Peanut Butter Chocolate Kiss Delight cookies blend creamy peanut butter with rich chocolate kisses for an indulgent treat. Classic comfort meets sweet romance in each perfectly balanced, melt-in-your-mouth cookie you’ll absolutely adore.
Ingredients
Main Ingredients:
- 1 (17.5 ounces/496 grams) Betty Crocker Peanut Butter Cookie Mix
- 1 egg
- 3 tablespoons vegetable oil
- 1 tablespoon water
Decoration Ingredients:
- Granulated sugar (for rolling)
- 36 pieces of chocolate kisses
Optional Decorative Toppings:
- White decorating gel
- Festive-themed candy sprinkles
Instructions
- Organize all necessary ingredients and create a clean, organized workspace. Set the oven temperature to 375°F (190°C) to ensure proper heat for baking.
- In a spacious mixing bowl, thoroughly blend the peanut butter cookie mix with the egg, vegetable oil, and water. Mix until the dough achieves a uniform consistency with no dry patches remaining.
- Craft uniform cookie balls by rolling the dough between your palms. Generously coat each sphere in granulated sugar, creating a sparkly, crisp exterior that enhances both texture and sweetness.
- Arrange the sugar-dusted dough spheres on an ungreased baking sheet, maintaining approximately two inches of separation to prevent cookies from merging during the baking process.
- Transfer the cookie sheet to the preheated oven and bake for 10-12 minutes. Look for light golden brown edges as an indicator of optimal doneness.
- Immediately after removing the cookies from the oven, delicately press a chocolate kiss into the center of each warm cookie. The residual heat will help the chocolate kiss melt slightly and adhere perfectly to the cookie surface.
- Allow the cookies to cool completely on the baking sheet, permitting the chocolate kiss to set and the cookie to firm up before transferring to a serving plate or storage container.
Notes
- Quickly prepare this simple recipe using a convenient Betty Crocker Peanut Butter Cookie Mix for a hassle-free baking experience.
- Roll cookie dough balls in granulated sugar for an extra layer of sweetness and delightful crackly texture that elevates the cookie’s appearance.
- Work swiftly after baking to press chocolate kisses into warm cookies, ensuring the chocolate melts slightly and creates a perfect bonding effect.
- Use ungreased cookie sheets to prevent unnecessary mess and make cleanup a breeze after enjoying these delectable treats.
- Store cookies in an airtight container at room temperature for up to 5 days to maintain their soft, chewy texture and rich flavor.
- Choose Hershey’s Kisses in various flavors like milk chocolate, dark chocolate, or caramel-filled for a personalized twist on this classic cookie.
- Prep Time: 10 minutes
- Cook Time: 12 minutes (per batch)
- Category: Desserts, Snacks
- Method: Baking
- Cuisine: American
Nutrition
- Serving Size: 36
- Calories: 120
- Sugar: 8 g
- Sodium: 150 mg
- Fat: 5 g
- Saturated Fat: 1 g
- Unsaturated Fat: 4 g
- Trans Fat: 0 g
- Carbohydrates: 17 g
- Fiber: 0 g
- Protein: 2 g
- Cholesterol: 10 mg
Isabella Rossi
Founder & Culinary Content Creator
Expertise
Recipe Development, Traditional Irish and European Cuisines, Food Styling and Photography, Culinary Education
Education
Dublin Institute of Technology (DIT) – School of Culinary Arts and Food Technology
Ballymaloe Cookery School
Liam is the voice behind many of Craft Meats’ most flavorful features. With roots in Dublin’s smoky barbecue scene and a culinary degree from the Dublin Institute of Technology, he brings time-tested cooking techniques to life.
His training at Ballymaloe Cookery School sharpened his farm-to-table approach, giving him a deep respect for every ingredient he writes about.
He’s not about overcomplicating the process, just helping you cook meat that’s worth talking about. When he’s not writing or grilling, he’s out foraging or nerding out on regional spice blends to add to his next recipe.