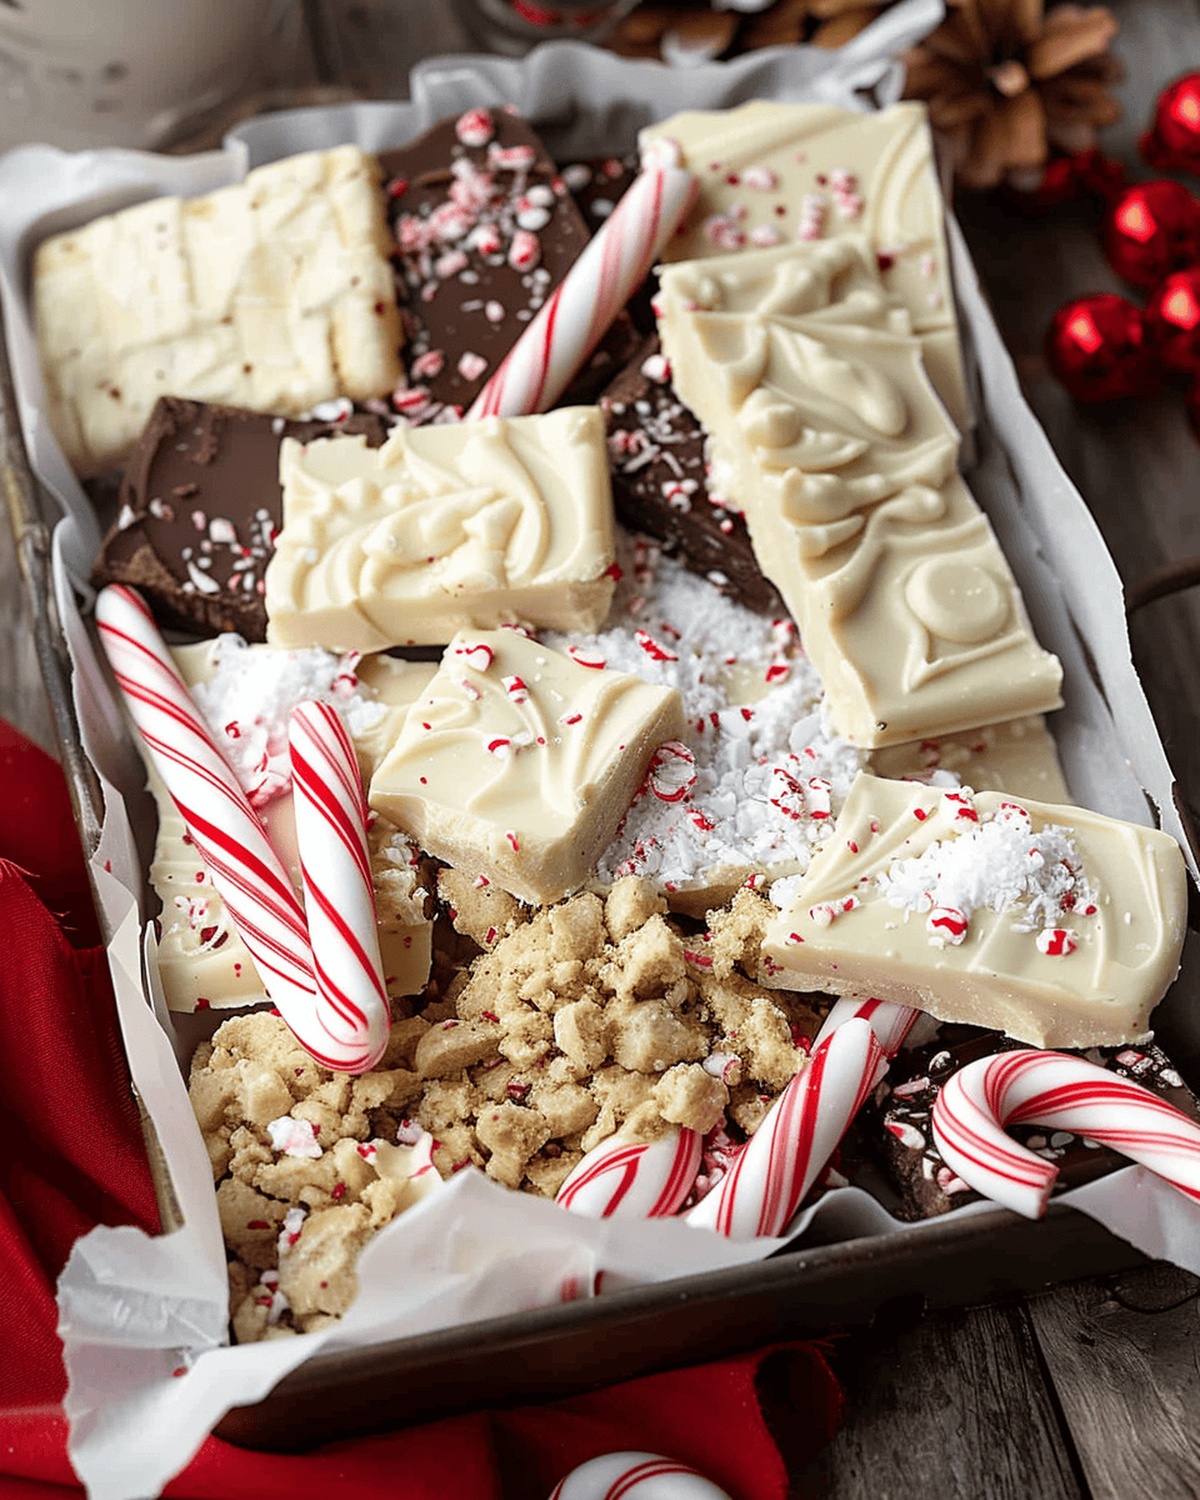
Peppermint Bark Recipe That’s Crisp and Ready to Gift
Cool and crisp peppermint delight bark brings winter magic right to your kitchen counter.
Sweet and crunchy textures dance together in this simple confection.
Chocolate meets minty freshness in a delectable seasonal treat that sparkles with festive charm.
Rich layers combine to create an irresistible snack perfect for gifting or indulging.
Smooth segments break into delightful pieces that melt smoothly on your tongue.
Hints of peppermint weave through each bite, creating a refreshing and decadent experience.
This recipe promises a quick and elegant dessert that looks impressive but requires minimal effort.
Explore this delicious creation and let the flavors transport you to a wonderland of sweet satisfaction.
Peppermint Bark That’s a Crowd-Pleaser
What You Need for Classic Peppermint Bark
Chocolate Base:Candy Cane Topping:Kitchen Tools:Simple Steps to Make This Seasonal Treat
Step 1: Set Up Your Candy Making Station
Grab a clean countertop and lay down a long sheet of parchment paper. Smooth out any wrinkles to create a perfect work surface for your delicious treat.
Step 2: Crush Candy Cane Treasures
Unwrap candy canes and toss them into a sturdy zip-top bag. Use a rolling pin or meat mallet to smash them into a delightful mix of chunky bits and fine powder. Channel your inner baker and have fun crushing!
Step 3: Separate Candy Cane Bits
Grab a fine mesh strainer and gently sift the crushed candy canes. Separate the powdery dust from the larger chunks. Place the fine powder in one small bowl and the chunky pieces in another.
Step 4: Transform White Chocolate
Select a microwave-safe glass bowl and pour in white chocolate chips. Heat in short 30-second bursts, stirring between each interval. Keep a close eye to prevent burning. The chocolate should become silky smooth after about 2 minutes of careful melting.
Step 5: Create Magical Peppermint Chocolate
Quickly fold the candy cane dust into the warm white chocolate. Stir with enthusiasm to ensure every bit of peppermint flavor is fully incorporated.
Ingredients:Step 6: Spread Sweet Canvas
Pour the peppermint-infused chocolate onto the prepared parchment paper. Use a spatula or the back of a spoon to spread it into a thin, even layer that looks like a delicate winter landscape.
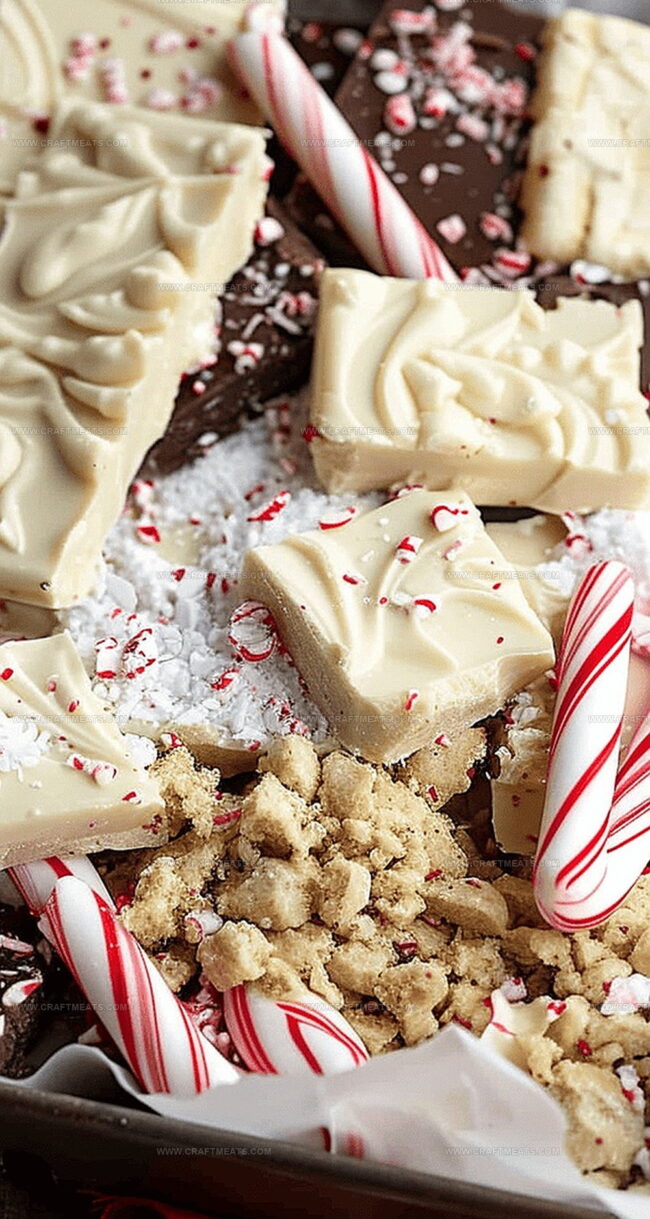
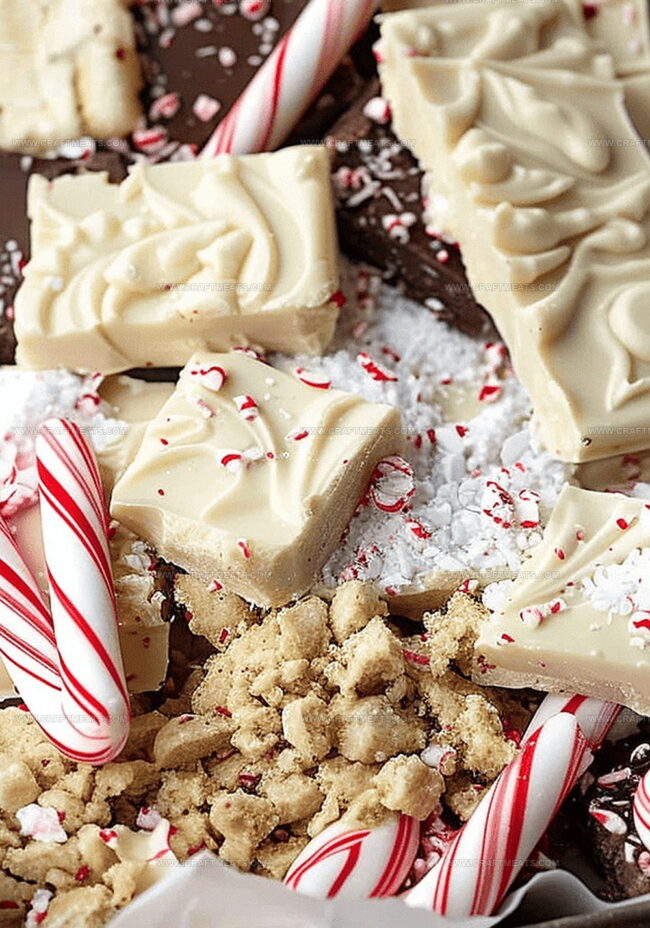
Step 7: Decorate with Candy Cane Pieces
Sprinkle the larger candy cane chunks over the chocolate surface. Gently press them down so they nestle into the chocolate, creating a festive mosaic.
Step 8: Patience Pays Off
Let the bark cool completely at room temperature. This might take about 30-45 minutes. Once set, break or cut into irregular pieces that look like delicious winter shards.
Peppermint Bark Prep Tips and Tricks
Best Ways to Keep It Crisp and Fresh
Tasty Pairings With Peppermint Bark
Twist It: Fun Bark Combinations to Try
Peppermint Bark FAQs for Holiday Hosts
The entire process takes about 15-20 minutes, with an additional 30-45 minutes for cooling and setting at room temperature.
White chocolate works best for this recipe, as it provides a smooth base and contrasts nicely with the red candy cane pieces. Other chocolates might change the final taste and appearance.
Store the bark in an airtight container at room temperature for up to 2 weeks. Keep it away from direct sunlight or heat to prevent melting.
You can use the bottom of a heavy skillet, a meat mallet, or even the back of a sturdy wooden spoon to crush the candy canes in a sealed zip-top bag.
Print
Peppermint Delight Bark Recipe
- Total Time: 15 minutes
- Yield: 12 1x
Description
Festive peppermint delight bark delivers winter magic with crisp chocolate layers and cool mint crunch. Chocolate lovers will savor this quick holiday treat that melts seamlessly between sweet and refreshing notes.
Ingredients
Main Chocolate Ingredients:
- 24 ounces (680 grams) white chocolate chips
Candy Topping:
- 12 peppermint candy canes
Instructions
- Position a lengthy parchment sheet across the kitchen workspace, creating a smooth surface for bark preparation.
- Unwrap candy canes and transfer them into a sturdy resealable plastic bag, then methodically crush using a rolling pin, creating a diverse texture of fine powder and irregular fragments.
- Utilize a delicate sieve to separate the powdery candy cane dust from chunkier pieces, allocating each portion into distinct containers for subsequent use.
- Transfer white chocolate chips into a microwave-safe vessel, heating in brief intervals and stirring consistently to achieve a smooth, fully liquefied consistency.
- Rapidly incorporate the candy cane dust into the molten chocolate, whisking energetically to ensure uniform distribution while maintaining the chocolate’s warm temperature.
- Elegantly cascade the infused chocolate mixture onto the prepared parchment, manipulating it with a silicone spatula to create a uniformly thin layer.
- Artfully distribute the reserved candy cane fragments across the chocolate surface, gently pressing them to secure their placement and ensure optimal adhesion.
- Allow the confection to solidify naturally at ambient temperature, transforming into a delicate, crisp bark that can be fractured or precisely sliced into delectable segments.
Notes
- Crushing candy canes requires a sturdy bag and rolling pin to create a mix of fine powder and larger chunks.
- Sifting the crushed candy canes separates fine dust from larger pieces, allowing precise control over texture and distribution.
- Melting white chocolate demands careful microwaving in short intervals, stirring consistently to prevent burning or seizing.
- Quickly incorporating candy cane dust into hot chocolate ensures smooth and even flavor distribution throughout the bark.
- Spreading chocolate in a thin, uniform layer guarantees a delicate and crisp texture for the final treat.
- Gently pressing candy cane chunks into the chocolate helps them adhere securely, creating a visually appealing and crunchy surface.
- Prep Time: 15 minutes
- Cook Time: 0 minutes
- Category: Desserts, Snacks
- Method: Mixing
- Cuisine: American
Nutrition
- Serving Size: 12
- Calories: 150
- Sugar: 18g
- Sodium: 10mg
- Fat: 8g
- Saturated Fat: 5g
- Unsaturated Fat: 3g
- Trans Fat: 0g
- Carbohydrates: 20g
- Fiber: 0g
- Protein: 1g
- Cholesterol: 5mg
Isabella Rossi
Founder & Culinary Content Creator
Expertise
Recipe Development, Traditional Irish and European Cuisines, Food Styling and Photography, Culinary Education
Education
Dublin Institute of Technology (DIT) – School of Culinary Arts and Food Technology
Ballymaloe Cookery School
Liam is the voice behind many of Craft Meats’ most flavorful features. With roots in Dublin’s smoky barbecue scene and a culinary degree from the Dublin Institute of Technology, he brings time-tested cooking techniques to life.
His training at Ballymaloe Cookery School sharpened his farm-to-table approach, giving him a deep respect for every ingredient he writes about.
He’s not about overcomplicating the process, just helping you cook meat that’s worth talking about. When he’s not writing or grilling, he’s out foraging or nerding out on regional spice blends to add to his next recipe.