Banana Pudding Recipe That’s Truly the Best
Sweet, creamy, and utterly irresistible, this best banana pudding ever recipe is a Southern classic that melts in your mouth.
Layers of velvety custard, ripe bananas, and crisp vanilla wafers create a dessert that feels like a warm hug.
The secret lies in the perfectly balanced ingredients and a touch of homemade love.
Each spoonful tells a story of comfort and nostalgia, bringing memories of summer gatherings and grandma’s kitchen.
Rich, decadent, and surprisingly simple to make, this dessert transforms ordinary ingredients into something extraordinary.
Dive into this crowd-pleasing treat that promises to become your new favorite dessert.
Quick Recipe Overview

What Goes In Best Banana Pudding Ever
For Pudding Base:For Layering Components:For Whipped Topping:Kitchen Tools For Best Banana Pudding Ever
Quick Instructions For Best Banana Pudding Ever

Create a silky smooth custard by blending sugar, cornstarch, and milk in a saucepan. Gently heat the mixture, stirring constantly until it transforms into a thick, bubbling concoction. Carefully mix egg yolks into the hot liquid, ensuring a velvety texture. Remove from heat and stir in butter and vanilla for an extra layer of richness.
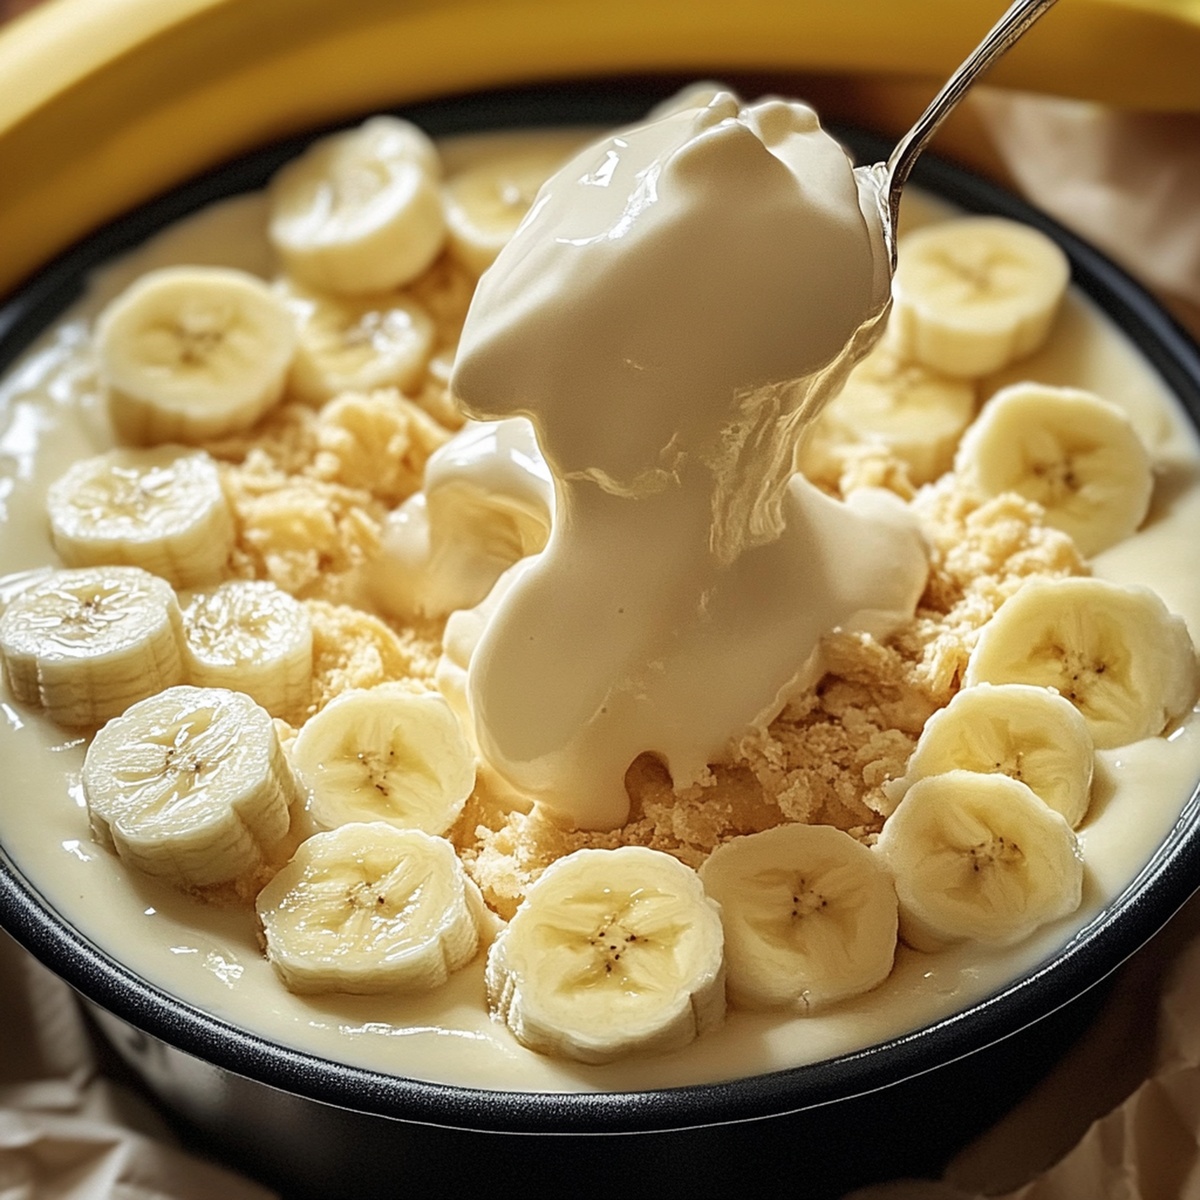
Transform your serving dish into a stunning dessert canvas. Start with a smooth pudding base, then artfully arrange crisp vanilla wafers and fresh banana slices. Build multiple layers, alternating between creamy pudding, crunchy cookies, and sweet fruit. Each layer tells a delicious story of flavor and texture.
Whip heavy cream into a dreamy, billowy crown for your dessert. Blend in a touch of sweetness and vanilla until soft peaks form, creating a light and airy finishing touch that will make mouths water.
Cover your masterpiece and let it rest in the refrigerator. During this time, the wafers will soften, the flavors will mingle, and the pudding will develop a perfect, creamy consistency. Patience transforms good desserts into unforgettable experiences.
Bring out your chilled creation and serve with a flourish. Each spoonful promises a symphony of creamy pudding, sweet bananas, and crisp wafers that will delight taste buds and create lasting memories.
Tasty Changes For Best Banana Pudding Ever
Ways To Serve Best Banana Pudding Ever
Keeping Best Banana Pudding Ever Fresh
Print
Silky Banana Pudding
- Total Time: 4 hours 35 minutes
- Yield: 8 1x
Description
Southern banana pudding combines creamy layers with vanilla wafers and fresh bananas. Sweet comfort dessert promises pure deliciousness you cannot resist.
Ingredients
- 5 ripe bananas, sliced
- 4 large egg yolks
- 3 cups (750 ml) whole milk
- 1 box (12 oz / 340 g) vanilla wafers
- 1 cup (240 ml) heavy whipping cream
- ¾ cup (150 g) granulated sugar
- ¼ cup (30 g) cornstarch
- 2 tbsps powdered sugar
- 2 tbsps unsalted butter
- 3 tsps vanilla extract
- ¼ tsp salt
Instructions
- Pudding Preparation: Whisk sugar, cornstarch, and salt in a saucepan. Gradually blend milk until smooth, then heat over medium, stirring consistently until mixture thickens and bubbles gently.
- Egg Integration: Carefully temper egg yolks by gradually introducing hot milk mixture while whisking continuously. Return tempered yolks to saucepan, cooking for 2-3 minutes until achieving a rich custard consistency.
- Flavor Enhancement: Remove from heat, incorporating butter and vanilla extract. Allow mixture to cool slightly, developing a velvety smooth texture.
- Layering Technique: Construct the dessert in a serving dish by spreading a thin pudding base. Alternate layers of vanilla wafers and banana slices, thoroughly coating each stratum with pudding.
- Cream Topping: Whip cream in a chilled bowl, blending powdered sugar and vanilla extract until forming stiff, cloud-like peaks.
- Final Presentation: Elegantly cover the top layer with whipped cream. Crush remaining vanilla wafers and sprinkle decoratively for added texture and visual appeal.
- Chilling and Serving: Refrigerate for a minimum of 4 hours, allowing flavors to meld and wafers to soften. Serve chilled, revealing a luscious, multi-layered dessert that promises a delightful culinary experience.
Notes
- Prevent Egg Scrambling: Temper egg yolks gradually by slowly introducing hot milk mixture while whisking continuously to maintain smooth, silky pudding texture.
- Control Pudding Consistency: Stir constantly over medium heat until mixture thickens and bubbles gently, ensuring perfect custard-like thickness without burning.
- Chill for Maximum Flavor: Refrigerate for at least 4 hours to allow wafers to soften and flavors to meld, creating a more harmonious dessert experience.
- Optimize Cream Whipping: Use a chilled bowl and utensils when whipping cream to achieve maximum volume and stiff, cloud-like peaks more efficiently.
- Prep Time: 35 minutes
- Cook Time: 4 hours
- Category: Desserts, Snacks
- Method: Mixing
- Cuisine: American
Nutrition
- Serving Size: 8
- Calories: 430
- Sugar: 32 g
- Sodium: 150 mg
- Fat: 22 g
- Saturated Fat: 13 g
- Unsaturated Fat: 9 g
- Trans Fat: 0 g
- Carbohydrates: 52 g
- Fiber: 1 g
- Protein: 6 g
- Cholesterol: 165 mg
Liam O’Sullivan
Founder & Culinary Content Creator
Expertise
Recipe Development, Traditional Irish and European Cuisines, Food Styling and Photography, Culinary Education
Education
Dublin Institute of Technology (DIT) – School of Culinary Arts and Food Technology
Ballymaloe Cookery School
Isabella brings a global spark to the Craft Meats table. Born in Florence and trained at the Apicius International School of Hospitality, she blends classic Italian flavor with modern writing that’s easy to follow and hard to forget.
Her additional training at the Italian Chef Academy fueled her love for well-crafted dishes, especially ones that spotlight beautiful cuts of meat.
She’s a food writer with heart, and a deep love for storytelling through single recipes. Her goal? To help you cook with more confidence and a little more joy, no matter where you start.