Heavenly Coconut Cream Pie Recipe: A Dreamy Dessert Delight
Dessert lovers swoon over this rich and decadent coconut cream pie that promises pure tropical bliss.
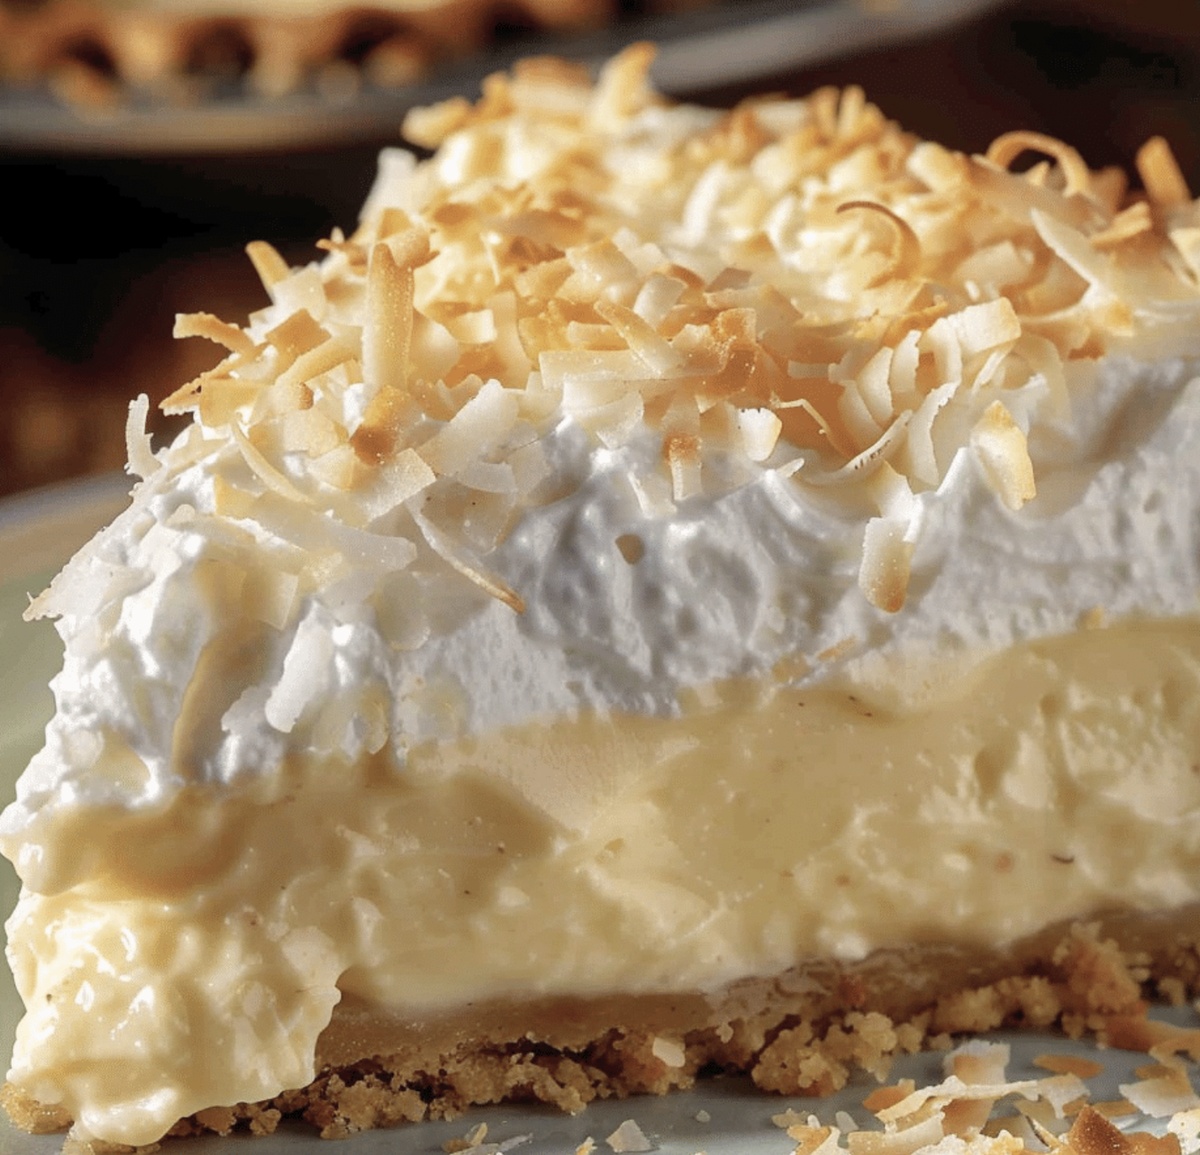
Creamy, silky, and bursting with sweet coconut flavor, this classic pie recipe delivers comfort in every single bite.
Homemade pastry cradles a luscious filling that melts on your tongue with incredible smoothness.
Each layer builds a delightful symphony of textures from the buttery crust to the pillowy cream.
The secret lies in selecting premium coconut and crafting each component with careful attention.
Topped with billowy whipped cream and delicate toasted coconut flakes, this pie transforms an ordinary dessert into an extraordinary experience.
One slice will transport you to a sun-drenched paradise of pure indulgence.
Helpful Tools For Baking Coconut Cream Pie
Bake The Perfect Coconut Cream Pie Without Stress
In a cozy saucepan, blend rich coconut milk with whole milk, creating a silky foundation. Introduce sweet sugar, golden egg yolks, cornstarch, and a whisper of salt to transform the liquid into a dreamy mixture.
Nurture the mixture over medium heat, constantly stirring with a whisk. Watch as the liquid gradually thickens and bubbles emerge, signaling the custard’s perfect transformation. This delicate process takes around 7-8 minutes.
Remove the pan from heat and welcome vibrant vanilla extract and cloud-like shredded coconut. Gently fold these ingredients into the warm custard, allowing their essence to mingle and create a harmonious blend.
Lovingly pour the velvety custard into a pre-baked pie crust. Use a soft spatula to caress the surface, ensuring a smooth, inviting landscape of creamy goodness. Let the pie chill and set, allowing flavors to deepen and marry.
Tasty Add-Ons For Your Coconut Cream Pie
Serving Coconut Cream Pie With That Tropical Touch
How To Store Coconut Cream Pie The Right Way
Quick Recipe Overview
Prep Time: 20 minutes
Cook Time: 4 hours
Total Time: 4 hours 20 minutes
Calories: 400 kcal
Servings: 7
What You’ll Need For Coconut Cream Pie
For Pie Crust:For Filling Base:For Finishing Touches: Print
Silky Coconut Cream Pie Recipe
- Total Time: 4 hours 20 minutes
- Yield: 7 1x
Description
Coconut cream pie brings tropical paradise to your dessert table with creamy, luscious filling. Flaky crust and toasted coconut garnish make this classic pie an irresistible treat you’ll savor to the last delightful bite.
Ingredients
- 1 pie crust (9-inch, homemade or store-bought)
- 13.5 oz (400 ml) coconut milk
- 300 ml whole milk
- 4 large egg yolks
- ½ cup (50 g) sweetened shredded coconut
- ¾ cup (150 g) granulated sugar
- ¼ cup (60 g) cornstarch
- 2 tbsps powdered sugar
- ¼ tsp salt
- 1 tsp vanilla extract
- 1 cup (240 ml) heavy whipping cream
- ½ tsp vanilla extract
- ¼ cup (30 g) toasted coconut flakes
Instructions
- Custard Preparation: Whisk coconut milk, whole milk, sugar, egg yolks, cornstarch, and salt in a saucepan until completely smooth and free of lumpy texture.
- Cooking Custard Base: Heat mixture over medium flame, stirring constantly and vigorously to prevent scorching, watching for gradual thickening and smooth transformation into a glossy pudding-like consistency.
- Texture Verification: Continue cooking until custard reaches a dense, velvety state that coats the back of a spoon, with small bubbles forming around pan edges, indicating proper thickening.
- Flavor Enhancement: Remove from heat and swiftly incorporate vanilla extract and shredded coconut, gently folding to distribute ingredients evenly and create a harmonious flavor profile.
- Pie Assembly: Pour warm custard into pre-baked pie crust, using a silicone spatula to spread filling uniformly and create a perfectly level surface.
- Cooling and Setting: Let pie rest at room temperature for 30 minutes, then transfer to refrigerator to allow custard to firm up and develop a rich, creamy texture before serving.
Notes
- Whisk Continuously: Prevent lumps and burning by maintaining constant, vigorous stirring during custard preparation, ensuring smooth and even texture.
- Temperature Control: Keep medium heat steady to achieve perfect custard consistency without scorching or undercooking the mixture.
- Check Custard Readiness: Test thickness by coating the back of a spoon – the custard should leave a clear path when you run a finger through it, indicating ideal setting point.
- Cooling Strategy: Allow pie to rest at room temperature before refrigerating, which helps custard stabilize and prevents condensation that could make crust soggy.
- Prep Time: 20 minutes
- Cook Time: 4 hours
- Category: Desserts
- Method: Simmering
- Cuisine: American
Nutrition
- Serving Size: 7
- Calories: 400
- Sugar: 34 g
- Sodium: 150 mg
- Fat: 28 g
- Saturated Fat: 20 g
- Unsaturated Fat: 6 g
- Trans Fat: 0 g
- Carbohydrates: 40 g
- Fiber: 1 g
- Protein: 4 g
- Cholesterol: 120 mg
Liam O’Sullivan
Founder & Culinary Content Creator
Expertise
Recipe Development, Traditional Irish and European Cuisines, Food Styling and Photography, Culinary Education
Education
Dublin Institute of Technology (DIT) – School of Culinary Arts and Food Technology
Ballymaloe Cookery School
Isabella brings a global spark to the Craft Meats table. Born in Florence and trained at the Apicius International School of Hospitality, she blends classic Italian flavor with modern writing that’s easy to follow and hard to forget.
Her additional training at the Italian Chef Academy fueled her love for well-crafted dishes, especially ones that spotlight beautiful cuts of meat.
She’s a food writer with heart, and a deep love for storytelling through single recipes. Her goal? To help you cook with more confidence and a little more joy, no matter where you start.