
Silky-Smooth Moist Vanilla Layer Cake Recipe for Any Occasion
Baking a delectable vanilla layer cake with creamy frosting can turn any ordinary day into a celebration of sweetness.
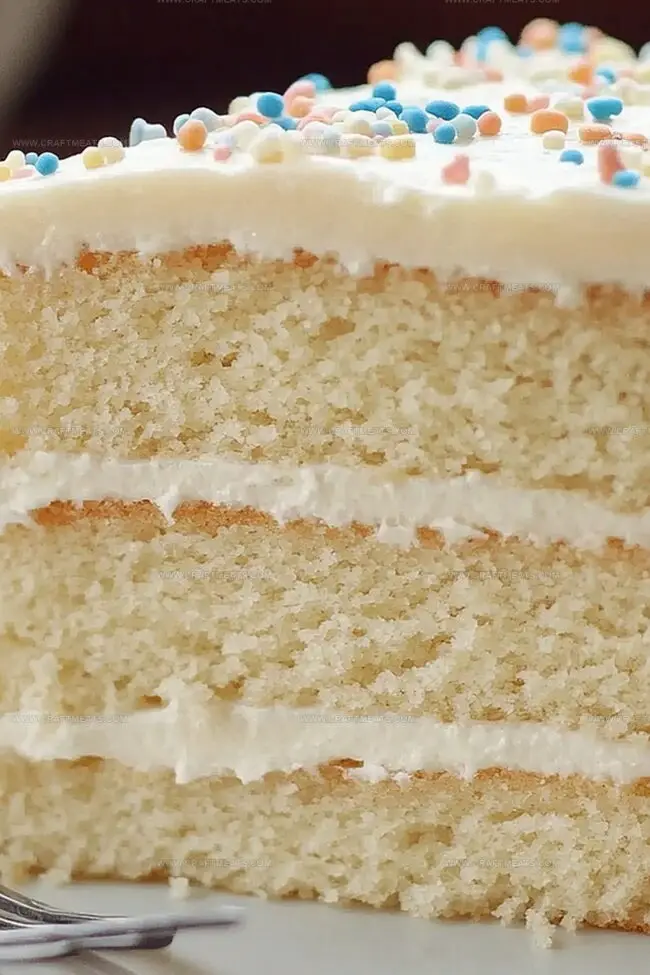
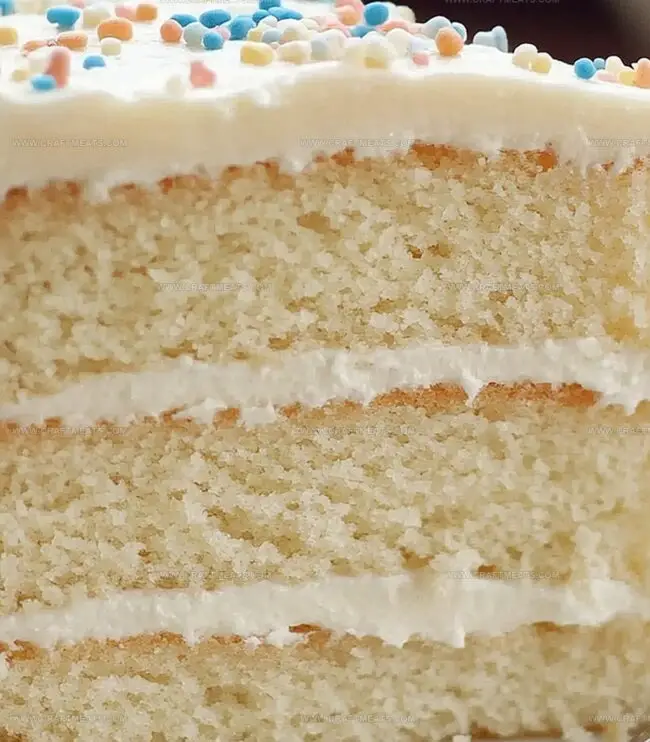
This classic honey-infused vanilla layer cake promises to melt hearts with its rich, tender crumb.
Soft layers of vanilla-kissed goodness create a dessert that whispers pure comfort and joy.
Every slice reveals a perfect balance of delicate flavor and luxurious texture.
Home bakers can easily master this straightforward recipe that requires simple ingredients and minimal fuss.
The golden-brown edges and soft center make this cake a true crowd-pleaser.
Dive into this irresistible dessert that will have everyone asking for seconds.
Quick Recipe Overview
Every Ingredient In Moist Vanilla Layer Cake
For Cake Base:For Moisture and Richness:For Frosting:Baking Tools For Moist Vanilla Layer Cake
Simple Steps For Moist Vanilla Layer Cake
Warm up your kitchen and get ready for a delightful baking journey. Grab your favorite cake pans and prepare them with a light coating of butter and a gentle dusting of flour. Your baking canvas is about to come alive.
Create a dance of ingredients in your mixing bowl. Blend softened butter and sugar until they transform into a light, fluffy cloud. Crack in fresh eggs one by one, letting each one blend smoothly. A splash of vanilla brings the whole mixture to life with its rich aroma.
Gently fold dry ingredients into your creamy mixture. Alternate with smooth buttermilk, letting each addition embrace the others. The key is gentle movements – no aggressive stirring allowed. Your batter should look like soft, silky clouds.
Slide your cake pans into a warm oven, watching the batter slowly rise and turn golden. Listen for the gentle sizzle and breathe in the sweet vanilla fragrance filling your kitchen. After about 25 minutes, a toothpick will reveal a perfectly baked cake.
Whip butter into a dreamy, creamy texture. Gradually welcome powdered sugar, transforming the mixture into a luxurious blanket of sweetness. A touch of vanilla and cream creates a frosting that’s pure magic.
Carefully place one cake layer on your favorite serving plate. Spread a generous layer of frosting like you’re painting a delicious masterpiece. Crown with the second layer and cover completely in your velvety frosting. Let your creativity shine with any decorative touches you desire.
Tricks To Perfect Your Moist Vanilla Layer Cake
Ways To Present Moist Vanilla Layer Cake Beautifully
Storage Advice For Moist Vanilla Layer Cake
Print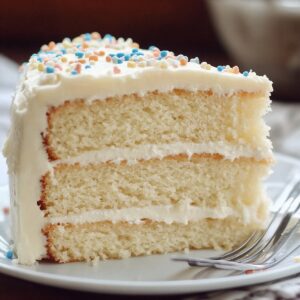
Silky Vanilla Layer Cake Recipe
- Total Time: 50 minutes
- Yield: 11 1x
Description
Classic vanilla layer cake blends delicate crumb with rich buttercream frosting for an elegant dessert. Bakers can craft this sweet centerpiece with simple ingredients and straightforward techniques, creating memorable moments around the table.
Ingredients
- 1 ¾ cups (350 g) granulated sugar
- 3 large eggs, room temperature
- 1 ¼ cups (300 ml / 10.14 fl oz) buttermilk, room temperature
- ¾ cup (170 g) unsalted butter, softened
- 2 ½ cups (315 g) all-purpose flour
- 2 ½ tsps baking powder
- 2 tsps vanilla extract
- ½ tsp baking soda
- ½ tsp salt
- 1 cup (225 g) unsalted butter, softened
- 4 cups (480 g) powdered sugar, sifted
- 23 tbsps (340 ml / 11.5 fl oz) heavy cream or milk
- 1 pinch salt
Instructions
- Prep Station: Grease two 9-inch round pans with parchment paper liners. Heat oven to 350F (175C), positioning rack in center.
- Dry Mix: Whisk flour, baking powder, baking soda, and salt in a medium bowl until uniformly blended, eliminating potential lumps.
- Butter Creaming: Use electric mixer to cream butter and sugar, transforming mixture into a light, airy consistency with pale color, about 3-4 minutes.
- Egg Integration: Add eggs individually, thoroughly mixing after each addition. Incorporate vanilla extract, ensuring complete absorption.
- Batter Formation: Gently fold dry ingredients into butter mixture, alternating with buttermilk. Mix on low speed, starting and concluding with dry ingredients. Cease mixing immediately when ingredients are just combined to maintain tender texture.
- Pan Distribution: Divide batter evenly between prepared pans, smoothing surfaces with spatula for level layers.
- Baking Process: Place in preheated oven, baking 25-30 minutes until toothpick inserted reveals minimal moist crumbs.
- Cooling Phase: Let cakes rest in pans for 10 minutes, then transfer to wire rack for complete cooling.
- Buttercream Creation: Whip softened butter until creamy and pale. Gradually incorporate sifted powdered sugar on low speed.
- Frosting Refinement: Add vanilla extract, salt, and heavy cream. Beat on medium-high speed until achieving fluffy, silky consistency.
- Cake Assembly: Position first layer on serving stand, spreading buttercream evenly. Carefully place second layer.
- Finishing Touches: Apply thin crumb coat, refrigerate 20 minutes. Cover cake with remaining buttercream using offset spatula for smooth finish.
- Decoration: Embellish with optional piped designs, sprinkles, or edible flowers for elegant presentation.
Notes
- Prevent Overmixing: Stop mixing batter as soon as ingredients combine to maintain cake’s tender, soft texture and avoid tough, dense layers.
- Temperature Precision: Ensure all ingredients are at room temperature for smoother blending and more consistent cake structure, especially butter and eggs.
- Uniform Baking: Level cake batter with a spatula to create even layers and prevent uneven rising or sunken centers during baking.
- Moisture Retention: Let cakes cool completely before frosting to lock in moisture and prevent buttercream from melting, ensuring a professional, smooth finish.
- Prep Time: 20 minutes
- Cook Time: 25-30 minutes
- Category: Desserts
- Method: Baking
- Cuisine: American
Nutrition
- Serving Size: 11
- Calories: 380
- Sugar: 36 g
- Sodium: 150 mg
- Fat: 20 g
- Saturated Fat: 12 g
- Unsaturated Fat: 8 g
- Trans Fat: 0 g
- Carbohydrates: 48 g
- Fiber: 0 g
- Protein: 3 g
- Cholesterol: 90 mg
Liam O’Sullivan
Founder & Culinary Content Creator
Expertise
Recipe Development, Traditional Irish and European Cuisines, Food Styling and Photography, Culinary Education
Education
Dublin Institute of Technology (DIT) – School of Culinary Arts and Food Technology
Ballymaloe Cookery School
Isabella brings a global spark to the Craft Meats table. Born in Florence and trained at the Apicius International School of Hospitality, she blends classic Italian flavor with modern writing that’s easy to follow and hard to forget.
Her additional training at the Italian Chef Academy fueled her love for well-crafted dishes, especially ones that spotlight beautiful cuts of meat.
She’s a food writer with heart, and a deep love for storytelling through single recipes. Her goal? To help you cook with more confidence and a little more joy, no matter where you start.