
No-Bake Vanilla Tiramisu Roll Recipe You’ll Adore
Decadent desserts often surprise us with their simplicity, and this no-bake vanilla tiramisu roll recipe proves that elegant treats can be effortlessly crafted.
The classic Italian-inspired roll blends rich mascarpone with delicate vanilla notes, creating a dreamy texture that melts on your tongue.
Light ladyfinger cookies soak up espresso and liqueur, adding depth to every silky slice.
Layers of creamy filling and soft cookies intertwine, promising a sophisticated yet uncomplicated dessert experience.
Minimal kitchen skills and zero baking required make this recipe a game-changer for sweet enthusiasts.
Chilled and refreshing, the roll delivers a luxurious taste that feels like a gourmet indulgence.
Prepare to impress your guests with this stunning, no-fuss dessert that transforms ordinary ingredients into an extraordinary culinary masterpiece.
Quick Recipe Overview
No-Bake Vanilla Tiramisu Roll Ingredient List
For Base and Moistening:For Filling and Creaming:For Garnishing and Finishing:Gear For Rolling No-Bake Vanilla Tiramisu Roll
How To Assemble No-Bake Vanilla Tiramisu Roll Easily

Ladyfingers get a luxurious coffee bath, transforming them into soft, flavor-packed layers ready to create a decadent dessert experience.
Mascarpone blends with sweet vanilla, creating a cloud-like mixture that promises pure indulgence with every single bite.
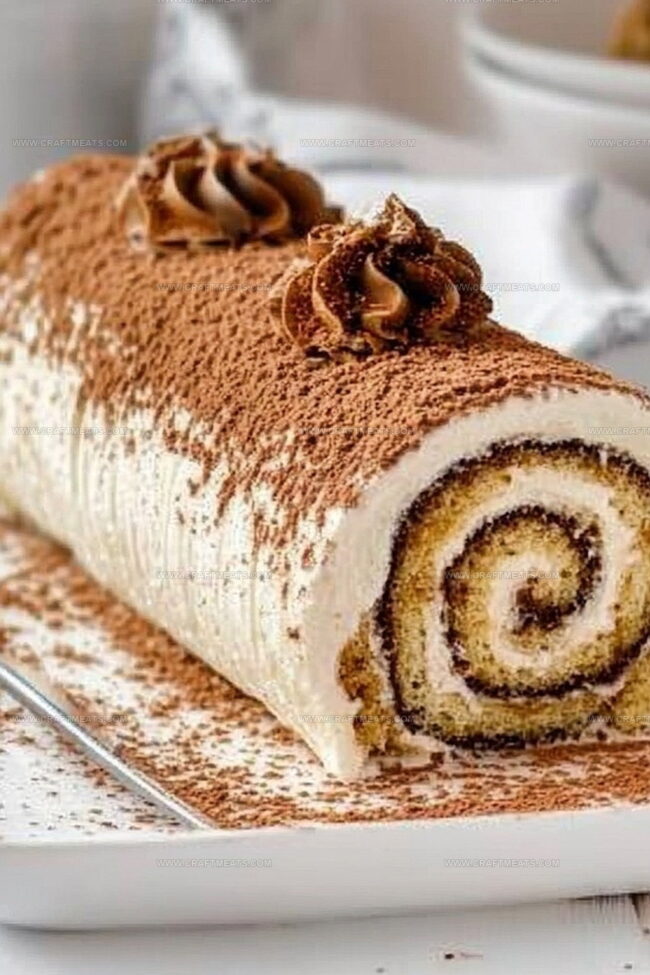
Carefully transform delicate ladyfingers into a stunning swirled log, using plastic wrap as your secret rolling companion to ensure perfect shape and texture.
Let the dessert rest in the refrigerator, allowing flavors to meld and become intensely rich while the texture becomes wonderfully smooth and elegant.
Unveil your masterpiece by dusting with cocoa powder, adding a dramatic finish that makes this dessert look as incredible as it tastes. Slice and serve to create instant culinary excitement.
Sweet Twists For No-Bake Vanilla Tiramisu Roll Filling
Serving No-Bake Vanilla Tiramisu Roll With Flair
Keep No-Bake Vanilla Tiramisu Roll Chilled And Sliced
Print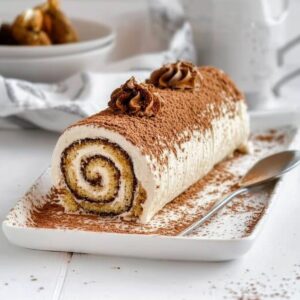
Silky Vanilla Tiramisu Roll Recipe
- Total Time: 4 hours 20 minutes
- Yield: 11 1x
Description
Silky vanilla tiramisu roll offers a delightful twist on classic Italian desserts. Cool layers of creamy mascarpone and delicate ladyfingers create an elegant treat for sweet-seeking souls.
Ingredients
- 24 ladyfingers (savoiardi)
- 8 oz (225 g) mascarpone cheese, softened
- 1 cup (240 ml) heavy cream, whipped
- 1 cup (240 ml) brewed coffee, cooled
- ¼ cup (60 ml) coffee liqueur
- ½ cup (60 g) powdered sugar
- 1 tsp vanilla extract
- ½ tsp almond extract
- 2 tbsps cocoa powder, for dusting
- Shaved white chocolate
Instructions
- Mascarpone Fusion: Whisk mascarpone cheese, powdered sugar, vanilla extract, and almond extract until velvety. Gently fold in whipped heavy cream to create a cloud-like, decadent filling with silky smooth consistency.
- Coffee Immersion: Combine brewed coffee and coffee liqueur in a shallow dish. Briefly dip each ladyfinger, allowing quick absorption without waterlogging, creating a perfectly moistened base.
- Layer and Roll: Spread plastic wrap and arrange coffee-dipped ladyfingers in a slightly overlapping rectangular pattern. Generously coat with mascarpone mixture, leaving a small border. Using the wrap as a guide, roll from the shorter edge into a tight cylinder, ensuring even distribution of filling.
- Chill and Set: Envelop the roll completely in plastic wrap, securing the shape. Refrigerate for a minimum of 4 hours, allowing flavors to harmonize and texture to stabilize into a cohesive dessert.
- Finishing Touches: Unwrap the chilled roll with care. Dust generously with cocoa powder and optionally garnish with delicate white chocolate shavings. Slice into sophisticated portions and serve directly from the refrigerator for optimal texture and taste.
Notes
- Control Coffee Soaking: Dip ladyfingers quickly and lightly to prevent soggy texture; aim for gentle moisture absorption without complete saturation.
- Manage Cream Consistency: Whip heavy cream to soft peaks for optimal volume and fold gently into mascarpone mixture to maintain airy, smooth filling without deflating.
- Secure Rolling Technique: Use plastic wrap as a tight rolling guide, applying gentle, even pressure to create compact cylindrical shape without squeezing out filling.
- Chill for Flavor Development: Refrigerate roll for minimum 4 hours, allowing ingredients to meld and firm up; overnight chilling enhances deeper taste profile and smoother texture.
- Prep Time: 20 minutes
- Cook Time: 4 hours
- Category: Desserts
- Method: Mixing
- Cuisine: Italian
Nutrition
- Serving Size: 11
- Calories: 300
- Sugar: 17 g
- Sodium: 80 mg
- Fat: 22 g
- Saturated Fat: 13 g
- Unsaturated Fat: 8 g
- Trans Fat: 0 g
- Carbohydrates: 25 g
- Fiber: 0 g
- Protein: 4 g
- Cholesterol: 70 mg
Liam O’Sullivan
Founder & Culinary Content Creator
Expertise
Recipe Development, Traditional Irish and European Cuisines, Food Styling and Photography, Culinary Education
Education
Dublin Institute of Technology (DIT) – School of Culinary Arts and Food Technology
Ballymaloe Cookery School
Isabella brings a global spark to the Craft Meats table. Born in Florence and trained at the Apicius International School of Hospitality, she blends classic Italian flavor with modern writing that’s easy to follow and hard to forget.
Her additional training at the Italian Chef Academy fueled her love for well-crafted dishes, especially ones that spotlight beautiful cuts of meat.
She’s a food writer with heart, and a deep love for storytelling through single recipes. Her goal? To help you cook with more confidence and a little more joy, no matter where you start.