Chocolate Ooey Gooey Cake Recipe Everyone Raves About
Decadent chocolate ooey gooey cake stands as the ultimate dessert for true chocolate enthusiasts.
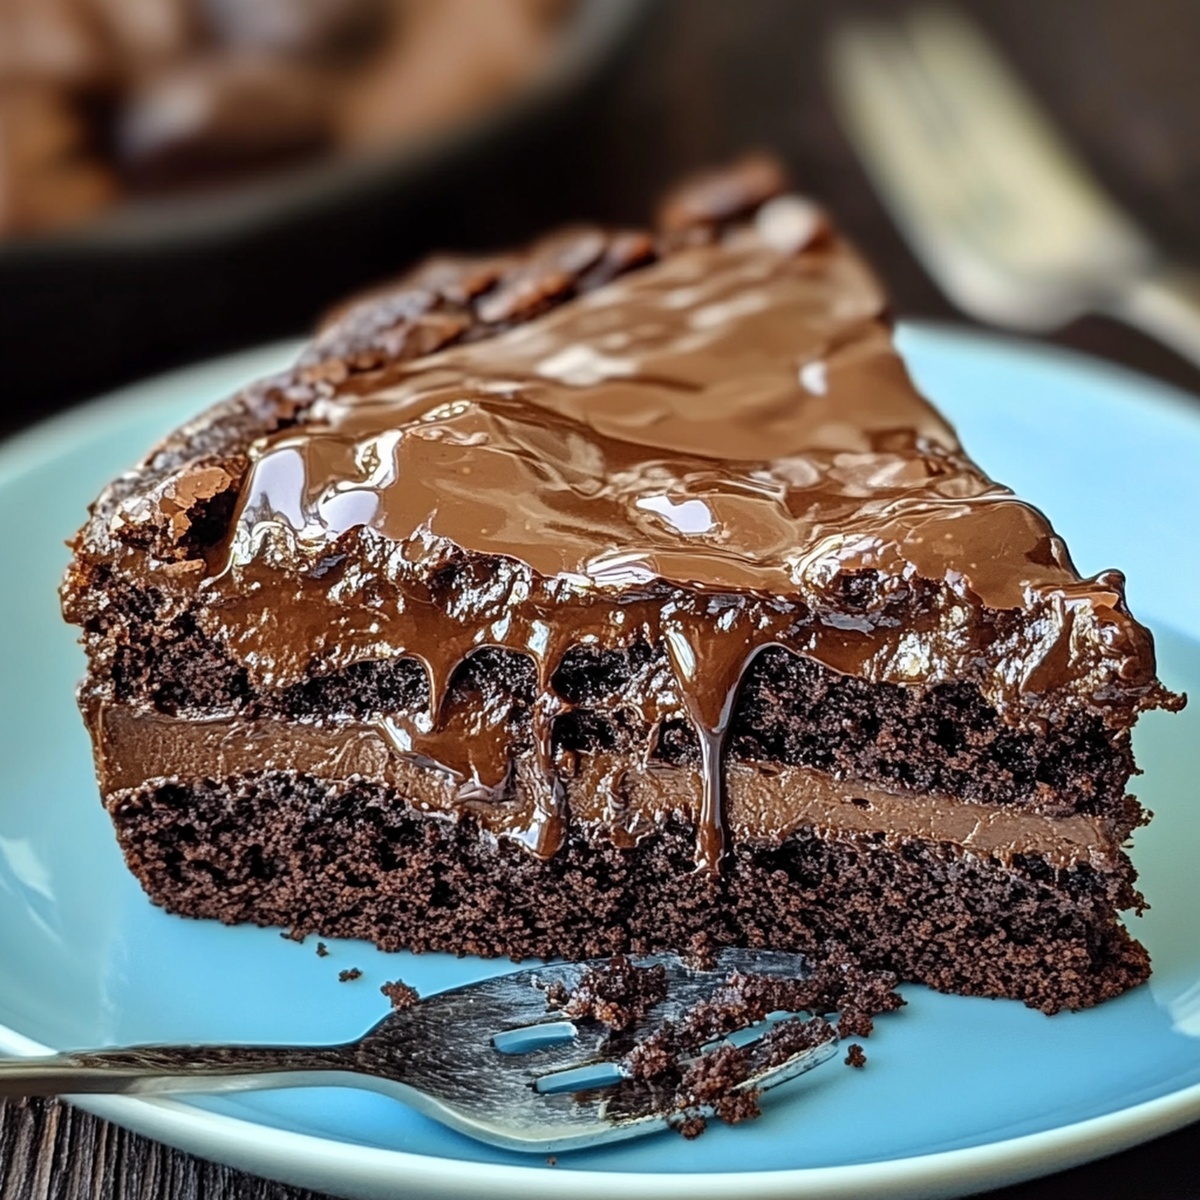
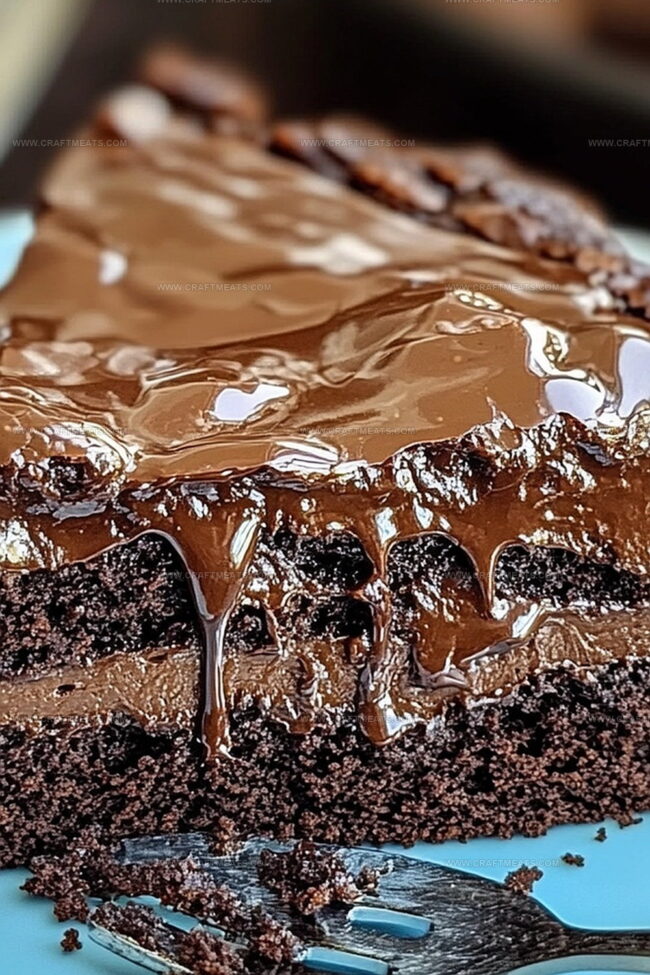
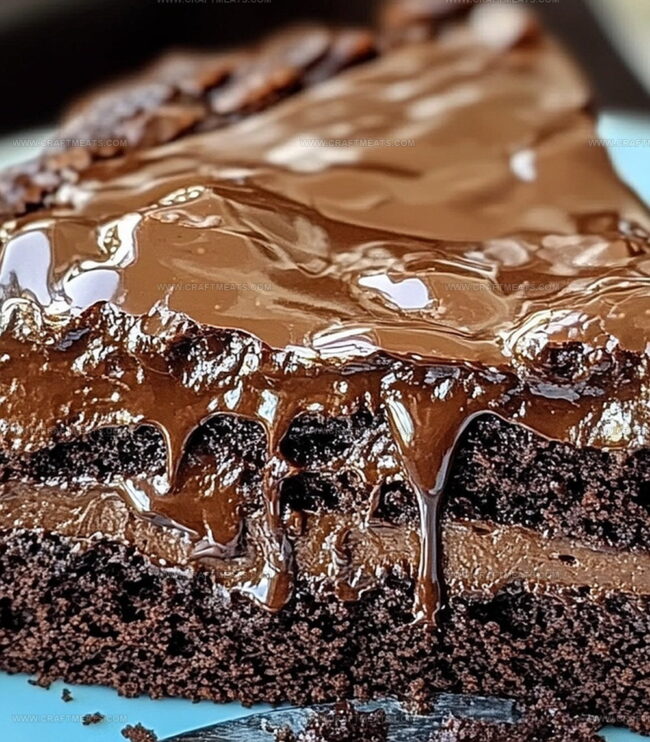
Rich layers of moist chocolate cake promise pure indulgence with every bite.
Soft, melting chocolate creates a heavenly texture that melts right on your tongue.
Preparing this dessert requires simple ingredients and minimal effort.
The recipe delivers an irresistible treat that promises to wow anyone who takes a single taste.
Chocolate lovers will instantly fall in love with its deep, intense flavor profile.
This cake transforms an ordinary evening into a spectacular dessert experience that lingers in memory long after the last delicious crumb disappears.
Quick Recipe Overview
What Goes Into Chocolate Ooey Gooey Cake
For Cake Base:For Gooey Layer:For Optional Finishing:Tools To Make Chocolate Ooey Gooey Cake
Steps To Bake Chocolate Ooey Gooey Cake

Crank up the heat to a cozy 350 degrees. Grab your baking dish and give it a quick butter massage to prevent any sticky situations.
Dive into mixing your chocolate cake base. Combine cake mix, melted butter, and a single egg until you’ve got a rich, chocolatey dough. Press this delightful mixture firmly into the bottom of your prepared pan, creating a smooth foundation.
Grab your mixing bowl and whip that cream cheese into silky submission. Introduce eggs, vanilla, and melted butter to create a dreamy mixture. Slowly fold in powdered sugar and cocoa powder until you’ve got a luxuriously smooth cream that promises pure indulgence.
Gently cascade the gooey layer over your chocolate base, spreading it with love and care to create a perfect blanket of deliciousness.
Slide your creation into the oven and let it bake for 40-45 minutes. You’re looking for set edges with a center that still wiggles slightly – this is the secret to that legendary ooey-gooey texture.
Give your masterpiece a moment to cool and settle. Slice into heavenly portions and serve. Optional: Crown with a dollop of whipped cream or a light dusting of powdered sugar for extra wow factor.
Rich Ideas For Chocolate Ooey Gooey Cake
How To Slice And Serve Chocolate Ooey Gooey Cake
How To Keep Chocolate Ooey Gooey Cake Moist
Print
Sinful Chocolate Ooey Gooey Cake Recipe
- Total Time: 1 hour
- Yield: 11 1x
Description
Indulgent chocolate ooey gooey cake promises pure dessert bliss with its rich, molten center. Chocolate lovers will savor each decadent bite of this irresistible Southern-style sweet treat.
Ingredients
- 1 large egg
- 1 (15.25 oz / 432 g) box of chocolate cake mix
- ½ cup (115 g) unsalted butter, melted
- 4 cups (500 g) powdered sugar
- 8 oz (227 g) cream cheese, softened
- ½ cup (120 g) unsalted butter, melted
- 2 large eggs
- ¼ cup (25 g) cocoa powder
- 1 tsp vanilla extract
- Whipped cream (optional)
- Chocolate chips (optional)
- Powdered sugar (optional)
Instructions
- Prep Station: Set oven to 350F (175C) and grease a 9×13-inch baking dish thoroughly with butter or non-stick spray.
- Base Layer Creation: Mix cake mix, melted butter, and egg until a uniform dough forms. Press mixture evenly into the prepared baking dish, creating a solid chocolate foundation.
- Filling Composition: Whip cream cheese until smooth, then incorporate eggs, vanilla extract, and melted butter. Blend cocoa powder and powdered sugar into the mixture, transforming it into a silky, rich cream.
- Assembly: Pour the creamy filling over the chocolate base, spreading it uniformly across the entire surface using a spatula.
- Baking Process: Transfer the dish to the preheated oven, baking for 40-45 minutes. Look for slightly set edges while maintaining a soft, gooey center—the quintessential characteristic of this decadent dessert.
- Cooling and Setting: After removing from the oven, allow the cake to rest for 20 minutes, enabling layers to settle and flavors to intensify.
- Serving Finale: Cut into generous portions and optionally dust with powdered sugar or top with a dollop of whipped cream for an extra touch of indulgence.
Notes
- Butter Matters: Use room temperature butter for smoother mixing and better texture in both cake base and filling layers.
- Even Distribution Technique: Press cake mix layer gently but firmly to create a uniform base, preventing uneven baking or crumbly texture.
- Temperature Control: Allow cream cheese to soften at room temperature before whipping to ensure silky, lump-free filling consistency.
- Monitor Baking Carefully: Check cake at 40-minute mark to prevent over-baking, which can dry out the signature gooey center – look for slightly jiggly middle with set edges.
- Prep Time: 15 minutes
- Cook Time: 45 minutes
- Category: Desserts
- Method: Baking
- Cuisine: American
Nutrition
- Serving Size: 11
- Calories: 350
- Sugar: 45 g
- Sodium: 300 mg
- Fat: 18 g
- Saturated Fat: 10 g
- Unsaturated Fat: 8 g
- Trans Fat: 0 g
- Carbohydrates: 43 g
- Fiber: 1 g
- Protein: 4 g
- Cholesterol: 70 mg
Liam O’Sullivan
Founder & Culinary Content Creator
Expertise
Recipe Development, Traditional Irish and European Cuisines, Food Styling and Photography, Culinary Education
Education
Dublin Institute of Technology (DIT) – School of Culinary Arts and Food Technology
Ballymaloe Cookery School
Isabella brings a global spark to the Craft Meats table. Born in Florence and trained at the Apicius International School of Hospitality, she blends classic Italian flavor with modern writing that’s easy to follow and hard to forget.
Her additional training at the Italian Chef Academy fueled her love for well-crafted dishes, especially ones that spotlight beautiful cuts of meat.
She’s a food writer with heart, and a deep love for storytelling through single recipes. Her goal? To help you cook with more confidence and a little more joy, no matter where you start.