Sinful Oreo Balls Recipe

Bite-sized Bliss: Homemade Oreo Balls Recipe for Sweet Smiles

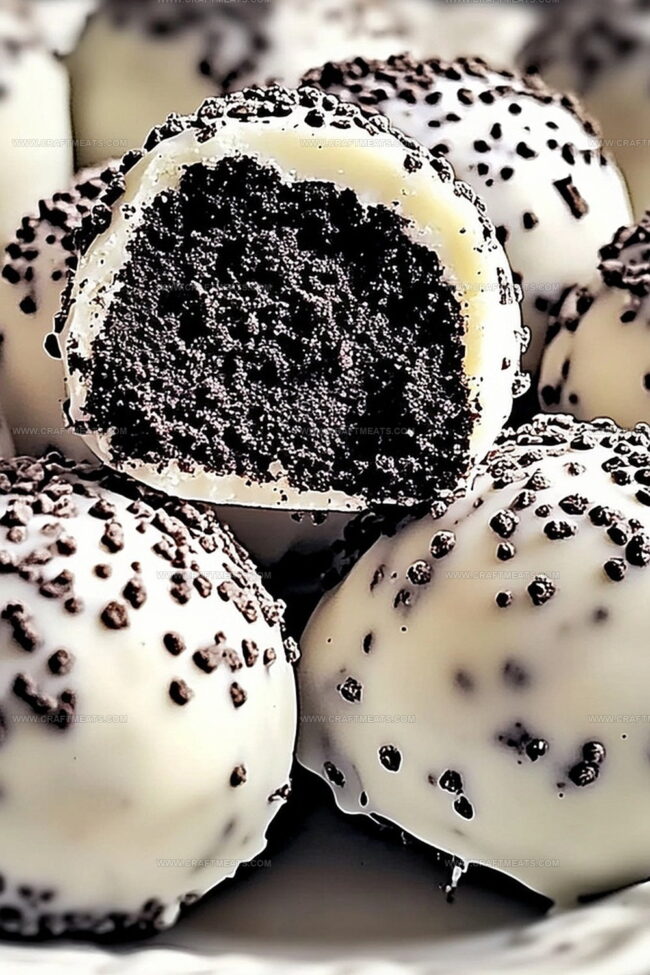
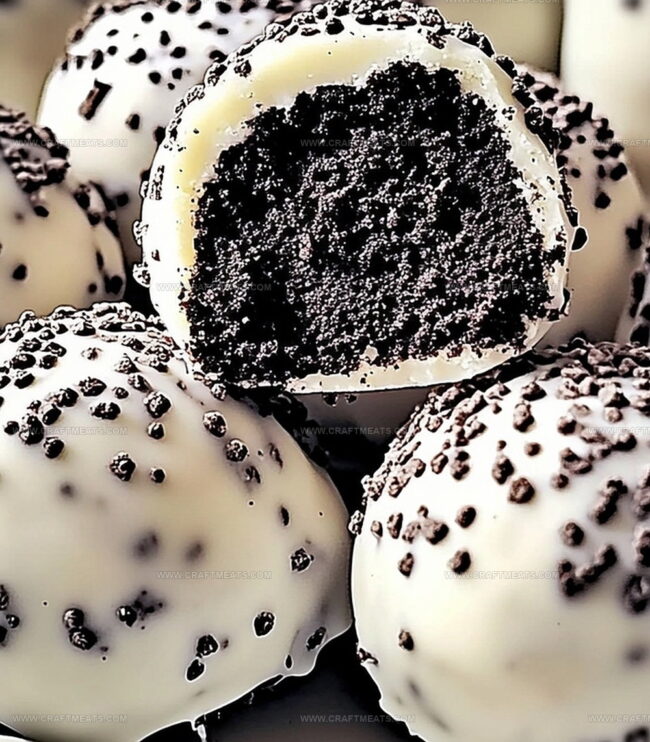
Chocolate-coated oreo balls deliver an irresistible no-bake dessert that melts in your mouth with creamy decadence.

These bite-sized treats pack incredible flavor into every single sphere.

Crushing oreo cookies and blending them with smooth cream cheese creates the perfect truffle-like base.

Chilled and dipped in rich melted chocolate, each ball becomes a delightful confection that sparks pure joy.

Rolling these sweet morsels is surprisingly simple and requires minimal ingredients.

The result is a crowd-pleasing dessert that looks professionally crafted yet takes just minutes to prepare.

Serve these delectable oreo balls at parties or enjoy them as a personal indulgence that satisfies every sweet craving.

Tools Required For Oreo Balls

  • Food Processor: Essential for grinding Oreos into fine, consistent crumbs.
  • Large Mixing Bowl: Perfect for combining Oreo crumbs and cream cheese.
  • Parchment Paper: Helps prevent sticking and makes cleanup easy.
  • Baking Sheet: Great for chilling and setting Oreo balls.
  • Microwave-Safe Bowl: Ideal for melting chocolate smoothly.
  • Fork: Helpful for dipping and draining excess chocolate.
  • Measuring Spoons: Useful for precise measurements.

How To Roll And Chill Oreo Balls

  • Oreo Crushing

Smash those classic cookies into tiny fragments using a food processor. Crumble them into a fine, powdery texture that looks like delicious dark sand. The whole cookie goes in – cream and all!

  • Creamy Mixture

Blend the cookie dust with soft cream cheese until you create a rich, moldable dough. The mixture should feel smooth and stick together perfectly when you press it.

  • Ball Formation

Gently roll the mixture into small, bite-sized spheres. Place these little treats on a cool tray lined with parchment paper. Pop them in the refrigerator to chill and firm up.

  • Chocolate Bath

Melt chocolate until it’s silky and glossy. Carefully dunk each ball, letting excess chocolate drip off. Use a fork to help you navigate this delicious dunking process.

  • Final Touches

Sprinkle some extra cookie crumbs or fun decorations while the chocolate is still wet. Let the Oreo balls rest in the refrigerator until the chocolate sets into a beautiful, crisp shell.

Tips For Better Oreo Balls

  • Cool Coating Tricks: Use a dipping fork or skewer for smooth, even chocolate coverage without messy fingers.
  • Chilling Perfection: Always refrigerate balls before and after chocolate coating to maintain a firm texture and prevent crumbling during dipping.
  • Dietary Friendly Swaps: Substitute regular Oreos with gluten-free cookies for celiac-friendly treats. Use dairy-free cream cheese and vegan chocolate for plant-based versions.
  • Make-Ahead Magic: These Oreo balls can be prepared up to a week in advance and stored in an airtight container in the refrigerator, making them ideal for party prep or unexpected guests.
  • Flavor Explosion: Experiment with different Oreo flavors like mint, peanut butter, or birthday cake to create unique taste combinations that will surprise and delight everyone.

How To Serve Oreo Balls For Snacks

  • Party Platter Perfection: Arrange Oreo balls on a beautiful tiered serving tray with varying heights to create visual interest and make guests feel excited about this delightful dessert.
  • Elegant Dessert Display: Garnish with a light dusting of cocoa powder or place each ball in mini cupcake liners for a sophisticated presentation that looks professionally crafted.
  • Sweet Gift Packaging: Pack these Oreo balls in clear gift boxes tied with ribbons, making them a perfect homemade treat for holidays, birthdays, or special celebrations with friends and family.
  • Flavor Fusion Fun: Experiment with different chocolate coatings like dark, milk, or white chocolate, and add fun toppings like crushed nuts, colored sprinkles, or drizzled caramel for unique flavor variations.

Oreo Balls Storage Ideas

  • Smart Refrigeration Strategy: Store Oreo balls in an airtight container inside the refrigerator for up to 7 days. Stack them carefully between parchment paper layers to prevent sticking and maintain their delicate chocolate coating.
  • Freezing Magic: Wrap individual Oreo balls in plastic wrap, then place them in a freezer-safe container. They'll stay delicious for 2-3 months. Thaw in the refrigerator for 1-2 hours before serving for the best texture and taste.
  • Make-Ahead Brilliance: Prepare the Oreo ball mixture up to 2 days before shaping and coating. Keep the unrolled mixture sealed in the refrigerator, then roll and dip just before your event or gathering for maximum freshness.
  • Portion Control Trick: Create smaller bite-sized versions by rolling 1/2-inch balls instead of full-sized ones. This approach works perfectly for parties, allowing guests to enjoy multiple treats without feeling overwhelmed. Use mini cupcake liners for an elegant presentation that keeps each ball separate and pristine.

Quick Recipe Overview

Prep Time: 15 minutes

Cook Time: 30 minutes

Total Time: 45 minutes

Calories: 150 kcal

Servings: 23

Ingredients Used In Oreo Balls

For Oreo Mixture:
  • Oreo Cookies: Creamy sandwich cookies that provide rich chocolate flavor and essential structure for the dessert, choose original flavor for classic taste.
  • Cream Cheese: Soft, tangy ingredient that binds the mixture and creates smooth texture, ensure it's room temperature for easy mixing.
For Coating:
  • Chocolate Chips: Creates delectable shell that adds shine and extra chocolatey goodness, use semi-sweet or milk chocolate for balanced sweetness.
  • White Chocolate Chips: Optional drizzling ingredient for elegant decoration, provides contrasting color and additional flavor complexity.
For Garnish:
  • Oreo Crumbs: Reserved topping that adds visual appeal and extra crunch, sprinkle immediately after coating while chocolate is still wet.
  • Sprinkles: Colorful decoration that brings playful texture and festive look, choose jimmies or nonpareils for best visual effect.
Print
clock clock iconcutlery cutlery iconflag flag iconfolder folder iconinstagram instagram iconpinterest pinterest iconfacebook facebook iconprint print iconsquares squares iconheart heart iconheart solid heart solid icon
Sinful Oreo Balls Recipe

Sinful Oreo Balls Recipe


5 Stars 4 Stars 3 Stars 2 Stars 1 Star

4.6 from 13 reviews

  • Total Time: 45 minutes
  • Yield: 23 1x

Description

Sinful Oreo balls merge crushed cookies with cream cheese and chocolate coating for an irresistible dessert. Cold treats deliver pure indulgence you cannot resist.


Ingredients

Scale
  • 36 Oreo cookies (1 standard package)
  • 8 oz (226 g) cream cheese, softened
  • 12 oz (340 g) semi-sweet chocolate chips or melting chocolate
  • Sprinkles
  • Crushed Oreos
  • White chocolate drizzle

Instructions

  1. Cookie Preparation: Pulse Oreo cookies in a food processor until transforming into fine, uniform crumbs. Reserve a small portion for garnishing.
  2. Dough Formation: Blend processed crumbs with cream cheese, kneading until creating a cohesive, pliable mixture. Roll into compact, one-inch spheres on a parchment-lined tray.
  3. Chilling Phase: Refrigerate formed balls for 20-30 minutes to stabilize their structure and enhance texture.
  4. Chocolate Coating: Melt chocolate chips using gentle microwave technique, stirring to achieve a smooth consistency. Dip each chilled ball completely, allowing excess chocolate to drip off using a fork.
  5. Decorative Finishing: While chocolate remains wet, sprinkle reserved Oreo crumbs or decorative elements across the surface. Return to refrigerator for final 15-20 minute setting period.

Notes

  • Prevent Crumb Clumping: Pulse Oreos in short bursts to achieve ultra-fine, uniform crumbs without creating dense, sticky masses.
  • Temperature Control for Cream Cheese: Allow cream cheese to reach room temperature beforehand, ensuring smooth blending and preventing lumpy texture.
  • Chocolate Dipping Technique: Use a fork’s edge to gently tap excess chocolate, creating a clean, professional coating without drips or uneven surfaces.
  • Dietary Adaptation: Swap regular Oreos with gluten-free or vegan alternatives, and use dairy-free cream cheese for inclusive treat options.
  • Prep Time: 15 minutes
  • Cook Time: 30 minutes
  • Category: Desserts, Snacks
  • Method: Mixing
  • Cuisine: American

Nutrition

  • Serving Size: 23
  • Calories: 150
  • Sugar: 12g
  • Sodium: 50mg
  • Fat: 8g
  • Saturated Fat: 5g
  • Unsaturated Fat: 3g
  • Trans Fat: 0g
  • Carbohydrates: 18g
  • Fiber: 1g
  • Protein: 2g
  • Cholesterol: 15mg
Liam O’Sullivan

Liam O’Sullivan

Founder & Culinary Content Creator

Expertise

Recipe Development​, Traditional Irish and European Cuisines, Food Styling and Photography, Culinary Education​

Education

Dublin Institute of Technology (DIT) – School of Culinary Arts and Food Technology

  • Degree: Bachelor of Arts in Culinary Arts
  • Focus: Comprehensive training in classical and modern cooking techniques, kitchen management, and menu development.​

Ballymaloe Cookery School

  • Program: 12-Week Certificate Course
  • Focus: Intensive, hands-on experience emphasizing farm-to-table cooking and sustainable practices.​

Isabella brings a global spark to the Craft Meats table. Born in Florence and trained at the Apicius International School of Hospitality, she blends classic Italian flavor with modern writing that’s easy to follow and hard to forget. 

Her additional training at the Italian Chef Academy fueled her love for well-crafted dishes, especially ones that spotlight beautiful cuts of meat.

She’s a food writer with heart, and a deep love for storytelling through single recipes. Her goal? To help you cook with more confidence and a little more joy, no matter where you start.

Leave a Reply

Your email address will not be published. Required fields are marked *

Recipe rating 5 Stars 4 Stars 3 Stars 2 Stars 1 Star