
Homemade Buttermilk Pecan Pralines Recipe: Sweet Southern Delicacy
Sweet Southern charm meets nutty decadence in these classic buttermilk pecan pralines that dance with rich, caramelized elegance.
Generations of home cooks have perfected this traditional Southern confection with loving care and secret techniques.
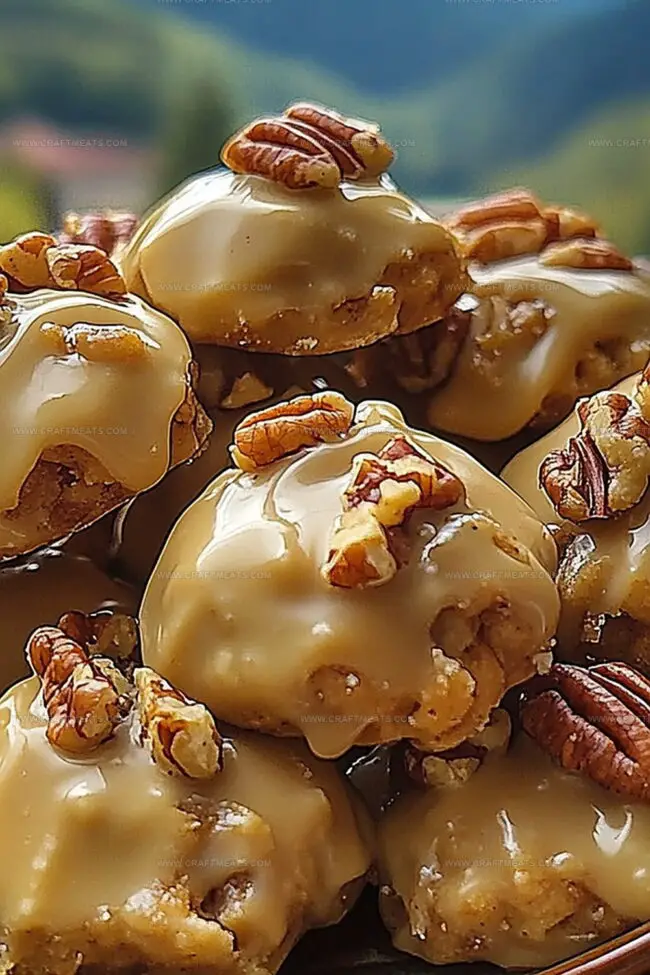
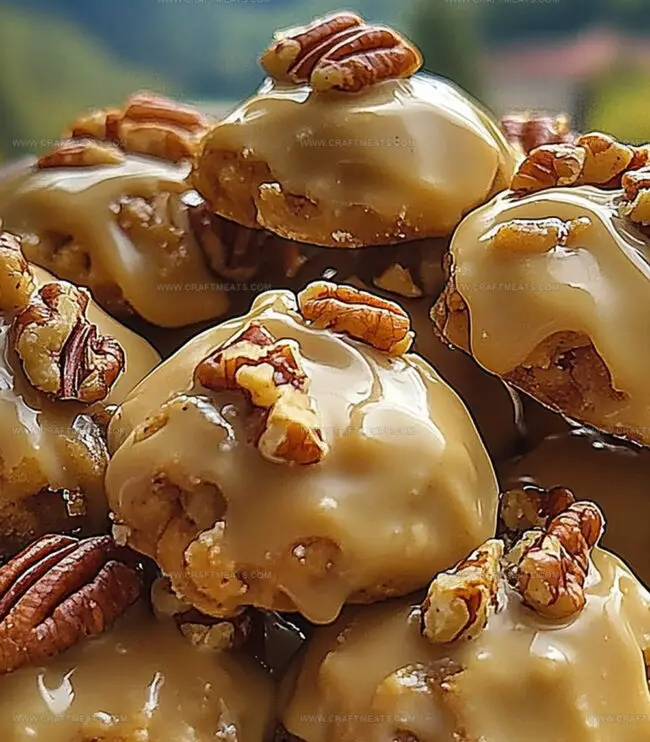
The smooth, golden pralines melt deliciously on your tongue, promising pure indulgence in every single bite.
Pecans provide a delightful crunch against the silky, buttery caramel base that defines this beloved treat.
Each praline carries the warmth of Southern hospitality and generations of culinary tradition.
These delicate confections require patience and precision but reward you with a sublime candy experience.
Dive into this timeless Southern recipe and create a batch of pralines that will surely become a cherished family favorite.
Quick Recipe Overview
What You’ll Need For Buttermilk Pecan Pralines
For Sweet Base:For Flavor Enhancers:For Final Touch:Tools To Make Buttermilk Pecan Pralines
How To Prepare Buttermilk Pecan Pralines
Set up a smooth workspace with a baking sheet lined with non-stick surface for easy candy transfer.
Combine creamy buttermilk, granulated sugar, rich butter, and baking soda in a sturdy saucepan. Heat gently while stirring, watching the ingredients meld and transform.
Monitor the simmering concoction carefully with a candy thermometer. The mixture needs to reach a perfect golden point where chemistry turns liquid into delectable candy.
Remove the hot mixture from heat. Fold in crunchy pecans and fragrant vanilla, letting the ingredients dance and blend their wonderful aromas.
Vigorously stir the mixture with a wooden spoon. Watch it change from glossy liquid to creamy, thick praline goodness. This moment requires patience and rhythmic stirring.
Work quickly and confidently, dropping spoonfuls of the warm mixture onto the prepared baking sheet. Each dollop becomes a delicate sweet treasure.
Let the pralines rest and solidify at room temperature. They’ll gradually transform into crisp, melt-in-your-mouth treats ready for delighted munching.
Tasty Tips For Buttermilk Pecan Pralines
How To Serve Buttermilk Pecan Pralines
Store Buttermilk Pecan Pralines The Right Way
Print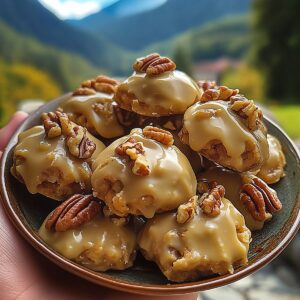
Smooth Buttermilk Pecan Pralines Recipe
- Total Time: 45 minutes
- Yield: 23 1x
Description
Southern buttermilk pecan pralines deliver a rich, creamy confection steeped in Louisiana culinary tradition. Crisp pecans and silky caramel create a classic sweet treat that delights you with authentic Southern charm.
Ingredients
- 1 ½ cups (180 g / 6.3 oz) pecan halves or pieces
- 2 cups (400 g / 14.1 oz) granulated sugar
- 1 cup (240 ml / 8 fl oz) buttermilk
- ½ cup (115 g / 4 oz) unsalted butter
- 1 tsp vanilla extract
- ½ tsp baking soda
Instructions
- Preparation: Line a baking sheet with parchment paper or silicone mat, creating a smooth, non-stick surface for cooling pralines.
- Mixture Creation: In a heavy-bottomed saucepan, blend buttermilk, sugar, baking soda, and butter over medium heat. Stir continuously until butter melts and sugar dissolves completely, forming a uniform mixture.
- Boiling Stage: Elevate the mixture to a gentle rolling boil, maintaining constant movement with a wooden spoon to prevent burning. Attach a candy thermometer to monitor temperature progression carefully.
- Temperature Precision: Cook until the mixture reaches exactly 235F (113C), signaling the critical soft-ball stage that determines praline texture and consistency.
- Flavor Integration: Remove from heat and gently incorporate toasted pecans and vanilla extract, allowing ingredients to meld seamlessly.
- Transformative Beating: Let mixture rest briefly, then vigorously beat with a wooden spoon until the glossy surface disappears and the texture becomes matte and slightly thickened.
- Portioning and Setting: Quickly drop rounded spoonfuls onto the prepared baking sheet, creating uniform pralines. Allow to cool completely at room temperature for 20-30 minutes until firm and easily removable.
Notes
- Control Cooking Temperature: Precise heat management is crucial; use a reliable candy thermometer and keep the heat at a steady medium to prevent burning or undercooking the sugar mixture.
- Prevent Sugar Crystallization: Stir continuously and avoid scraping the sides of the pan during cooking to ensure smooth, creamy pralines without grainy texture.
- Quick Beating Technique: Beat the mixture immediately after removing from heat, working rapidly to achieve the perfect consistency before it starts to harden.
- Moisture Management: Work in a low-humidity environment, as excess moisture can affect the pralines’ texture and ability to set properly.
- Prep Time: 10 minutes
- Cook Time: 20 minutes
- Category: Desserts, Snacks
- Method: Boiling
- Cuisine: Southern American
Nutrition
- Serving Size: 23
- Calories: 190
- Sugar: 16 g
- Sodium: 25 mg
- Fat: 9 g
- Saturated Fat: 5 g
- Unsaturated Fat: 4 g
- Trans Fat: 0 g
- Carbohydrates: 26 g
- Fiber: 1 g
- Protein: 2 g
- Cholesterol: 20 mg
Liam O’Sullivan
Founder & Culinary Content Creator
Expertise
Recipe Development, Traditional Irish and European Cuisines, Food Styling and Photography, Culinary Education
Education
Dublin Institute of Technology (DIT) – School of Culinary Arts and Food Technology
Ballymaloe Cookery School
Isabella brings a global spark to the Craft Meats table. Born in Florence and trained at the Apicius International School of Hospitality, she blends classic Italian flavor with modern writing that’s easy to follow and hard to forget.
Her additional training at the Italian Chef Academy fueled her love for well-crafted dishes, especially ones that spotlight beautiful cuts of meat.
She’s a food writer with heart, and a deep love for storytelling through single recipes. Her goal? To help you cook with more confidence and a little more joy, no matter where you start.