Golden Saltine Cracker Toffee Recipe with a Crunch
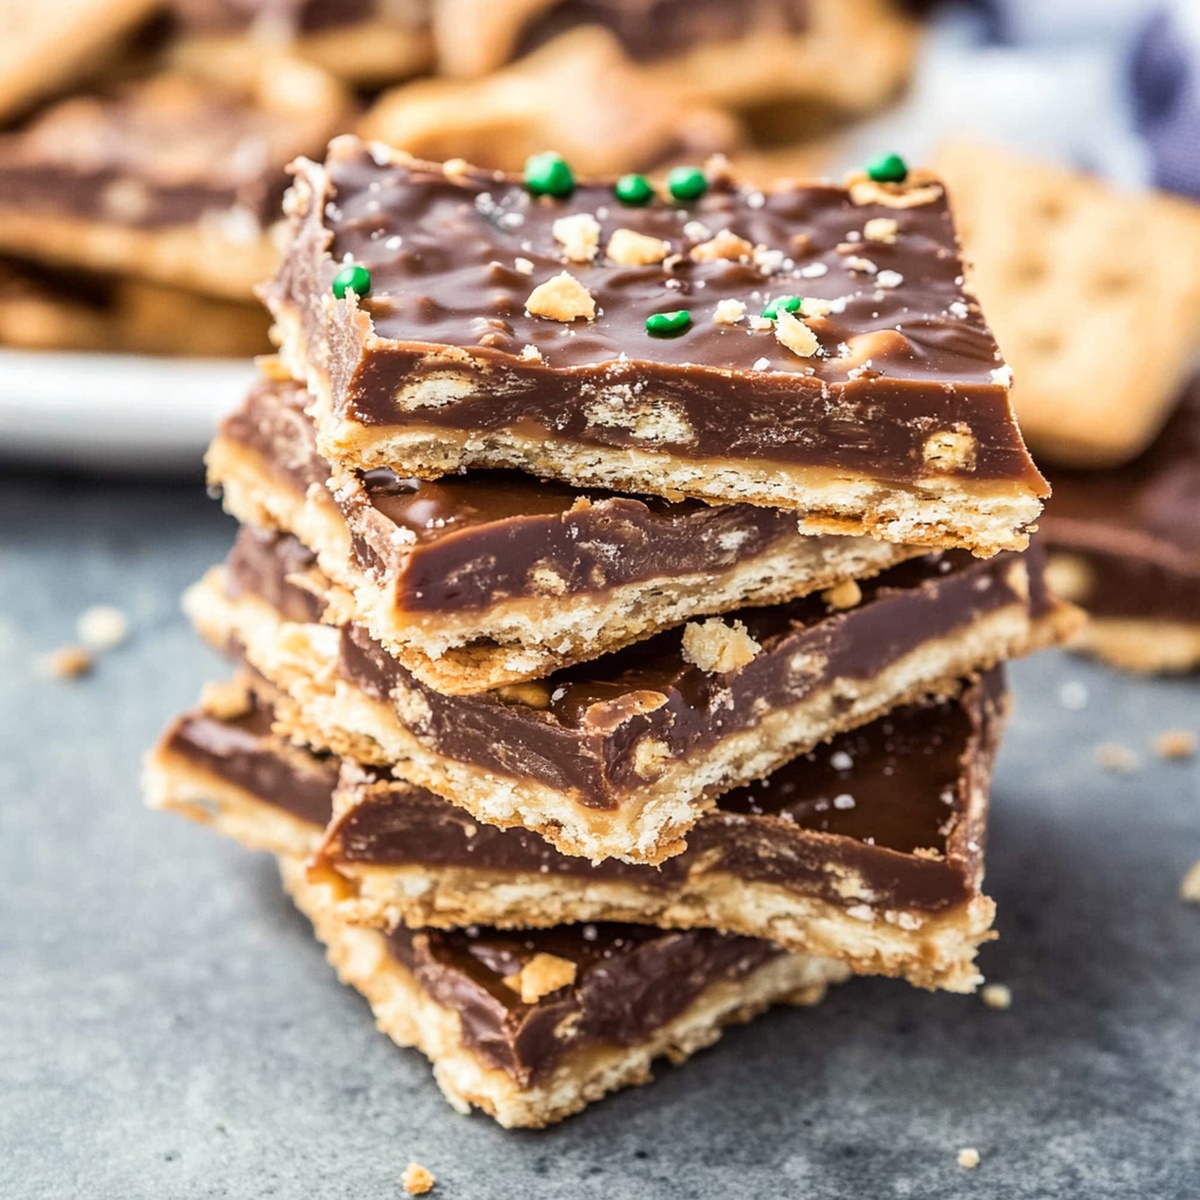
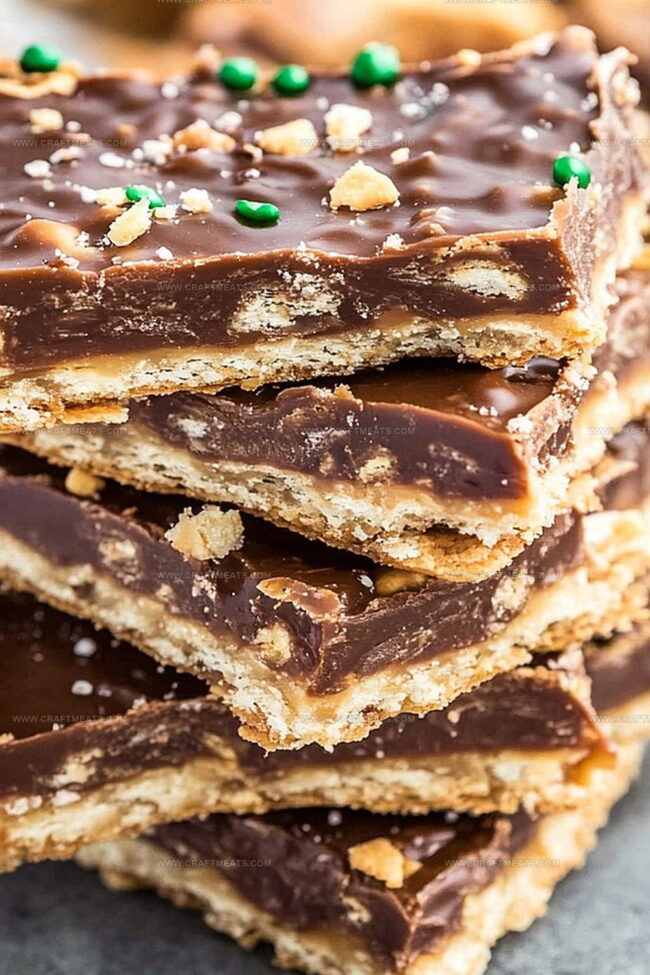
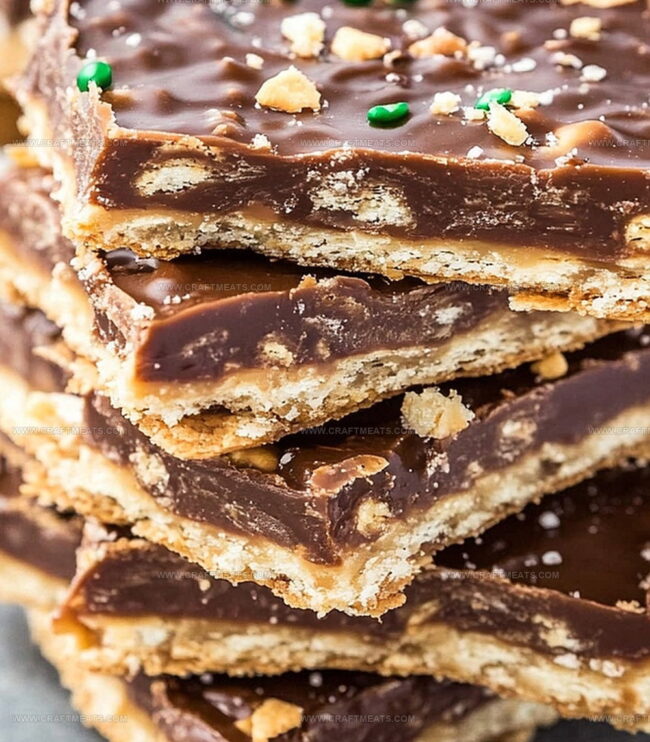
Chocolate and caramel lovers unite around this irresistible saltine cracker toffee that combines sweet and salty flavors in one addictive treat.
Crisp saltine crackers form the perfect base for a rich, buttery toffee layer that melts in your mouth.
The homemade dessert comes together with just a few simple ingredients and minimal effort.
Melted chocolate cascades over the golden toffee, creating a decadent finish that looks far more complicated than it actually is.
Each bite delivers a satisfying crunch and a luxurious blend of textures that will have everyone asking for the recipe.
This quick and easy dessert works magic for potlucks, holiday gatherings, or spontaneous sweet cravings.
Dive into this delightful confection that proves sometimes the most delicious treats come from the most unexpected combinations.
Quick Recipe Overview
Everything That Goes In Saltine Cracker Toffee
For Base Layer:For Toffee Coating:For Chocolate and Topping Layer:Tools For Spreading Saltine Cracker Toffee Just Right
How To Make Saltine Cracker Toffee Quickly
Grab a baking sheet and line it with foil, making sure the entire surface is covered. Lightly grease the foil to prevent sticking. Carefully spread saltine crackers across the surface, creating a snug single layer.
In a saucepan, combine butter and brown sugar over medium heat. Stir the mixture until it transforms into a bubbling, golden concoction. Let it dance and bubble for a few minutes without touching it.
Slide the baking sheet into a warm oven. Watch as the toffee becomes a glistening, caramel-like layer that hugs each cracker.
Pull the tray from the oven and sprinkle chocolate chips across the hot surface. Give the chips a moment to melt into a smooth, glossy coating. Gently spread the chocolate until it creates a perfect blanket.
Shower the chocolate with your favorite toppings – maybe some crunchy nuts or colorful sprinkles for extra pizzazz.
Let the toffee cool down naturally, then tuck it into the refrigerator. Allow it to firm up and become gloriously crisp.
Once completely set, break the toffee into delightful, irregular pieces. Enjoy your sweet, crunchy creation!
Flavor Mixes To Add To Saltine Cracker Toffee
Serving Saltine Cracker Toffee At Gatherings
How To Store Saltine Cracker Toffee So It Stays Crisp
Print
Sweet Saltine Cracker Toffee Recipe
- Total Time: 1 hour 20 minutes
- Yield: 11 1x
Description
Homemade saltine cracker toffee delights sweet and salty palates with its irresistible crunch. Chocolate-drizzled layers of caramelized goodness invite you to savor each delectable bite.
Ingredients
- 40 saltine crackers (about 1 sleeve)
- 1 cup (225 grams / 8 oz) unsalted butter
- 1 cup (200 grams) brown sugar, packed
- 2 cups (340 grams) semi-sweet chocolate chips
- chopped nuts (pecans, almonds, or walnuts)
- sprinkles
- crushed candy canes
Instructions
- Preparation: Line a rimmed baking sheet with aluminum foil, greasing lightly. Arrange saltine crackers in a single, tight layer with edges touching.
- Toffee Creation: Combine butter and brown sugar in a medium saucepan over medium heat. Stir continuously until the mixture reaches a rolling boil, maintaining heat for 3 minutes.
- Toffee Application: Pour molten toffee evenly across cracker base, using a spatula to ensure complete and uniform coverage.
- Baking Process: Place sheet in a preheated oven at 350F (175C), allowing toffee to bubble and caramelize for 5 minutes.
- Chocolate Layer: Remove from oven and immediately scatter chocolate chips across hot toffee. Let residual heat melt chocolate for 2-3 minutes, then spread into a smooth, consistent layer.
- Finishing Touch: Sprinkle chopped nuts, crushed candy canes, or decorative sprinkles over the molten chocolate layer.
- Cooling and Setting: Allow confection to cool completely at room temperature, then refrigerate for 1-2 hours until fully solidified.
- Serving: Break the hardened toffee into rustic, irregular pieces, creating an artisanal sweet treat ready for enjoyment.
Notes
- Precise Temperature Control: Watch the caramel closely during boiling to prevent burning, aiming for a golden amber color without darkening too quickly.
- Cracker Placement Technique: Arrange crackers tightly without gaps to create a uniform base that supports even toffee distribution and prevents uneven coating.
- Chocolate Melting Strategy: Let residual heat melt chocolate chips naturally for smooth coverage, avoiding direct heat to prevent scorching or separation.
- Dietary Modification Options: Substitute gluten-free crackers for traditional saltines, use dairy-free chocolate chips, and replace nuts with seeds for alternative dietary needs.
- Prep Time: 10 minutes
- Cook Time: 1-2 hours
- Category: Desserts, Snacks
- Method: Baking
- Cuisine: American
Nutrition
- Serving Size: 11
- Calories: 260
- Sugar: 18 g
- Sodium: 200 mg
- Fat: 16 g
- Saturated Fat: 10 g
- Unsaturated Fat: 6 g
- Trans Fat: 0 g
- Carbohydrates: 30 g
- Fiber: 1 g
- Protein: 2 g
- Cholesterol: 30 mg
Liam O’Sullivan
Founder & Culinary Content Creator
Expertise
Recipe Development, Traditional Irish and European Cuisines, Food Styling and Photography, Culinary Education
Education
Dublin Institute of Technology (DIT) – School of Culinary Arts and Food Technology
Ballymaloe Cookery School
Isabella brings a global spark to the Craft Meats table. Born in Florence and trained at the Apicius International School of Hospitality, she blends classic Italian flavor with modern writing that’s easy to follow and hard to forget.
Her additional training at the Italian Chef Academy fueled her love for well-crafted dishes, especially ones that spotlight beautiful cuts of meat.
She’s a food writer with heart, and a deep love for storytelling through single recipes. Her goal? To help you cook with more confidence and a little more joy, no matter where you start.