
Festive Thumbprint Cookies with Icing Recipe: Sweet Joy in Bites!
Sweet memories bloom with every bite of these delightful thumbprint cookies with icing that bring comfort straight to your kitchen.
Soft, buttery dough cradles a dollop of colorful frosting in each perfectly pressed center.
These classic treats offer a nostalgic journey back to childhood baking moments.
Delicate and charming, they melt in your mouth with a perfect balance of tender cookie and smooth icing.
The simple ingredients transform into an irresistible dessert that sparks joy at first glance.
Bakers of all skill levels can create these elegant cookies that look like they came from a professional bakery.
Dive into this recipe and let the magic of homemade goodness fill your home with warmth and sweetness.
Quick Recipe Overview

Everything In Thumbprint Cookies With Icing
For Base of Cookies:For Flavor and Texture Enhancement:For Decoration and Filling:Tools To Bake Thumbprint Cookies With Icing
How To Make Thumbprint Cookies With Icing Fast

Warm up the kitchen appliance and set it to the perfect baking temperature. Spread clean parchment paper across baking trays to create a smooth landing spot for your delightful cookies.
Mix soft butter, sugar, and vanilla until they become a creamy dream. Gently fold in flour to create a tender, light dough that will melt in your mouth. Roll the mixture into tiny round treasures, each one a potential burst of happiness.
Use your thumb or the back of a spoon to create cute little wells in the center of each cookie. These little pockets will soon be filled with colorful, sweet surprises.
Carefully drop a dollop of vibrant jam into each cookie’s cozy center. Choose flavors that make your taste buds dance – strawberry, raspberry, or any fruity delight that catches your eye.
Slide the cookie-filled trays into the warm oven. Let them bake until the edges turn a gentle golden brown, transforming from soft dough to crisp, delectable treats.
Once cooled, drizzle or pipe a layer of sweet icing over the cookies. Let your creativity flow as you add a final touch of sugary elegance to these homemade delights.
Tips To Boost Flavor In Thumbprint Cookies With Icing
How To Serve Thumbprint Cookies With Icing Nicely
How To Store Thumbprint Cookies With Icing Right
Print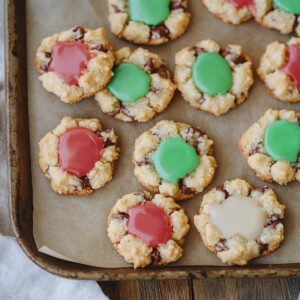
Sweet Thumbprint Cookies With Icing Recipe
- Total Time: 32 minutes
- Yield: 23 1x
Description
Classic thumbprint cookies offer a delightful blend of buttery shortbread and sweet jam. Small treats bring joy with their simple charm and nostalgic flavor profile, inviting you to savor each delicate bite.
Ingredients
- 1 cup (225 g) unsalted butter, softened
- ⅔ cup (135 g) granulated sugar
- 2 cups (250 g) all-purpose flour
- 1 large egg yolk
- 1 tsp vanilla extract
- ¼ tsp salt
- 1 cup (120 g) powdered sugar
- 2 tbsps milk or cream
- ½ tsp vanilla or almond extract
- Food coloring (optional)
Instructions
- Preparation: Position oven rack centrally and preheat to 350F (175C). Line baking sheets with parchment paper for effortless cookie release.
- Dough Creation: Whip butter and sugar into a light, airy mixture. Blend vanilla extract and egg yolk thoroughly, ensuring smooth incorporation.
- Mixing Process: Gently fold flour and salt into the creamy base, developing a cohesive dough without overworking, which prevents tough texture.
- Shaping Cookies: Form walnut-sized dough spheres, creating a uniform thumb or spoon indent in each ball’s center to cradle jam filling.
- Jam Filling: Distribute preferred jam delicately into each cookie’s depression, showcasing vibrant color and flavor.
- Baking Stage: Arrange cookies on prepared sheets, maintaining slight separation. Bake 12-15 minutes until edges transform to a golden hue.
- Cooling and Finishing: Rest cookies on baking sheets until completely cooled. Craft icing by whisking powdered sugar with milk into a smooth, drizzling consistency.
- Decorative Touch: Elegantly pipe or drizzle icing across jam-filled centers, creating an artistic final presentation.
- Storage: Allow icing to set completely before transferring cookies to an airtight container, preserving their delicate texture and visual appeal.
Notes
- Choose Quality Ingredients: Select high-fat butter and fresh egg yolks for a richer, more tender cookie texture that melts in your mouth.
- Control Dough Consistency: Avoid overmixing when adding flour to prevent tough, dense cookies; mix just until ingredients combine smoothly.
- Master Thumbprint Technique: Create uniform wells by using the back of a small spoon or your thumb, applying gentle, even pressure to ensure consistent jam placement.
- Temperature Matters: Allow butter and eggs to reach room temperature before mixing, which helps create a more homogeneous dough and promotes even baking.
- Prep Time: 20 minutes
- Cook Time: 12 minutes
- Category: Desserts, Snacks
- Method: Baking
- Cuisine: American
Nutrition
- Serving Size: 23
- Calories: 151
- Sugar: 8 g
- Sodium: 45 mg
- Fat: 10 g
- Saturated Fat: 6 g
- Unsaturated Fat: 4 g
- Trans Fat: 0 g
- Carbohydrates: 16 g
- Fiber: 0.5 g
- Protein: 1.5 g
- Cholesterol: 30 mg
Liam O’Sullivan
Founder & Culinary Content Creator
Expertise
Recipe Development, Traditional Irish and European Cuisines, Food Styling and Photography, Culinary Education
Education
Dublin Institute of Technology (DIT) – School of Culinary Arts and Food Technology
Ballymaloe Cookery School
Isabella brings a global spark to the Craft Meats table. Born in Florence and trained at the Apicius International School of Hospitality, she blends classic Italian flavor with modern writing that’s easy to follow and hard to forget.
Her additional training at the Italian Chef Academy fueled her love for well-crafted dishes, especially ones that spotlight beautiful cuts of meat.
She’s a food writer with heart, and a deep love for storytelling through single recipes. Her goal? To help you cook with more confidence and a little more joy, no matter where you start.