
Dill Pickle Cheese Ball Recipe for Snacking and Sharing
Crafting the perfect dill pickle cheese balls will elevate your appetizer game to new heights.
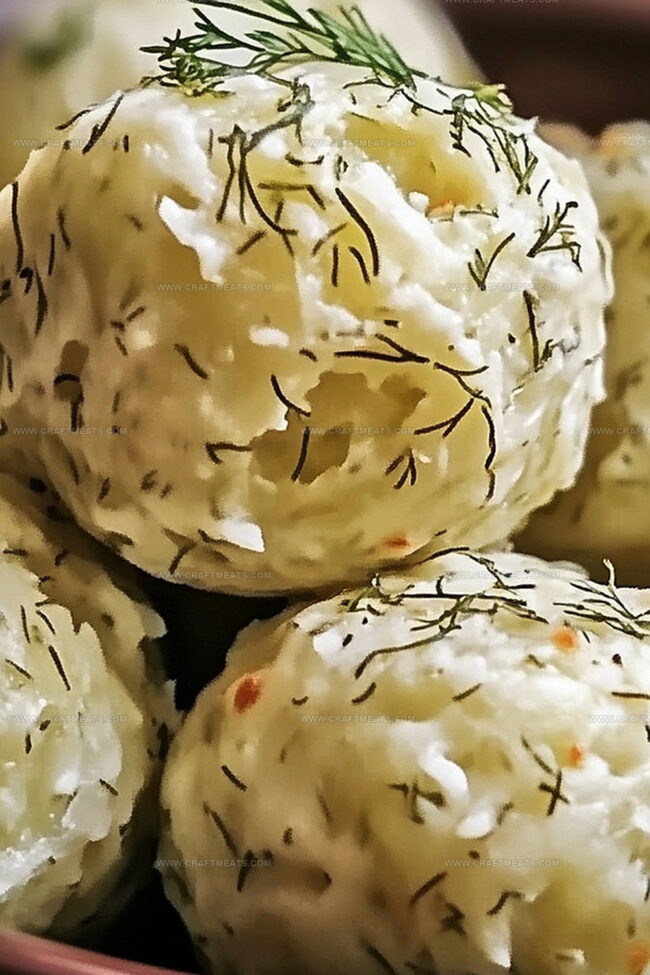
These irresistible bites blend tangy pickle flavor with rich, creamy cheese in a way that delights every palate.
Partygoers can’t resist the crispy exterior and melt-in-your-mouth center of these addictive snacks.
The combination of sharp cheddar, zesty dill pickles, and crunchy coating creates a flavor explosion that keeps everyone coming back for more.
Prepare to wow your guests with this simple yet impressive recipe that takes minimal effort.
Each bite promises a burst of savory goodness that will have everyone asking for the secret.
Roll up your sleeves and get ready to become the star of your next gathering with these mouthwatering cheese balls.
Quick Recipe Overview
Ingredients List For Dill Pickle Cheese Balls
For Creamy Base:For Flavor Enhancers:For Coating:What You’ll Need For Dill Pickle Cheese Balls
Steps To Make Dill Pickle Cheese Balls

Mix cream cheese, cheddar, and chopped pickles in a bowl. Blend until creamy, adding a splash of pickle juice and sprinkle of seasonings. Ensure ingredients are perfectly combined for a zesty taste experience.
Tuck the mixture into the refrigerator for about 30 minutes. This cooling period helps the blend set and makes shaping easier, allowing flavors to mingle and intensify.
Gently roll the chilled mixture into small, uniform spheres using your palms. Each sphere should be compact and smooth, ready for its delicious coating.
Create a vibrant coating by mixing finely chopped pickles with fresh herbs. Tenderly roll each cheese sphere in this zesty mixture, pressing lightly to ensure the coating sticks perfectly.
Arrange the coated spheres on a serving plate. Refrigerate for an hour to let the flavors dance and develop. Serve alongside crispy crackers or fresh veggie sticks for a crowd-pleasing appetizer.
Tips And Ideas For Dill Pickle Cheese Balls
How To Serve Dill Pickle Cheese Balls
Storage Help For Dill Pickle Cheese Balls
Print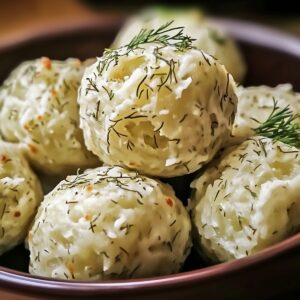
Tangy Dill Pickle Cheese Balls Recipe
- Total Time: 1 hour 15 minutes
- Yield: 23 1x
Description
Savory dill pickle cheese balls bring creamy, tangy goodness to party appetizers. Cheese and pickle lovers will delight in these irresistible bites that promise flavor and fun.
Ingredients
- 8 oz (225 g) cream cheese, softened
- 1 cup (100 g) shredded sharp cheddar cheese
- ½ cup (75 g) finely chopped dill pickles
- ½ cup (75 g) chopped dill pickles
- 12 tbsps pickle juice
- ¼ cup (15 g) chopped fresh dill or parsley
- 1 tbsp fresh dill, finely chopped (or 1 tsp dried dill)
- 1 tsp garlic powder
- 1 tsp onion powder
- ¼ tsp black pepper
Instructions
- Preparation: Thoroughly blend cream cheese, cheddar, dill pickles, pickle juice, garlic powder, onion powder, dried dill, and black pepper in a large mixing bowl until achieving a smooth, homogeneous consistency.
- Chilling and Firming: Cover the mixture with plastic wrap and refrigerate for 30 minutes to enhance moldability and allow flavors to meld together.
- Forming and Coating: Gently shape the chilled mixture into uniform bite-sized spheres, then roll each cheese ball in a prepared mixture of finely chopped dill pickles and freshly minced dill or parsley, ensuring complete and even coverage.
- Final Refinement: Return the coated cheese balls to the refrigerator for at least one hour to further develop and intensify the flavor profile.
- Serving: Present the chilled cheese balls alongside an array of complementary accompaniments such as crackers, vegetable sticks, or pretzels, creating an inviting and flavorful appetizer spread.
Notes
- Chill Thoroughly: Refrigerate the mixture for at least 30 minutes to help the cheese balls maintain their shape and develop a firmer texture, preventing crumbling during coating.
- Pickle Precision: Finely dice pickles to ensure even distribution and prevent large chunks that might disrupt the smooth cheese ball consistency.
- Coating Technique: Gently roll cheese balls in the pickle-herb mixture, using light pressure to help the coating adhere without breaking the delicate cheese sphere.
- Dietary Modifications: Swap full-fat cream cheese for low-fat versions or use dairy-free alternatives to accommodate different dietary needs while maintaining the recipe’s zesty flavor profile.
- Prep Time: 15 minutes
- Cook Time: 1 hour
- Category: Snacks, Appetizer
- Method: Mixing
- Cuisine: American
Nutrition
- Serving Size: 23
- Calories: 90
- Sugar: 1 g
- Sodium: 250 mg
- Fat: 7 g
- Saturated Fat: 4 g
- Unsaturated Fat: 2 g
- Trans Fat: 0 g
- Carbohydrates: 3 g
- Fiber: 0 g
- Protein: 5 g
- Cholesterol: 20 mg
Liam O’Sullivan
Founder & Culinary Content Creator
Expertise
Recipe Development, Traditional Irish and European Cuisines, Food Styling and Photography, Culinary Education
Education
Dublin Institute of Technology (DIT) – School of Culinary Arts and Food Technology
Ballymaloe Cookery School
Isabella brings a global spark to the Craft Meats table. Born in Florence and trained at the Apicius International School of Hospitality, she blends classic Italian flavor with modern writing that’s easy to follow and hard to forget.
Her additional training at the Italian Chef Academy fueled her love for well-crafted dishes, especially ones that spotlight beautiful cuts of meat.
She’s a food writer with heart, and a deep love for storytelling through single recipes. Her goal? To help you cook with more confidence and a little more joy, no matter where you start.