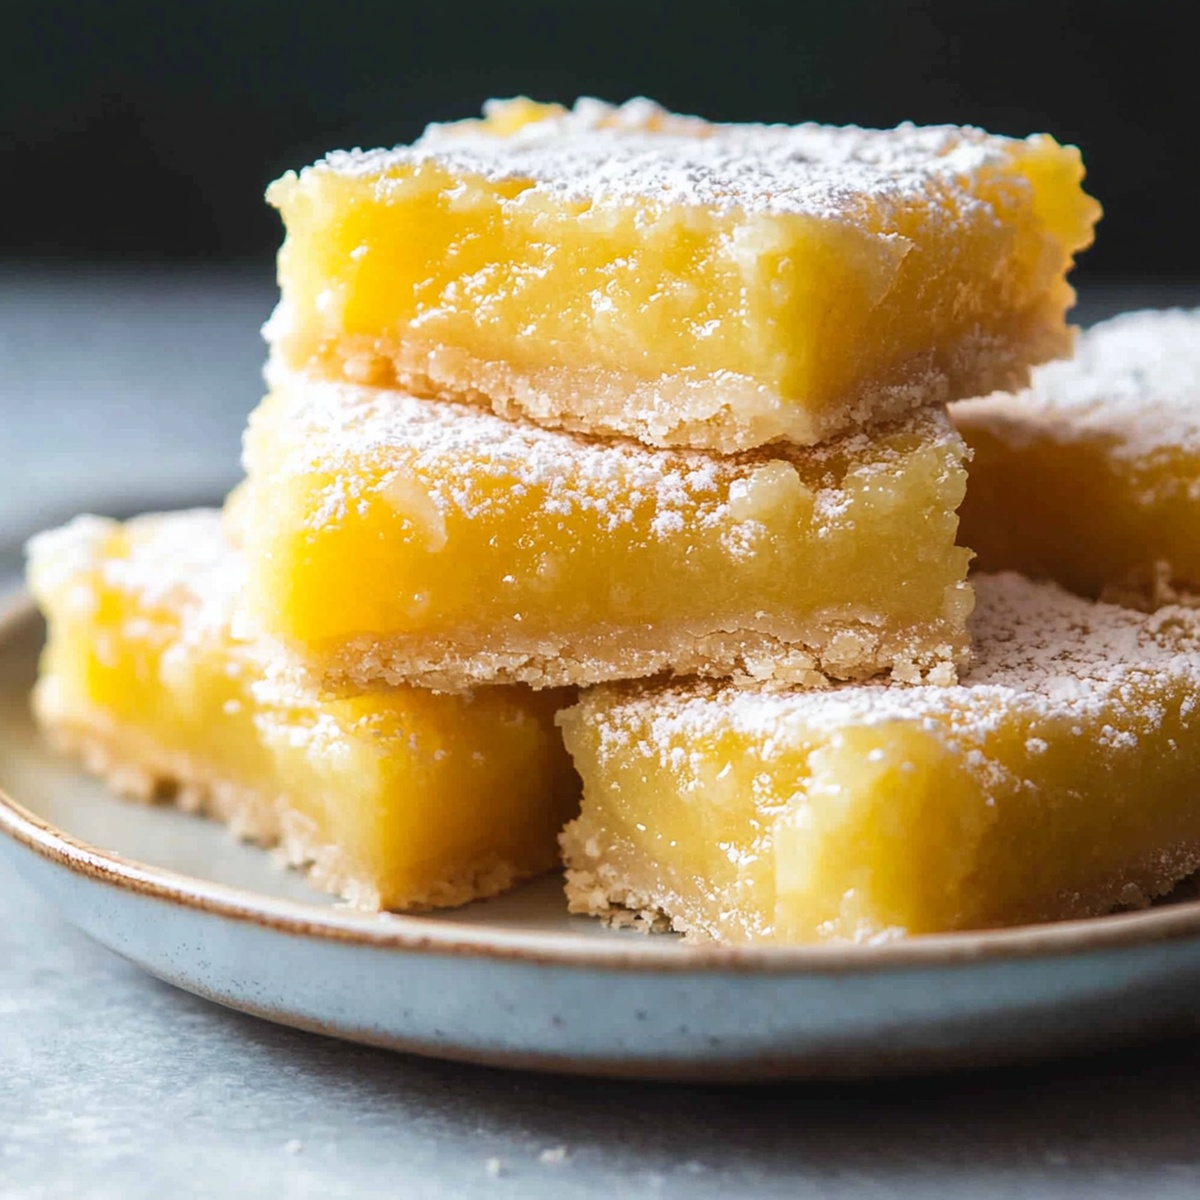
Classic Lemon Bars Recipe with Sweet Citrus Layers
Sunshine bursts through every bite of this classic lemon bars recipe that promises pure tangy delight.
Zesty lemons dance with buttery crust, creating a dessert that sings with brightness.
Each square delivers a perfect balance of sweet and tart flavors.
Soft, creamy filling nestles atop a golden shortbread base that crumbles delicately on your tongue.
The recipe brings together simple ingredients in a magical transformation.
You’ll fall in love with these bars that remind us of summer’s most refreshing moments.
Gather your ingredients and let the baking adventure begin!
Quick Recipe Overview
Classic Lemon Bars Ingredient Checklist
For Crust:For Lemon Filling:For Finishing:Best Tools To Make Classic Lemon Bars
Easy Directions For Classic Lemon Bars
Warm up your oven to a cozy 350 degrees, creating the perfect baking environment for these zesty treats.
Grab a rectangular pan and give it a light coating of grease, then lay down a protective parchment paper blanket that’ll make lifting out your bars a breeze.
Mix together soft butter with flour and a sprinkle of sugar, pressing the crumbly mixture into the pan’s bottom to create a golden, crispy base that’ll make your taste buds dance.
Send the pan into the heated oven for about 15-20 minutes, watching for edges that turn a delightful light golden brown – this is your signal that the crust is ready for its lemony topping.
Whisk eggs with sugar, creating a smooth canvas, then fold in fresh lemon juice and zest that’ll bring a bright, sunshine-like flavor bursting through every bite.
Pour the zesty mixture over the warm crust and return to the oven, letting everything meld together for another 20 minutes until the filling sets with a gentle wiggle.
Let the bars cool completely, then sprinkle a soft cloud of powdered sugar on top, transforming your creation into a bakery-worthy dessert that’ll make everyone’s eyes light up.
Tips To Improve Classic Lemon Bars Flavor
How To Serve Classic Lemon Bars Like A Pro
Storage Tips For Classic Lemon Bars That Work
Print
Tangy Lemon Bars Recipe
- Total Time: 1 hour
- Yield: 15 1x
Description
Zesty classic lemon bars combine tangy citrus flavor with buttery shortbread crust for a delightful dessert. Sweet-tart layers invite you to savor each refreshing bite of this timeless treat.
Ingredients
- 4 large eggs
- 1 ½ cups (300 g) granulated sugar
- 2 cups (250 g) all-purpose flour
- 1 cup (225 g) unsalted butter, softened
- ⅔ cup (160 ml) fresh lemon juice (about 3–4 lemons)
- ½ cup (100 g) granulated sugar
- ¼ tsp salt
- Zest of 1 lemon (optional, for added flavor)
- Powdered sugar, for dusting
Instructions
- Prepare Pan: Generously butter a 9×13-inch pan and line with parchment paper for effortless dessert removal.
- Create Crust: Blend flour, powdered sugar, and cold butter until crumbly, then firmly press mixture into pan, creating a uniform base with slightly elevated edges.
- Initial Baking: Roast crust in preheated oven at 350°F until edges turn golden brown, approximately 15-20 minutes, developing a crisp and toasted foundation.
- Craft Lemon Filling: Whisk eggs, granulated sugar, flour, lemon zest, and fresh lemon juice until achieving a silky, luminous custard with vibrant citrus notes.
- Assembly and Final Bake: Pour lemon mixture over slightly cooled crust, ensuring even distribution, then return to oven and bake until filling sets with a gentle center wobble, around 20-25 minutes.
- Cooling and Presentation: Allow bars to cool completely at room temperature, then lift from pan using parchment paper, dust generously with powdered sugar, and slice into precise squares revealing beautiful golden layers.
Notes
- Boost Lemon Zest Flavor: Select fresh, bright lemons with vibrant yellow skin to maximize citrusy punch and aromatic intensity in your bars.
- Create Perfectly Smooth Crust: Use cold butter and minimal handling when mixing shortbread to prevent tough, dense texture and maintain delicate, crumbly consistency.
- Prevent Soggy Bottom: Allow shortbread crust to cool slightly before adding lemon filling, which helps create a crisp base and prevents liquid absorption.
- Master Cutting Technique: Chill bars completely before slicing and use a sharp, clean knife wiped between cuts to achieve clean, professional-looking squares with distinct layers.
- Prep Time: 15 minutes
- Cook Time: 40-45 minutes
- Category: Desserts, Snacks
- Method: Baking
- Cuisine: American
Nutrition
- Serving Size: 15
- Calories: 250
- Sugar: 22 g
- Sodium: 50 mg
- Fat: 14 g
- Saturated Fat: 9 g
- Unsaturated Fat: 5 g
- Trans Fat: 0 g
- Carbohydrates: 30 g
- Fiber: 1 g
- Protein: 3 g
- Cholesterol: 70 mg
Liam O’Sullivan
Founder & Culinary Content Creator
Expertise
Recipe Development, Traditional Irish and European Cuisines, Food Styling and Photography, Culinary Education
Education
Dublin Institute of Technology (DIT) – School of Culinary Arts and Food Technology
Ballymaloe Cookery School
Isabella brings a global spark to the Craft Meats table. Born in Florence and trained at the Apicius International School of Hospitality, she blends classic Italian flavor with modern writing that’s easy to follow and hard to forget.
Her additional training at the Italian Chef Academy fueled her love for well-crafted dishes, especially ones that spotlight beautiful cuts of meat.
She’s a food writer with heart, and a deep love for storytelling through single recipes. Her goal? To help you cook with more confidence and a little more joy, no matter where you start.