Tangy Mini Key Lime Pies Recipe

Zesty No-Bake Mini Key Lime Pies Recipe for Sweet Treats

Cool summer days call for a zesty no-bake mini key lime pies that burst with tangy tropical flavor.

These adorable desserts pack a punch of citrusy goodness in every bite.

Small enough to be handheld yet luxurious in taste, these miniature treats are perfect for parties or casual gatherings.

Fresh lime juice and a creamy filling create a delightful contrast against the crisp graham cracker crust.

Each mini pie delivers a refreshing escape from ordinary desserts.

Sweet, tart, and impossibly simple to prepare, these bite-sized delights will have everyone asking for seconds.

Dive into this delectable recipe and transform your dessert game with these irresistible key lime mini pies.

Quick Recipe Overview

Prep Time: 20 minutes

Cook Time: 23 hours

Total Time: 2 hours 20 minutes

Calories: 247 kcal

Servings: 11

What’s Inside No-Bake Mini Key Lime Pies Recipe

For Crust Base:
  • Graham Cracker Crumbs: Crispy foundation that provides a delightful sandy texture and classic graham flavor for the pie base.
  • Butter: Binds the crumbs together, creating a rich, golden crust that holds its shape perfectly.
  • Sugar: Adds subtle sweetness and helps the crust become slightly crisp when chilled.
For Creamy Filling:
  • Sweetened Condensed Milk: Silky smooth base that delivers rich, sweet creaminess and helps set the filling's luxurious texture.
  • Lime Juice: Brings zesty, tangy brightness that defines the classic key lime pie flavor profile.
  • Lime Zest: Infuses intense citrus oils for a vibrant, fresh lime aroma and deeper citrus notes.
  • Heavy Cream: Creates light, airy texture and adds luxurious richness to the filling.
  • Powdered Sugar: Softens and sweetens the whipped cream while helping it maintain stable peaks.
For Garnish:
  • Whipped Cream: Adds elegant, cloud-like topping that complements the tart lime filling.
  • Fresh Lime Slice: Provides visual appeal and hints at the pie's bright citrus flavor.
  • Additional Lime Zest: Offers a pop of color and reinforces the recipe's citrusy essence.

Kitchen Tools For No-Bake Mini Key Lime Pies Recipe

  • Large mixing bowl: For combining graham cracker crust ingredients and key lime filling.
  • Small bowl: For whipping cream separately.
  • Whisk: To blend condensed milk, lime juice, and zest smoothly.
  • Electric mixer or hand mixer: Essential for whipping cream to stiff peaks.
  • Measuring cups and spoons: For accurate ingredient measurements.
  • Muffin tin or mini tart pans: To shape and hold mini pie crusts.
  • Cupcake liners (optional): For easy removal and neat presentation.
  • Spatula: To smooth filling and fold whipped cream.
  • Spoon or glass bottom: For pressing and compacting crust.
  • Zester or grater: To create fresh lime zest.

Steps To Prep No-Bake Mini Key Lime Pies Recipe

  • Crust Foundation

Crush graham crackers into fine crumbs and blend with melted butter. Press the mixture firmly into mini tart pans, creating a sturdy base that will hold your creamy filling. Chill in the refrigerator to set the foundation.

  • Zesty Filling Creation

Combine sweetened condensed milk with fresh lime juice and zest, whisking until silky smooth. Separately, whip cream until it forms luxurious peaks. Gently fold the whipped cream into the lime mixture, creating a light and airy filling that promises tangy delight.

  • Pie Assembly

Carefully spoon the vibrant lime mixture into the chilled crusts, ensuring each mini pie is filled to perfection. Smooth the tops with a gentle touch, creating an inviting surface that hints at the deliciousness within.

  • Final Flourish

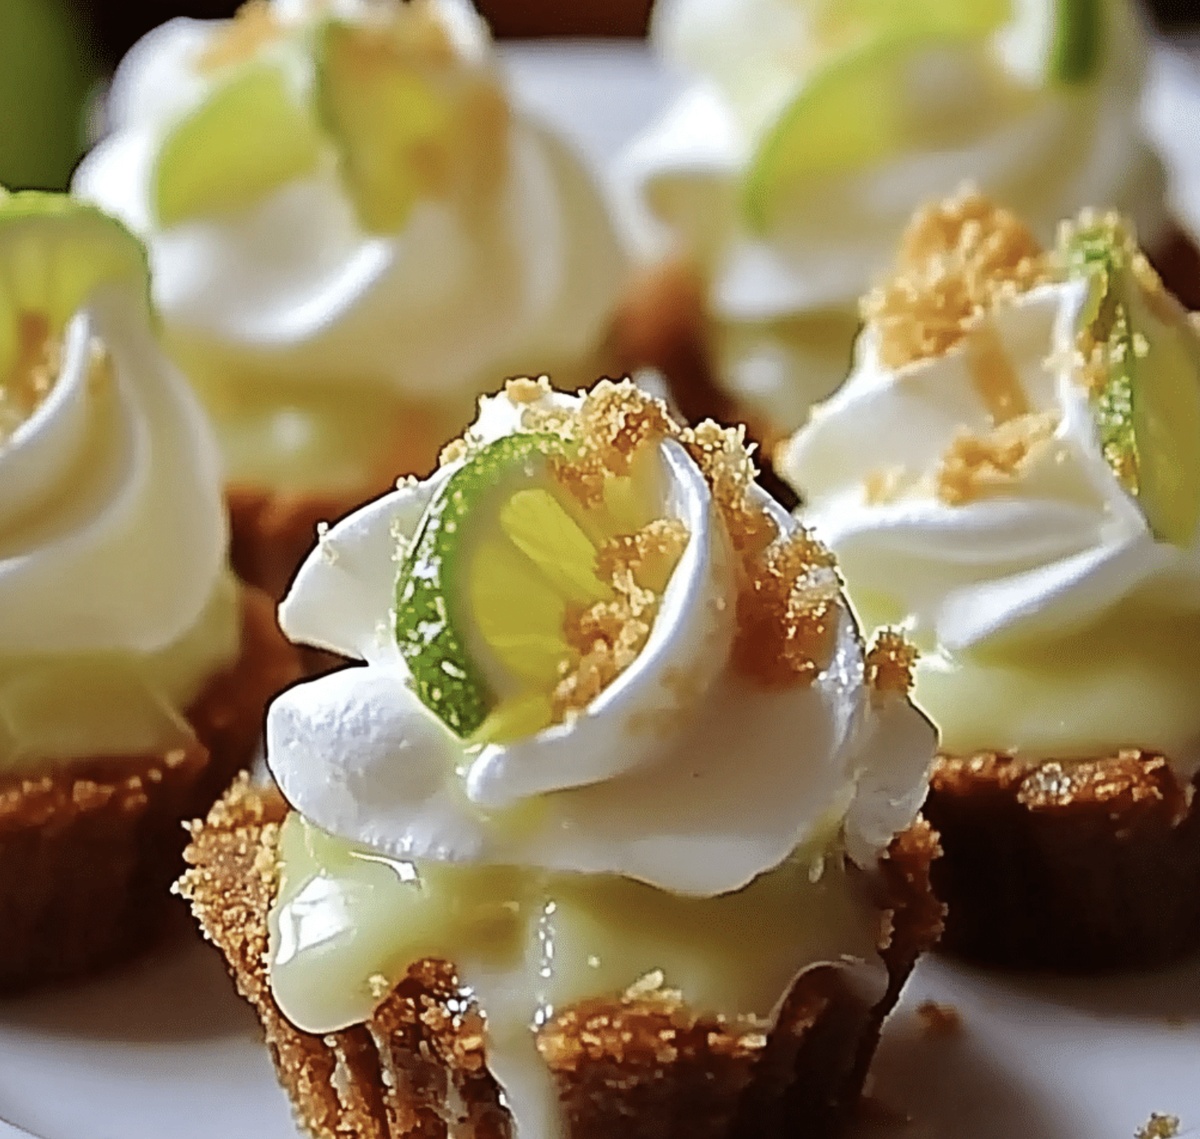
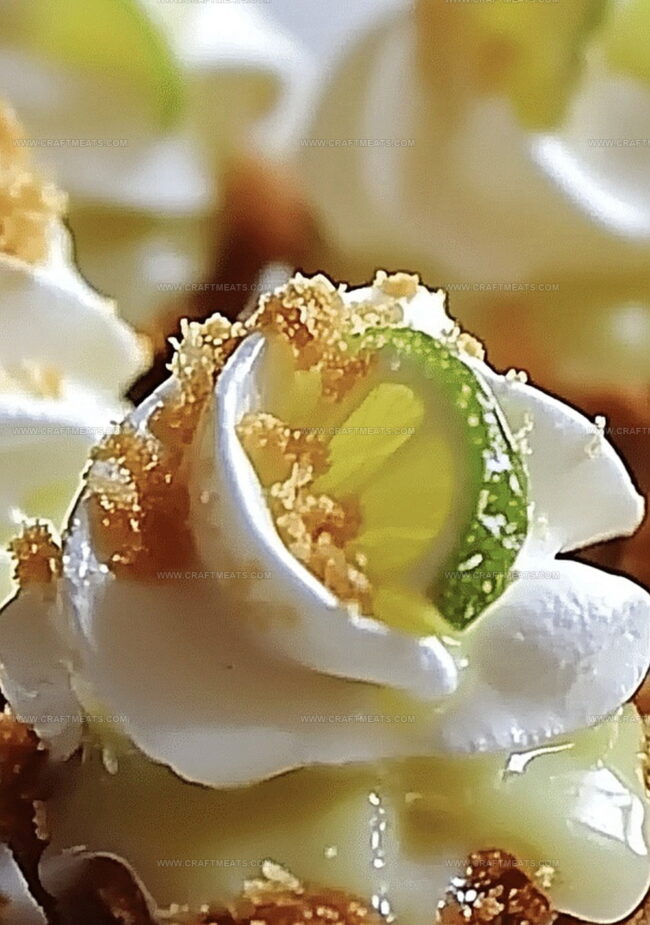
Refrigerate the mini pies until they’re beautifully set and chilled. Before serving, crown each pie with a cloud of whipped cream and a delicate lime garnish. These tiny treasures are ready to transport taste buds to a tropical paradise.

Helpful Tips For No-Bake Mini Key Lime Pies Recipe

  • Cool Lime Pie Insider Secrets
  • Crust Perfection Hack: Press graham cracker mixture firmly into pan edges to prevent crumbling. Cold hands work best for creating a compact, even base that holds together beautifully.
  • Zesty Flavor Boost: Use fresh key limes instead of bottled juice for an authentic, brighter flavor profile. Roll limes on countertop before juicing to maximize juice extraction.
  • Dairy-Free Twist: Swap heavy cream with coconut cream and use coconut condensed milk for a completely dairy-free version. Vegan bakers can substitute graham crackers with gluten-free alternatives.
  • Make-Ahead Magic: These mini pies can be prepared up to 3 days in advance, making them perfect for party planning. Store covered in refrigerator and add fresh garnishes just before serving to maintain crisp texture.
  • Gluten-Free Option: Replace graham cracker crumbs with almond flour or crushed gluten-free cookies. Ensure all ingredients are certified gluten-free for sensitive guests.

Serve No-Bake Mini Key Lime Pies Recipe Cool

  • Beach Party Centerpiece: Arrange these mini key lime pies on a beautiful coastal-themed platter with seashells and tropical flowers for a summer gathering that screams vacation vibes.
  • Brunch Delight: Serve these petite pies alongside mimosas and fresh fruit for a sophisticated weekend brunch that will impress your guests with minimal effort.
  • Dessert Bar Star: Create a dessert station with these mini pies, allowing guests to grab and enjoy individual portions without the need for cutting or serving utensils.
  • Picnic Perfect Treat: Pack these portable desserts in small containers for outdoor events, ensuring a cool, refreshing end to your outdoor meal that travels well and stays intact.

How To Store No-Bake Mini Key Lime Pies Recipe Right

  • Fridge Storage Solutions: Keep these delightful mini pies in an airtight container in the refrigerator for up to 5 days. Carefully stack them with parchment paper between layers to prevent sticking.
  • Make-Ahead Magic: Prepare the entire batch up to 3 days before your event. The graham cracker crust and creamy filling hold up beautifully when chilled, making party prep a breeze.
  • Freezing Friendly: Wrap individual pies tightly in plastic wrap, then place in a freezer-safe container. These treats will stay delicious for up to 2 months. Thaw overnight in the refrigerator before serving for the best texture and flavor.
  • Portion Perfect: Create single-serve portions by keeping them in their original tart pans or cupcake liners. This method prevents accidental squishing and makes grabbing a quick dessert super easy for grab-and-go enjoyment.
Print
clock clock iconcutlery cutlery iconflag flag iconfolder folder iconinstagram instagram iconpinterest pinterest iconfacebook facebook iconprint print iconsquares squares iconheart heart iconheart solid heart solid icon
Tangy Mini Key Lime Pies Recipe

Tangy Mini Key Lime Pies Recipe


5 Stars 4 Stars 3 Stars 2 Stars 1 Star

4.7 from 28 reviews

  • Total Time: 2 hours 20 minutes
  • Yield: 11 1x

Description

Key lime pie dreams come alive in these miniature no-bake desserts perfect for summer gatherings. Cool citrus flavors and graham cracker crusts deliver refreshing tropical satisfaction you’ll crave again and again.


Ingredients

Scale
  • 1 ½ cups (180 g) graham cracker crumbs
  • 1 can (14 oz/400 g) sweetened condensed milk
  • ½ cup (120 ml) fresh key lime juice
  • ⅓ cup (75 g) unsalted butter, melted
  • 1 cup (240 ml) heavy whipping cream
  • 2 tbsps granulated sugar
  • 2 tbsps powdered sugar
  • 1 tsp lime zest
  • lime slices (optional)
  • whipped cream

Instructions

  1. Crust Preparation: Pulverize graham crackers with melted butter and sugar, creating a cohesive sandy texture that binds when pressed.
  2. Crust Setting: Compress the crumb mixture into mini tart pans, forming a sturdy base that climbs the pan’s sides, then chill for 15 minutes to solidify.
  3. Lime Cream Base: Whisk sweetened condensed milk with fresh lime juice and zest until achieving a silky, uniform consistency.
  4. Cream Integration: Whip heavy cream with powdered sugar until forming stiff peaks, then delicately fold into the lime mixture to maintain its ethereal volume.
  5. Filling Assembly: Transfer the luminous lime cream into chilled crusts, smoothing with gentle precision to create a flawless surface.
  6. Chilling Phase: Refrigerate the assembled mini pies for 2-3 hours, allowing flavors to harmonize and filling to set completely.
  7. Garnishing Finale: Embellish each miniature pie with a lavish dollop of whipped cream, a zesty lime wedge, or a sprinkle of vibrant lime zest before serving.

Notes

  • Crust Consistency Check: Press graham cracker mixture firmly and evenly to prevent crumbling or uneven texture during serving.
  • Cream Folding Technique: Fold whipped cream gently into lime mixture using a spatula to maintain light, airy structure and prevent deflation.
  • Chilling Duration Matters: Refrigerate pies for full 2-3 hours to ensure proper setting and enhance flavor development.
  • Zest Freshness Tip: Use freshly grated lime zest for maximum citrus intensity and vibrant flavor profile.
  • Prep Time: 20 minutes
  • Cook Time: 23 hours
  • Category: Desserts, Snacks
  • Method: Mixing
  • Cuisine: American

Nutrition

  • Serving Size: 11
  • Calories: 247
  • Sugar: 14 g
  • Sodium: 75 mg
  • Fat: 16 g
  • Saturated Fat: 10 g
  • Unsaturated Fat: 4 g
  • Trans Fat: 0 g
  • Carbohydrates: 27 g
  • Fiber: 1 g
  • Protein: 3 g
  • Cholesterol: 63 mg
Liam O’Sullivan

Liam O’Sullivan

Founder & Culinary Content Creator

Expertise

Recipe Development​, Traditional Irish and European Cuisines, Food Styling and Photography, Culinary Education​

Education

Dublin Institute of Technology (DIT) – School of Culinary Arts and Food Technology

  • Degree: Bachelor of Arts in Culinary Arts
  • Focus: Comprehensive training in classical and modern cooking techniques, kitchen management, and menu development.​

Ballymaloe Cookery School

  • Program: 12-Week Certificate Course
  • Focus: Intensive, hands-on experience emphasizing farm-to-table cooking and sustainable practices.​

Isabella brings a global spark to the Craft Meats table. Born in Florence and trained at the Apicius International School of Hospitality, she blends classic Italian flavor with modern writing that’s easy to follow and hard to forget. 

Her additional training at the Italian Chef Academy fueled her love for well-crafted dishes, especially ones that spotlight beautiful cuts of meat.

She’s a food writer with heart, and a deep love for storytelling through single recipes. Her goal? To help you cook with more confidence and a little more joy, no matter where you start.

Leave a Reply

Your email address will not be published. Required fields are marked *

Recipe rating 5 Stars 4 Stars 3 Stars 2 Stars 1 Star